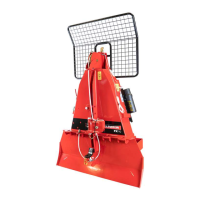
Transport
FX85, FX110, FX140
Skidding Winch
36
14. Attach the PTO shaft to the tractor PTO driveline.
Press the lock-pin button and push the PTO shaft onto the
tractor's output shaft. Make sure that you hear the click
when the lock pin engages.
15. Attach the safety chain that is on the PTO shaft guard to the
anchor point. Make the safety chain distance as short as
possible to prevent the PTO shaft guard from turning.
For more information, see Figure 36.
Figure 36 – PTO shaft installed
16. Retract the machine support stands. Insert a snap lock pin
in each support stand.
The FX85/FX85R/FX85S/FX85RS models do not have
support stands.
17. If your model has a remote control:
• Connect the hydraulic hoses.
For more information, see Hydraulic Connections on
page 37.
• Connect the electrical wires.
For more information, see Electrical Connections on
page 37.
18. Start the tractor and slowly lift the machine through the
working range.
Make sure that the PTO shaft does not fully extend or
retract.
7.2.2 Disconnect from a Tractor
Make sure that there is enough space and clearance for the
tractor to safely drive away from the machine.
1. Put the machine in position, and then lower it to the ground.
2. Disengage the tractor PTO.
3. Apply the tractor parking brake.
4. Stop the tractor engine and remove the ignition key.
5. Operate the remote hydraulic valve to relieve the pressure.
6. Wait for the PTO shaft to stop turning.
7. Extend the machine support stands. Insert the snap lock
pins.
Make sure that the machine is stable.
8. Disconnect the PTO shaft guard safety chain from the
anchor point.
9. Move the collar off the PTO shaft connection.
10. Disconnect the PTO shaft from the tractor driveline.
11. If your model has a remote control:
• Disconnect the hydraulic hoses.
• Disconnect the electrical wires.
12. Disconnect the toplink from the top hitch point on the
machine:
a. Remove the linchpin and hitch pin.
b. Move the toplink.
c. Install the hitch pin and linchpin on the machine.
13. Disconnect the lift arms from the machine. On each side of
the machine:
a. Remove the linchpin and hitch pin.
a. Move the lift arm.
b. Install the hitch pin and linchpin on the machine.
14. Slowly, drive the tractor forward, away from the machine.
15. Move the tractor lift arms and drawbar to the necessary
positions.