FX85, FX110, FX140
Skidding Winch
Transport
39
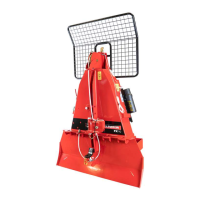
12. Use a straight edge to transfer a mark from the end of one
tube section to the other section as shown.
Figure 39 – Transferring the mark
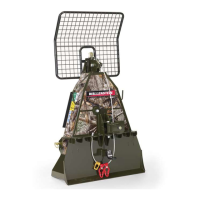
13. Add 2 inches (50 mm) to that measurement and place a
second mark on the outer plastic tube. This is where the
plastic shielding needs to be cut off.
00941
Figure 40 – Place mark to cut plastic tube
14. Cut the plastic tube at the mark, leaving the steel shaft
inside.
00942
Figure 41 – Cut plastic tube at the mark
15. Use the cut-off length of the plastic tube as a guide to mark
the steel tube. Align the end of the plastic tube with the end
of the steel shaft.
00943
Figure 42 – Marking steel tube.
16. Cut the steel tube off at the mark.
17. Use the cut length of plastic tube to mark the remaining
cuts, repeat this process for both PTO shaft sections.
Put the end of the steel shaft to be removed in a
vice, so that it is easier to control your cut.
18. Remove the burrs from the edges of the steel shaft that was
cut. Clean the steel shaft sections.
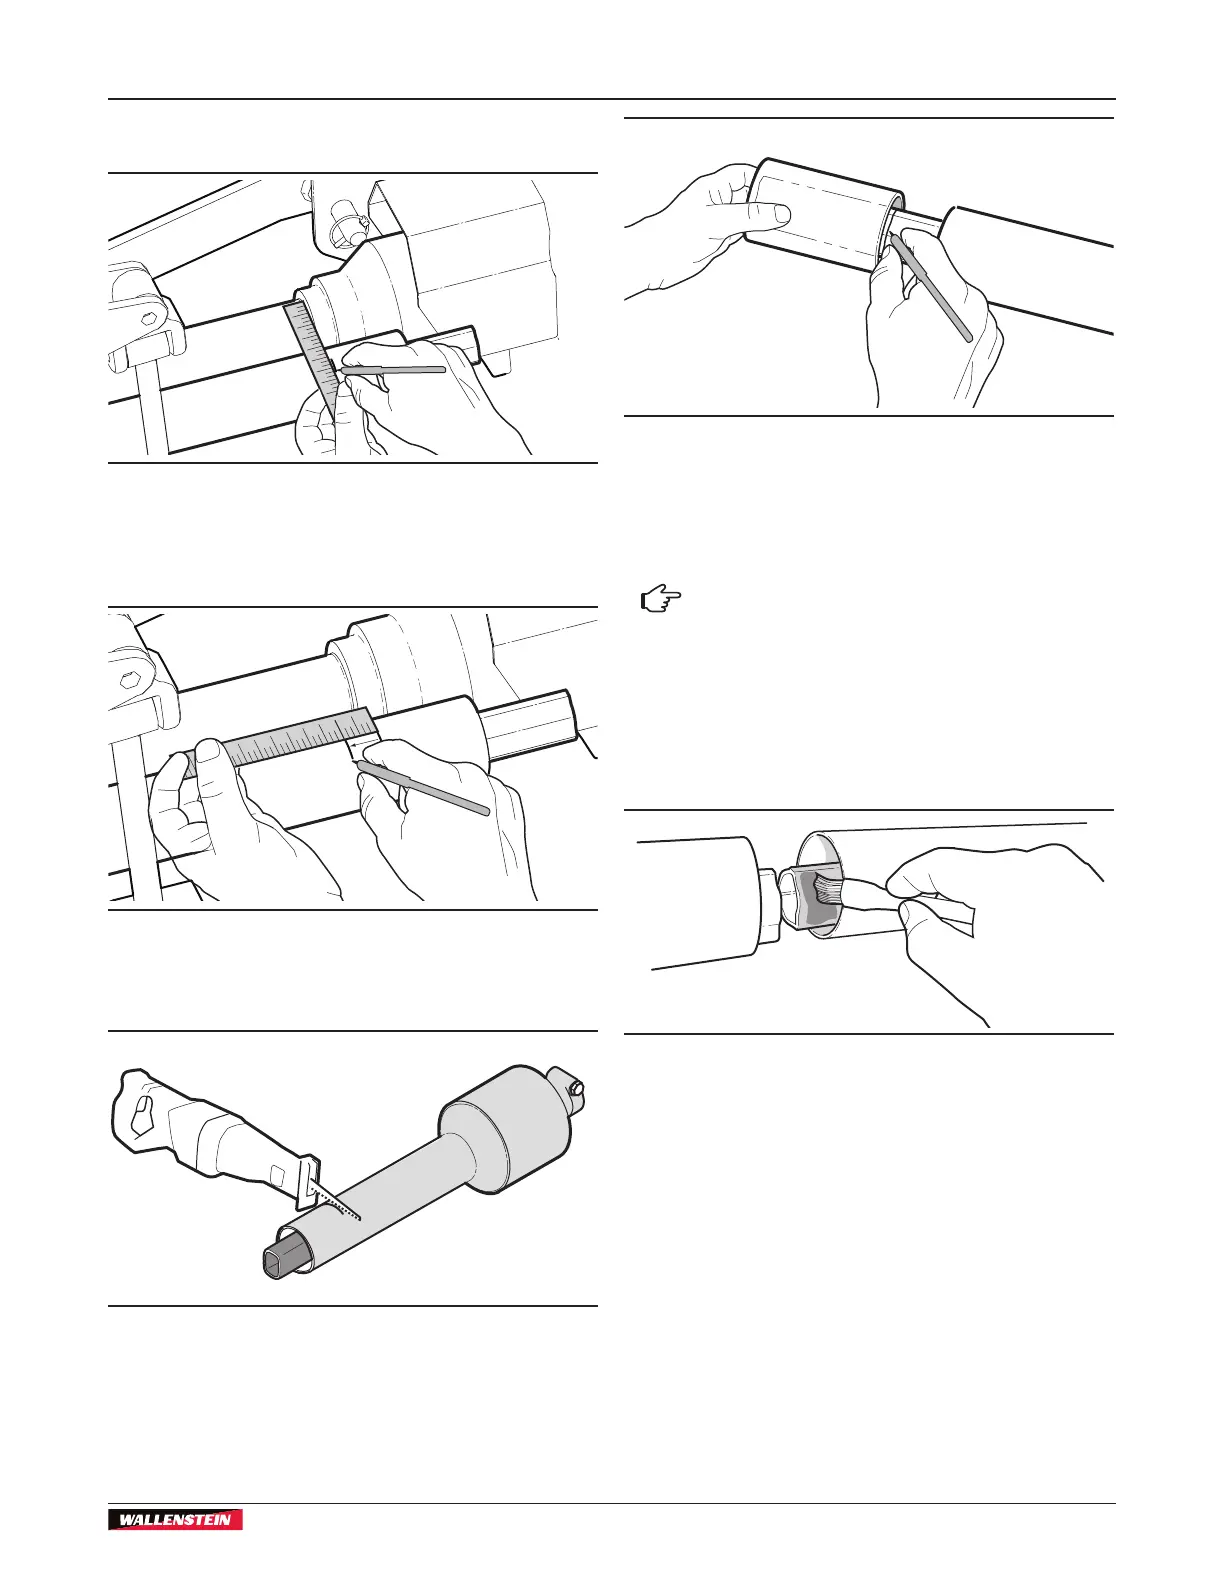
19. Grease the inner tube, so that the tube sections slide
together easier.
Figure 43 – Grease the inner tube
20. Assemble the two sections of the PTO shaft.
21. Make sure that the shaft can telescope freely before
installing it. If the shaft does not telescope freely, separate
the two sections and examine them for burrs or cuttings on
the shaft ends.
 Loading...