Lit. No. 27366, Rev. 01 February 15, 2008
19
HYDRAULIC COMPONENT INSTALLATION
SYSTEM OVERVIEW – HYDRAULIC
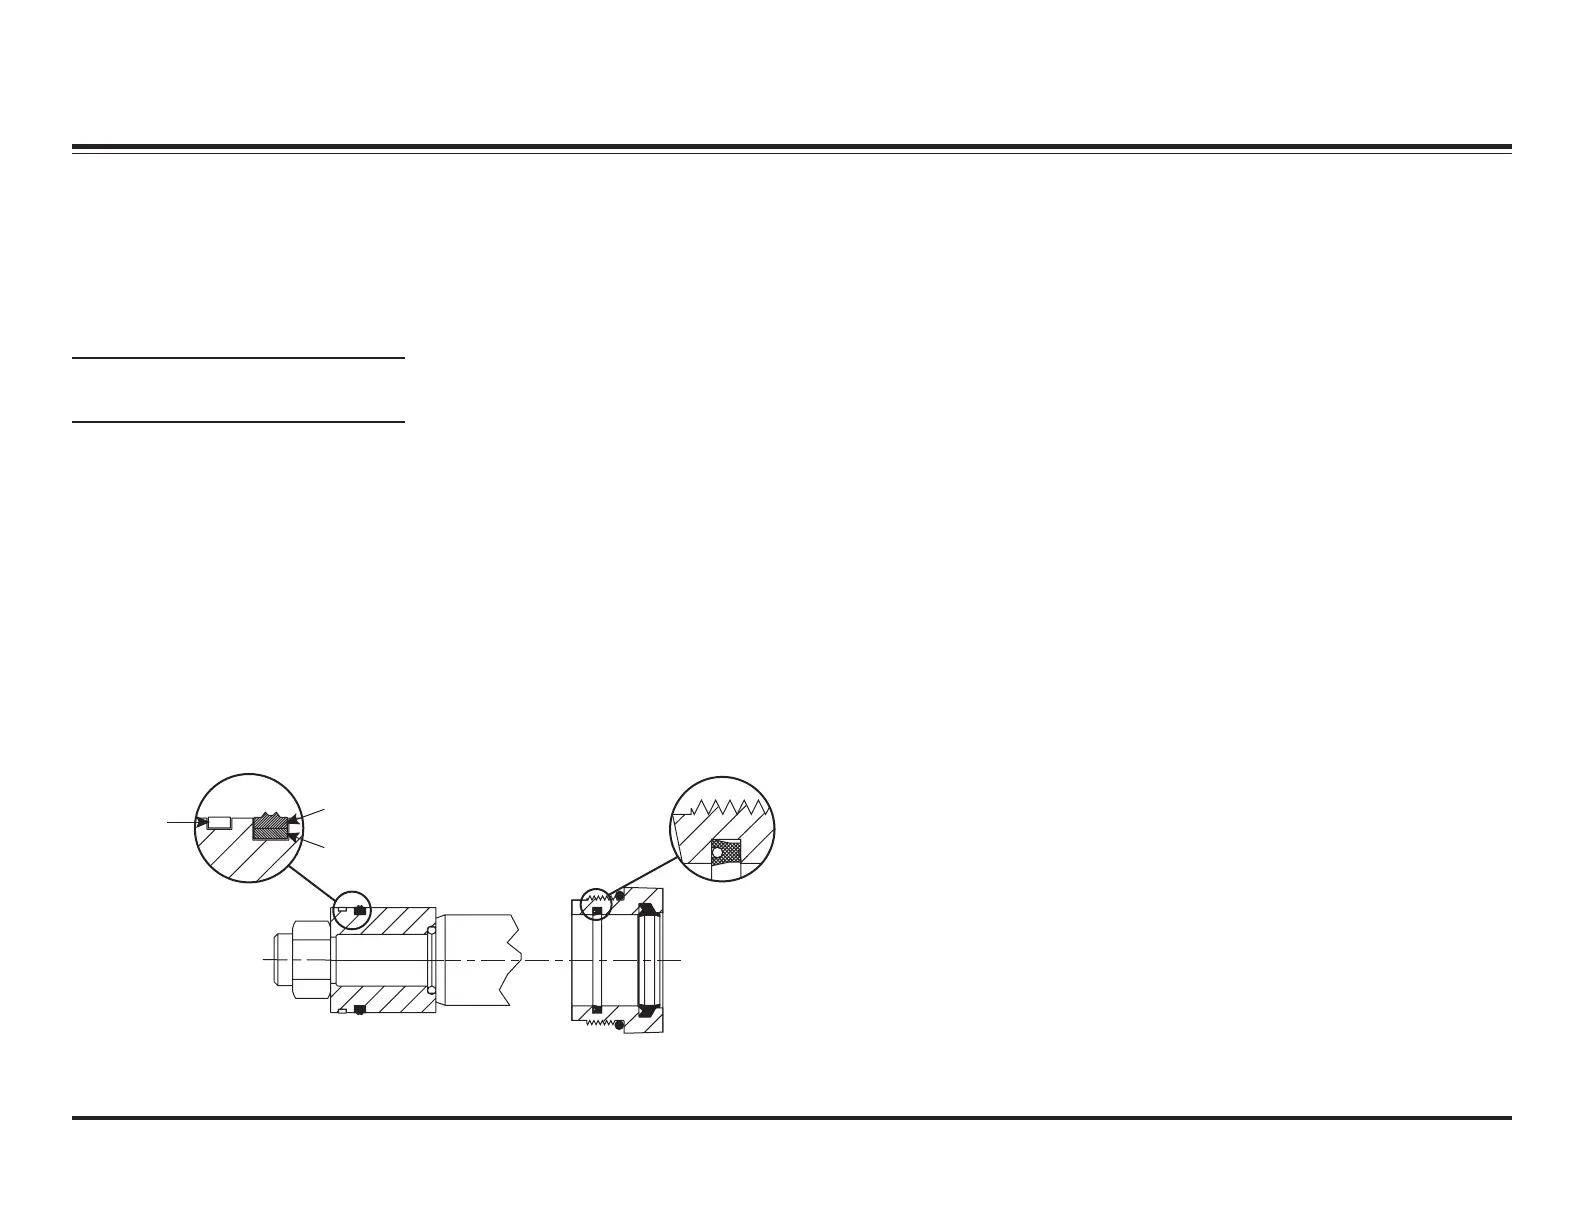
Ram Seal Installation
1. Lubricate the seals and O-rings
with hydraulic fluid.
NOTE: Placing the part in warm
fluid will facilitate installation.
2. Install the seals and O-rings in
the exact orientation as shown.
3. For single-acting (lift) rams:
Slide the gland nut over the split
bearing end of the rod to prevent
damaging the seals.
For double-acting (angle)
rams: Remove the piston, and
slide the gland nut over the
threaded end of the rod to
prevent damaging the seals.
It is possible to remove cartridges
and check valves from a hydraulic
unit without draining the hydraulic
fluid from the reservoir.
1. Install the Diagnostic Harness
(PN 29290-1) following the
instructions included with the kit.
2. Cycle through the control
functions twice to remove the
pressure in the hydraulic unit.
3. Slowly remove the breather from
the top of the hydraulic unit.
4. Either (a) completely drain
reservoir and skip to Step 9 or
(b) proceed for instructions on
removing hydraulic components
without completely draining
reservoir.
4. For double-acting (angle) rams
only: Install the piston in the
orientation shown. Tighten piston
locknut to 100–120 ft-lb.
5. Carefully reassemble the ram.
6. Insert a 0.012" feeler gauge
between the front surface of the
cylinder tube face and the hex of
the gland nut. Tighten the gland
nut until it is snug against the
feeler gauge.
7. Remove the feeler gauge, and
tighten the gland nut an
additional 1/4 turn. This
adjustment procedure will
provide a torque of 150–180 ft-lb.
Outer Seal
Inner Backing
Ring
Double-Acting
Rams Only
Single- and
Double-Acting
Rams
Split Wear
Ring (If Used)
Cartridge & Check Valve Removal
5. Install a 3/8" barb fitting into the
top of the reservoir tank.
6. Attach a hand-operated vacuum
pump to the barb fitting.
7. Using the vacuum pump, pull a
vacuum of approximately
5"–10" Hg.
8. You should now be able to
remove cartridges and check
valves from the hydraulic unit
with minimal fluid loss. Maintain
the vacuum until the replacement
cartridge/check valve has been
installed. Once the replacement
part has been installed, release
the vacuum and remove the
3/8" barb fitting.
9. Reinstall the breather and
remove the 29290-1 Diagnostic
Harness according to the
instructions included with the kit.
Excerpts taken from Gland Nut Ram Seal Kits Service Literature (Lit. No. 28944, Rev. 01).

 Loading...