Lit. No. 27366, Rev. 01 February 15, 2008
5
NOTE: Indicates a situation or
action that can lead to damage to
your snowplow and vehicle or
other property. Other useful
information can also be described.
SAFETY INFORMATION
INSTRUCTIONS
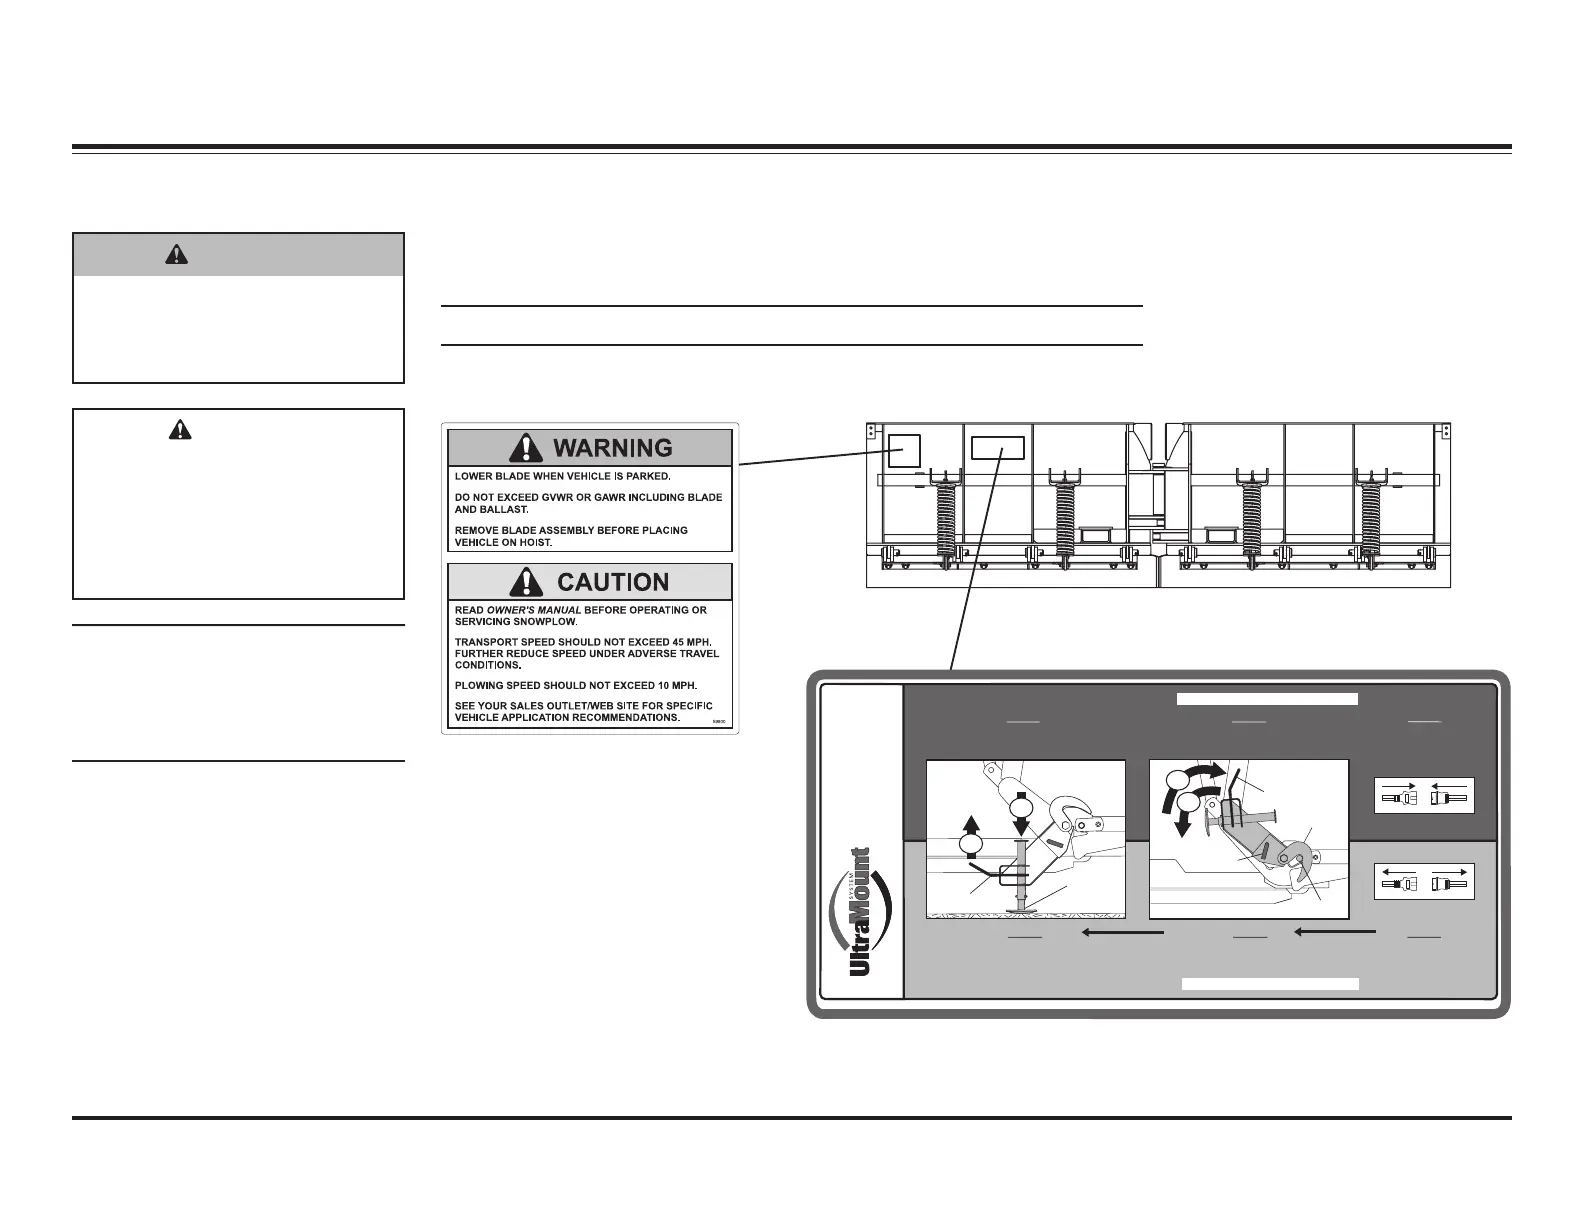
Pull and hold Lock Pin out; then rotate Handle DOWN
and release Lock Pin. It must lock into LOWER hole.
Push down top of Shoe; Shoe will be on the
ground. Repeat steps 2 and 3 on other side of plow.
Back vehicle away.
After lowering blade and
turning control off, disconnect
electrical connections.
STEP 3
STEP 2
STEP 1
After seating plow horns in receiver brackets,
pull Handle up; Shoe will lift off the ground.
Pull and hold Lock Pin out; then rotate Handle UP
and release Lock Pin. It must lock into UPPER
hole. Stand Hook must grip Receiver Pin.
Plug in electrical connections.
Repeat steps 1 and 2 on
other side of plow.
STEP 1
STEP 2
STEP 3
ON
OFF
OFF
ON
Receiver Pin
Stand Hook
Handle
(Pull)
Lock Pin
Shoe
Handle
MOUNTING PLOW (ON)
Read Owner's Manual for complete instructions.
REMOVING PLOW (OFF)
Read Owner's Manual for complete instructions.
Patents: US 4,999,935; 5,420,480; RE 35,700; 6,145,222; 6,209,231; 6,253,470; 6,526,677; CAN 2,060,425; patents pending.
67796
®
WARNING/CAUTION AND INSTRUCTION LABELS
Become familiar with and inform users about the warning and instruction labels
on the back of the blade.
NOTE: If labels are missing or cannot be read, see your sales outlet.
Warning and Caution Label
Instruction Label
CAUTION
Indicates a potentially
hazardous situation that, if not
avoided, may result in minor or
moderate injury. It may also be
used to alert against unsafe
practices.
WARNING
Indicates a potentially
hazardous situation that, if not
avoided, could result in death
or serious personal injury.
SAFETY DEFINITIONS
 Loading...