2
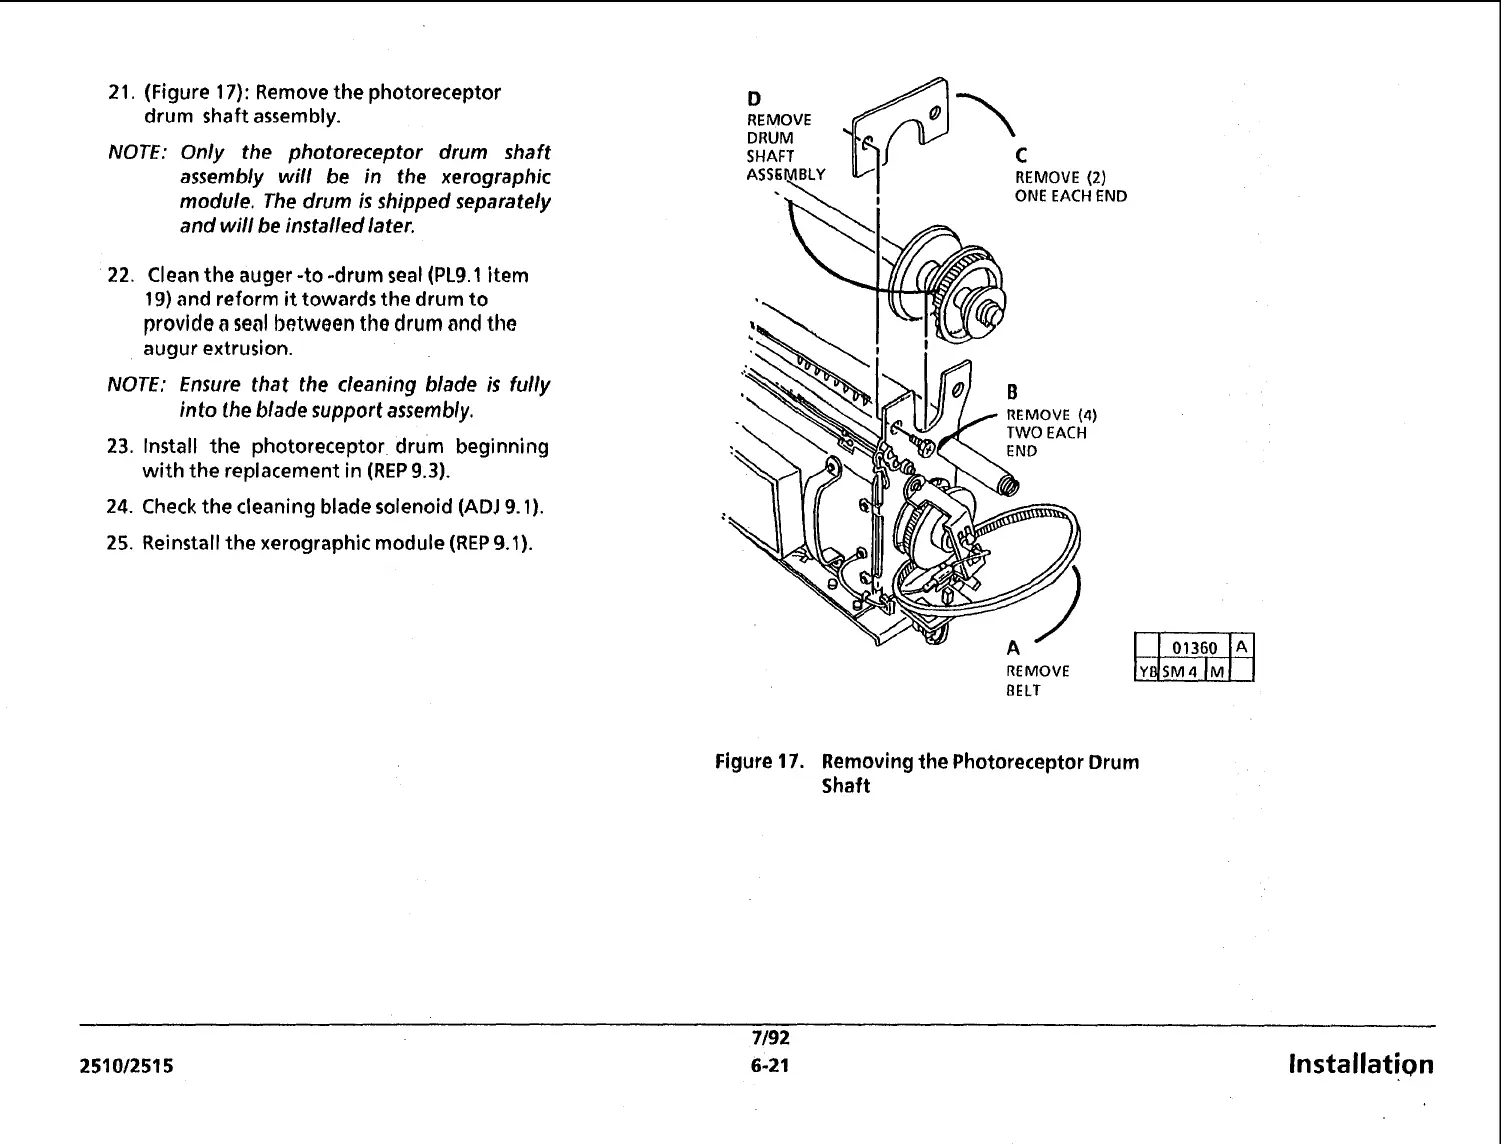
1.
(Figure
17):
Remove the photoreceptor
drum shaft assembly.
NOTE: Only the photoreceptor drum shaft
assembly will be in the xerographic
module. The drum is shipped separately
and will be installed later.
22.
Clean the
auger
-to -drum seal
(PL9.1
item
19)
and reform
it
towards the drum to
provide
a
seal between the
drum and
the
augur extrusion.
NOTE: Ensure that the cleaning blade
is
fully
into
the
blade
support
assembly.
23.
Install the photoreceptor drum beginning
with the replacement in
(REP
9.3).
24.
Check the cleaning blade solenoid
(ADJ
9.1).
25.
Reinstall the xerographic module
(REP
9.1).
D
REMOVE DRUM
@
'
SHAFT
c
ASSCYBLY
REMOVE
(2)
REMOVE
BELT
Figure
17.
Removing the Photoreceptor Drum
shaft
 Loading...


