Addendum
9-24 Xerox 4112/4127 EPS
User Guide
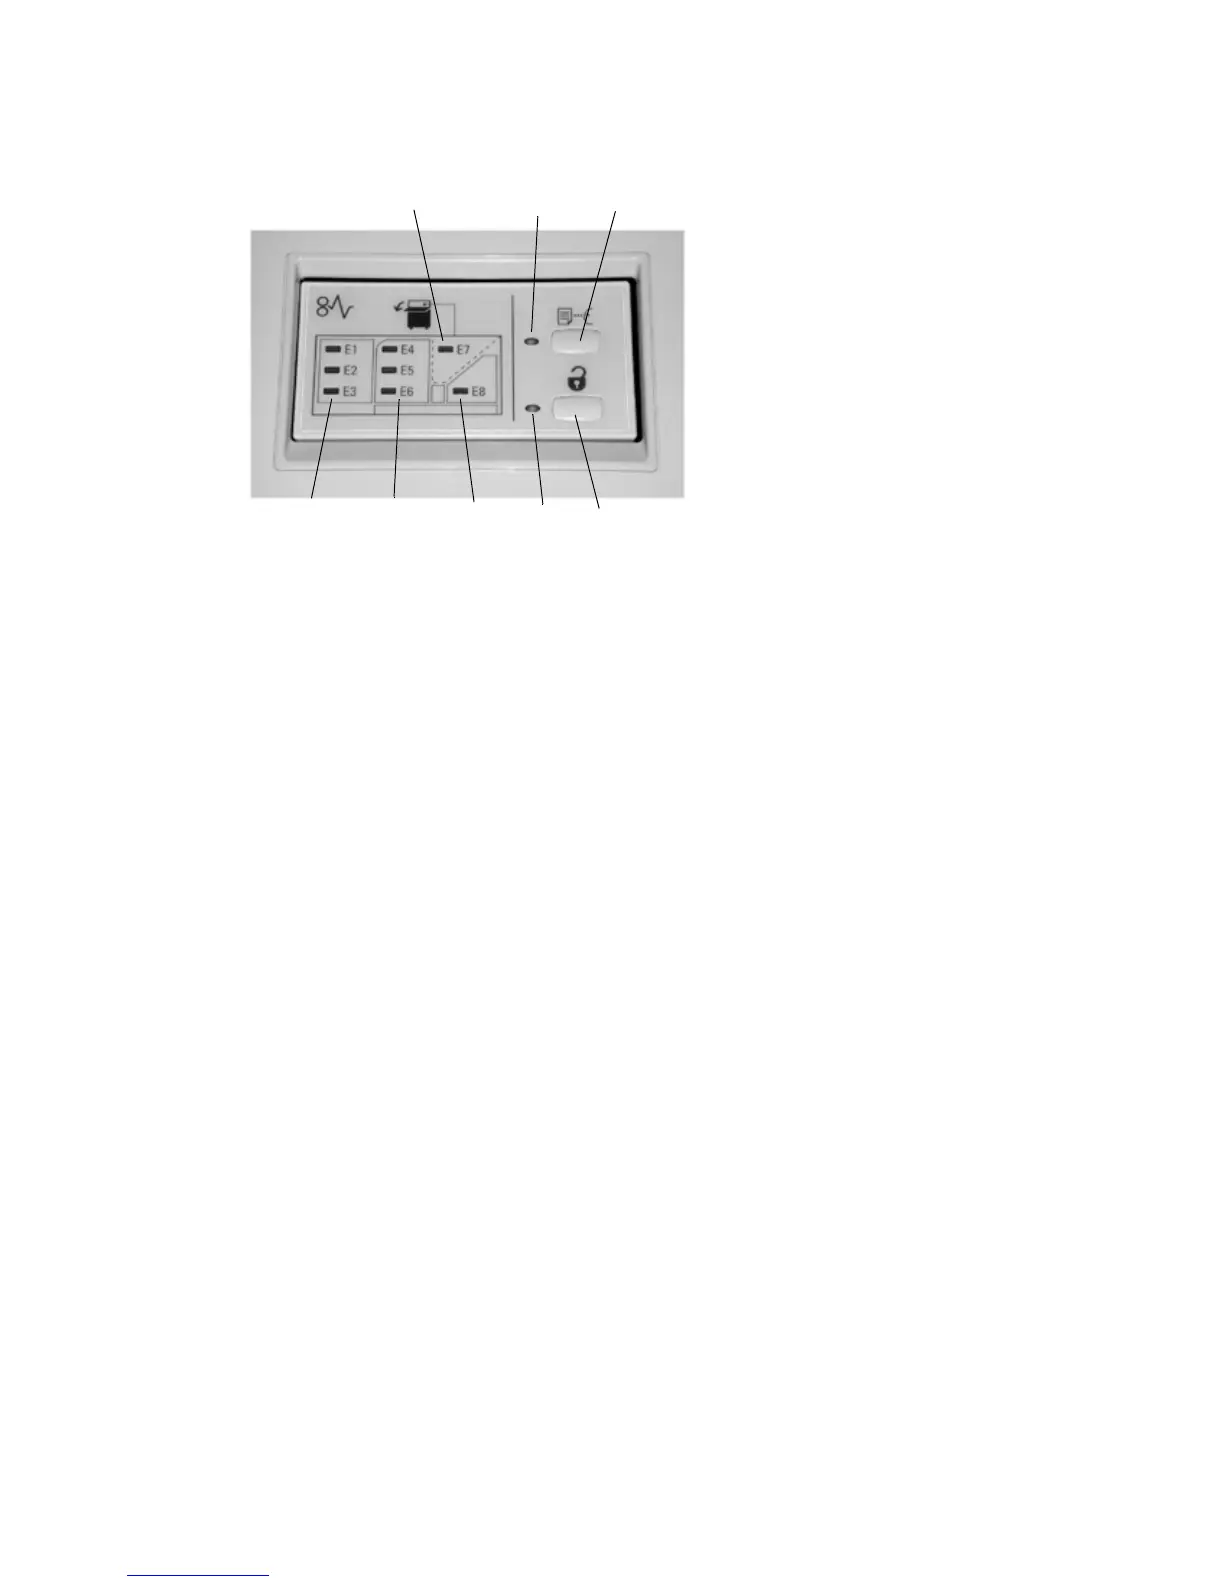
Control Panel
1. Sample indicator: This indicator blinks until a proof set is delivered to the Top Tray.
2. Sample button: Press this button to have the HCS deliver the next collated set to the top tray.
3. Unload button: Press once to lower the Stacker Tray and unlock the front door.
4. Unload indicator: This indicator lights when the Stacker Tray has reached the down position and the
front door can be opened.
5. Top Tray jam area: Blinks when there is a jam in the top tray area (E7).
6. Exit jam area: Blinks where there is a jam in the exit area (E8).
7. Stacker Entrance jam area: Blinks when there is a jam in the Stacker Entrance area (E1, E2, or E3).
8. Stacker Transport jam area: Blinks when there is a jam in the Stacker Transport area (E4, E5, or E6).
HCS Trays
Top Tray
The Top Tray offers the following:
• Copies/prints are aligned easily without folds or winkles in the output.
• To enable easier pick-up of the output copies/prints, the HCS can be stopped by selecting
the Stop button on the machine's UI.
Sample Print feature
Sample prints can be printed by performing the following steps:
1. From the Copy Output feature, select:
a. Collated or Uncollated and
b. Output Destination/Offset Stacker
2. Select Stacker - Stacker Cart then Real Time Sample Job.
3. Select Sample Job On.
2
1
5
3
4
6
8
7
 Loading...