DocuMate 250 Scanner Installation Guide 29
Scanning from PaperPort
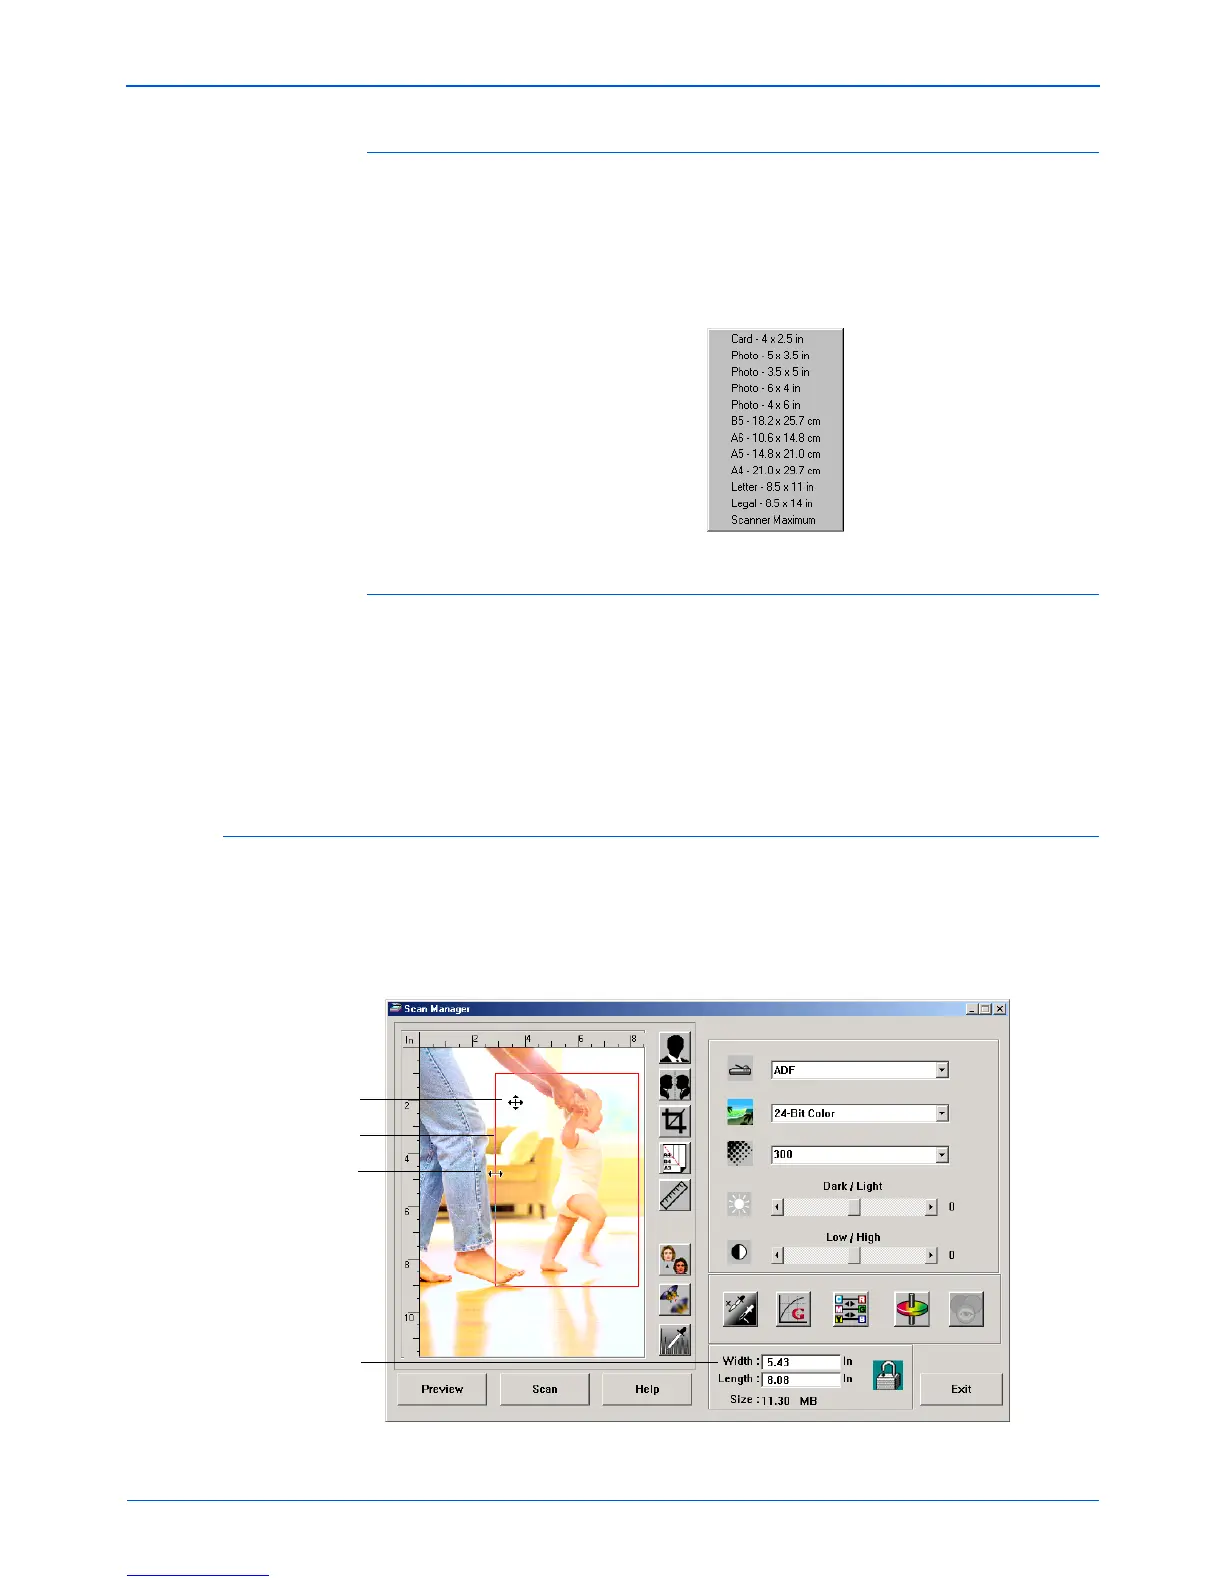
Paper Size
If you know the size of the item(s) you’re scanning, set the paper
size. This automatically sets the scan size to the paper size.
• Click the Paper Size button and select the image’s paper size
from the list.
Units
The ruler around the edges of the image area and the output
dimensions can be displayed in inches, centimeters, or pixels.
• Click the Units button to select the units for the ruler. Clicking
the button toggles through the three choices. The ruler and
output dimensions change to the new units.
Setting the Scan Area
You can manually adjust the output area to scan specific sections
of an image. For example, if you’re scanning a photograph and
want to focus on one section, manually setting the output size
removes the rest of the photograph from the final scanned image.
Manually set area
Resize pointer
Move pointer
Output Dimensions
 Loading...