EasyManuals Logo

Xerox Phaser 3052 User Manual

Xerox Phaser 3052
144 pages
To Next Page IconTo Next Page
To Previous Page IconTo Previous Page
Page #92 background imageLoading...
Page #92 background image
June 2014
4-40
Xerox® Phaser® 3052/3260 Service Manual
REP 1.26
Repairs
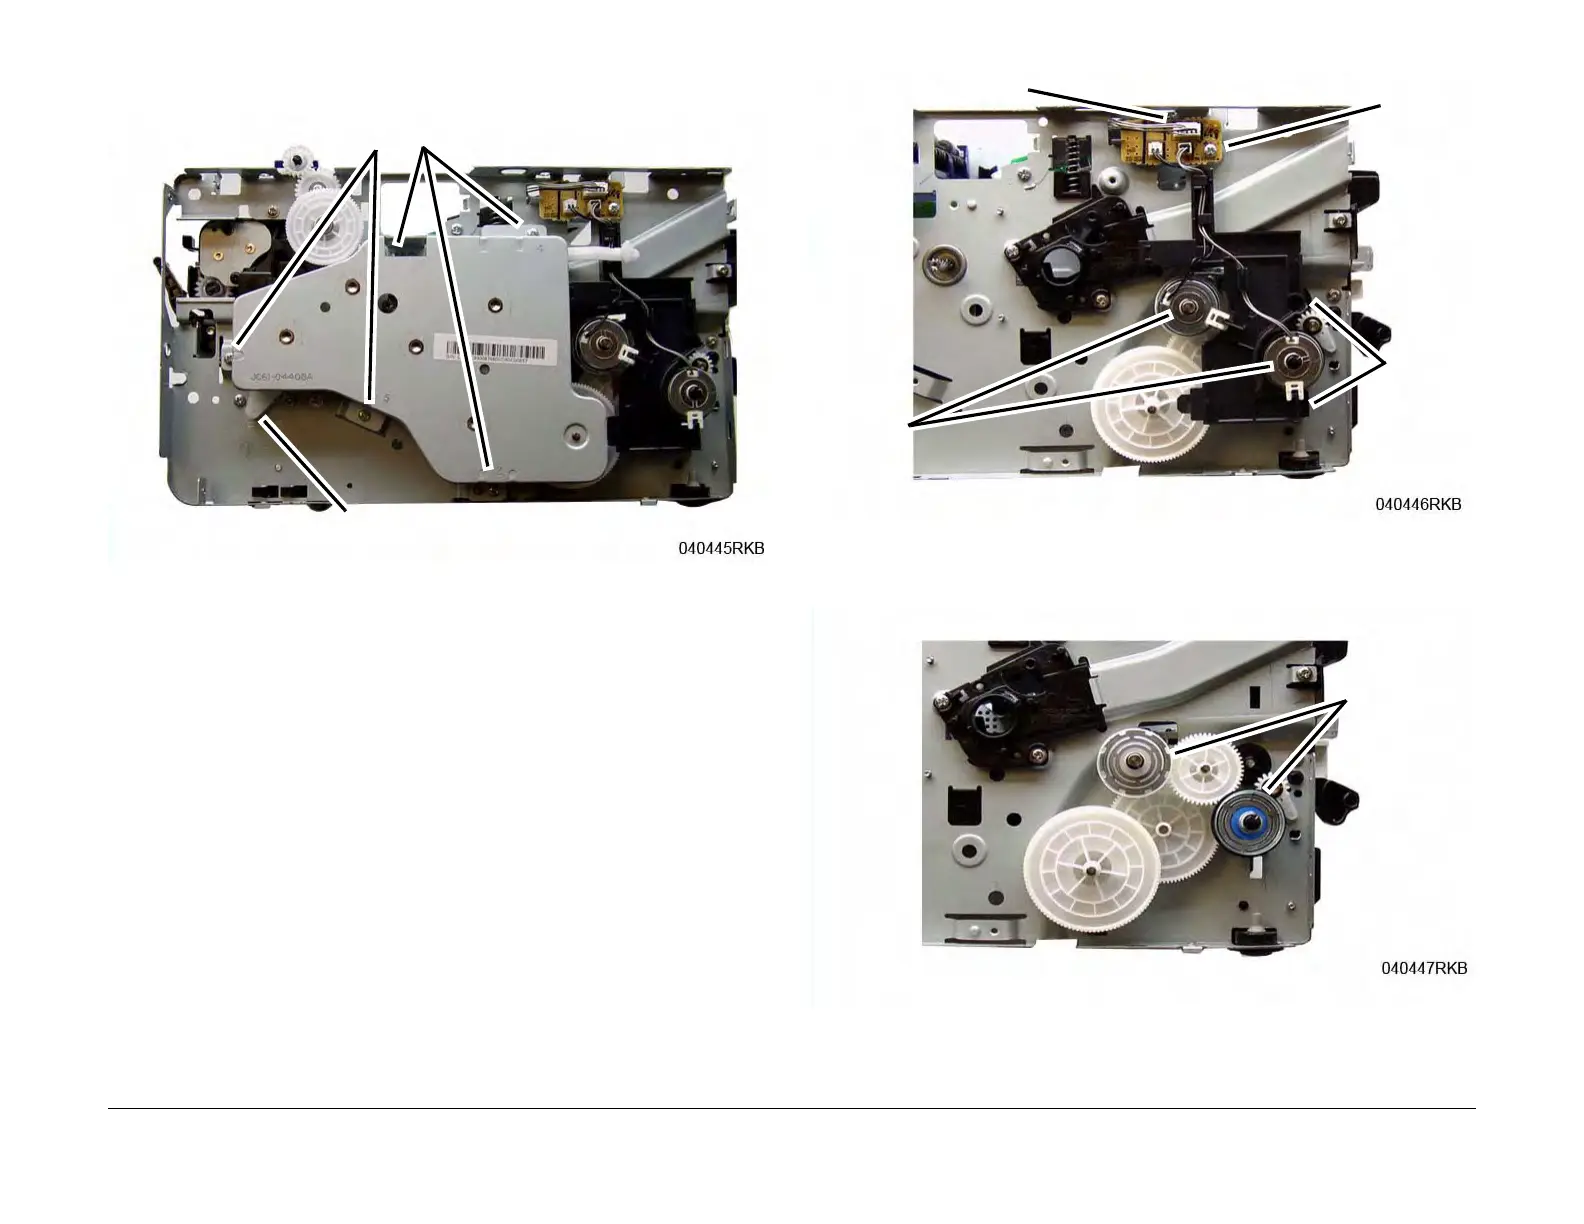
5. Remove the Main Drive Unit (5 screws) and move the Fuser Drive Locking Lever to the
Unlock position (Right) (Figure 2).
Figure 2 Main Drive Unit
6. Perform the Following (Figure 3):
a. Disconnect the paper Feed PWB Connector (CN3), and remove the PWB (1 screw).
b. Remove the Feed and Registration Clutches, remove the Snap Rings and Washer
from the Clutches.
c. Remove the Feed and Registration Clutch Assembly and the PWB, release the
latches (2).
Figure 3 Feed and Registration Clutch / Paper Feed PWB
7. Remove the Feed and Registration Clutch Drive Gears (Figure 4).
Figure 4 Feed and Registration Clutch Drive Gears
Screws
Locking Lever
Screw
CN3
Snap Rings
& Washers
Latches
Clutch Drive
Gears

Table of Contents

Other manuals for Xerox Phaser 3052

Questions and Answers:

Question and Answer IconNeed help?

Do you have a question about the Xerox Phaser 3052 and is the answer not in the manual?

Xerox Phaser 3052 Specifications

General IconGeneral
Print TechnologyLaser
First Page Out TimeAs fast as 8.5 seconds
Maximum Paper Size8.5 x 14 in.
ConnectivityUSB 2.0
Media Sizes SupportedLetter, Legal, Executive, Folio, Oficio, Statement
Print LanguagesPCL6, PostScript 3
Operating System CompatibilityWindows, Mac, Linux

Related product manuals