June 2014
4-41
Xerox® Phaser® 3052/3260 Service Manual
REP 1.26
Repairs
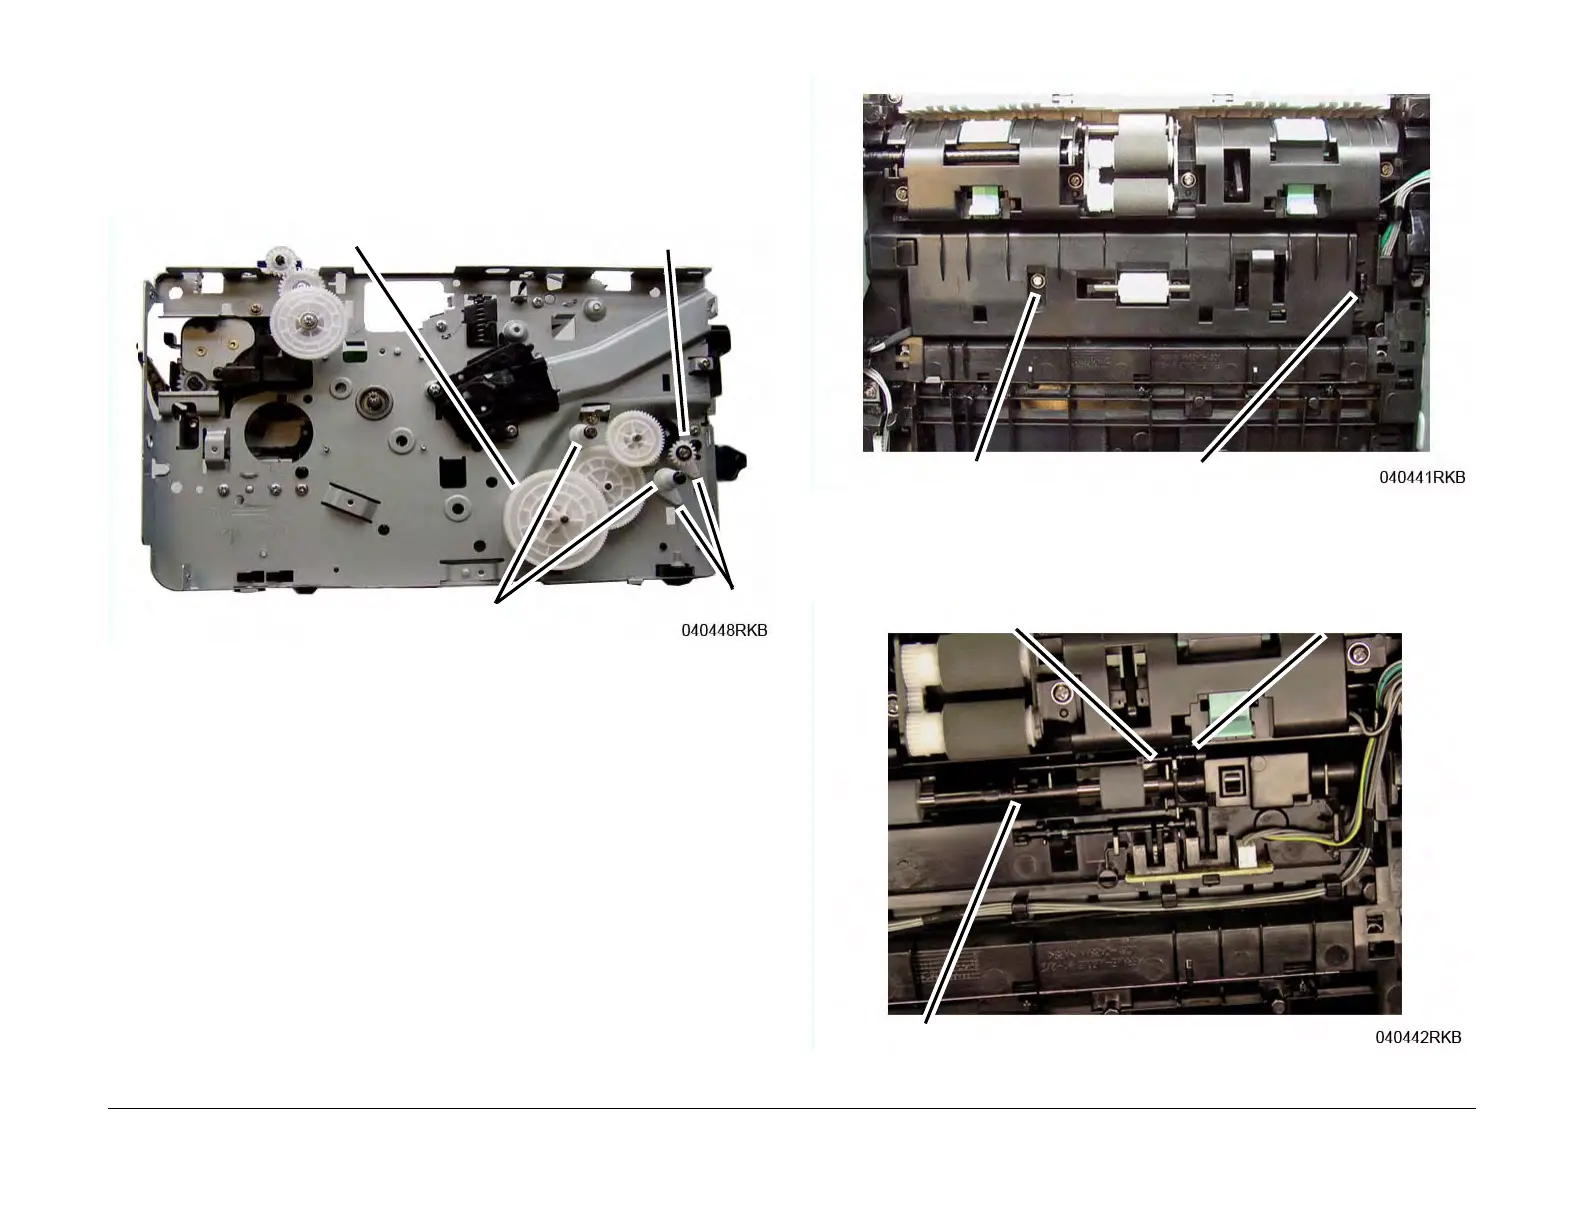
8. Remove the following (Figure 5):
Make note of the order that the Feed and Registration Drive Gears are remove in so they
can be re-installed correctly.
a. Feed and Registration Drive Gears, there is a Snap Ring on one gear.
b. Feed and Registration Clutch Bushings (2 Snap Rings).
c. Shaft Bushings (2), release the latches.
Figure 5 Drive Gears and Bushings
9. On the Bottom of the printer, remove the Feed and Registration Sensor PWB Cover (Fig-
ure 6).
a. Remove the screw (1).
b. Release the Latch and remove the cover.
Figure 6 Feed and Reg Sensors PWB Cover (Bottom View)
10. Removing the Feed Sensor Actuator, release the actuator from the latch (Figure 7):
Note the location of the Spring in the frame cutout for reinstallation.
Figure 7 Feed Sensor Actuator (Bottom View)
Snap Ring
Feed & Registration Drive Gears
Clutch Bushings
Shaft Bushings
Screw
Latch
Feed Sensor Actuator
Spring
Latch