June 2014
4-42
Xerox® Phaser® 3052/3260 Service Manual
REP 1.26
Repairs
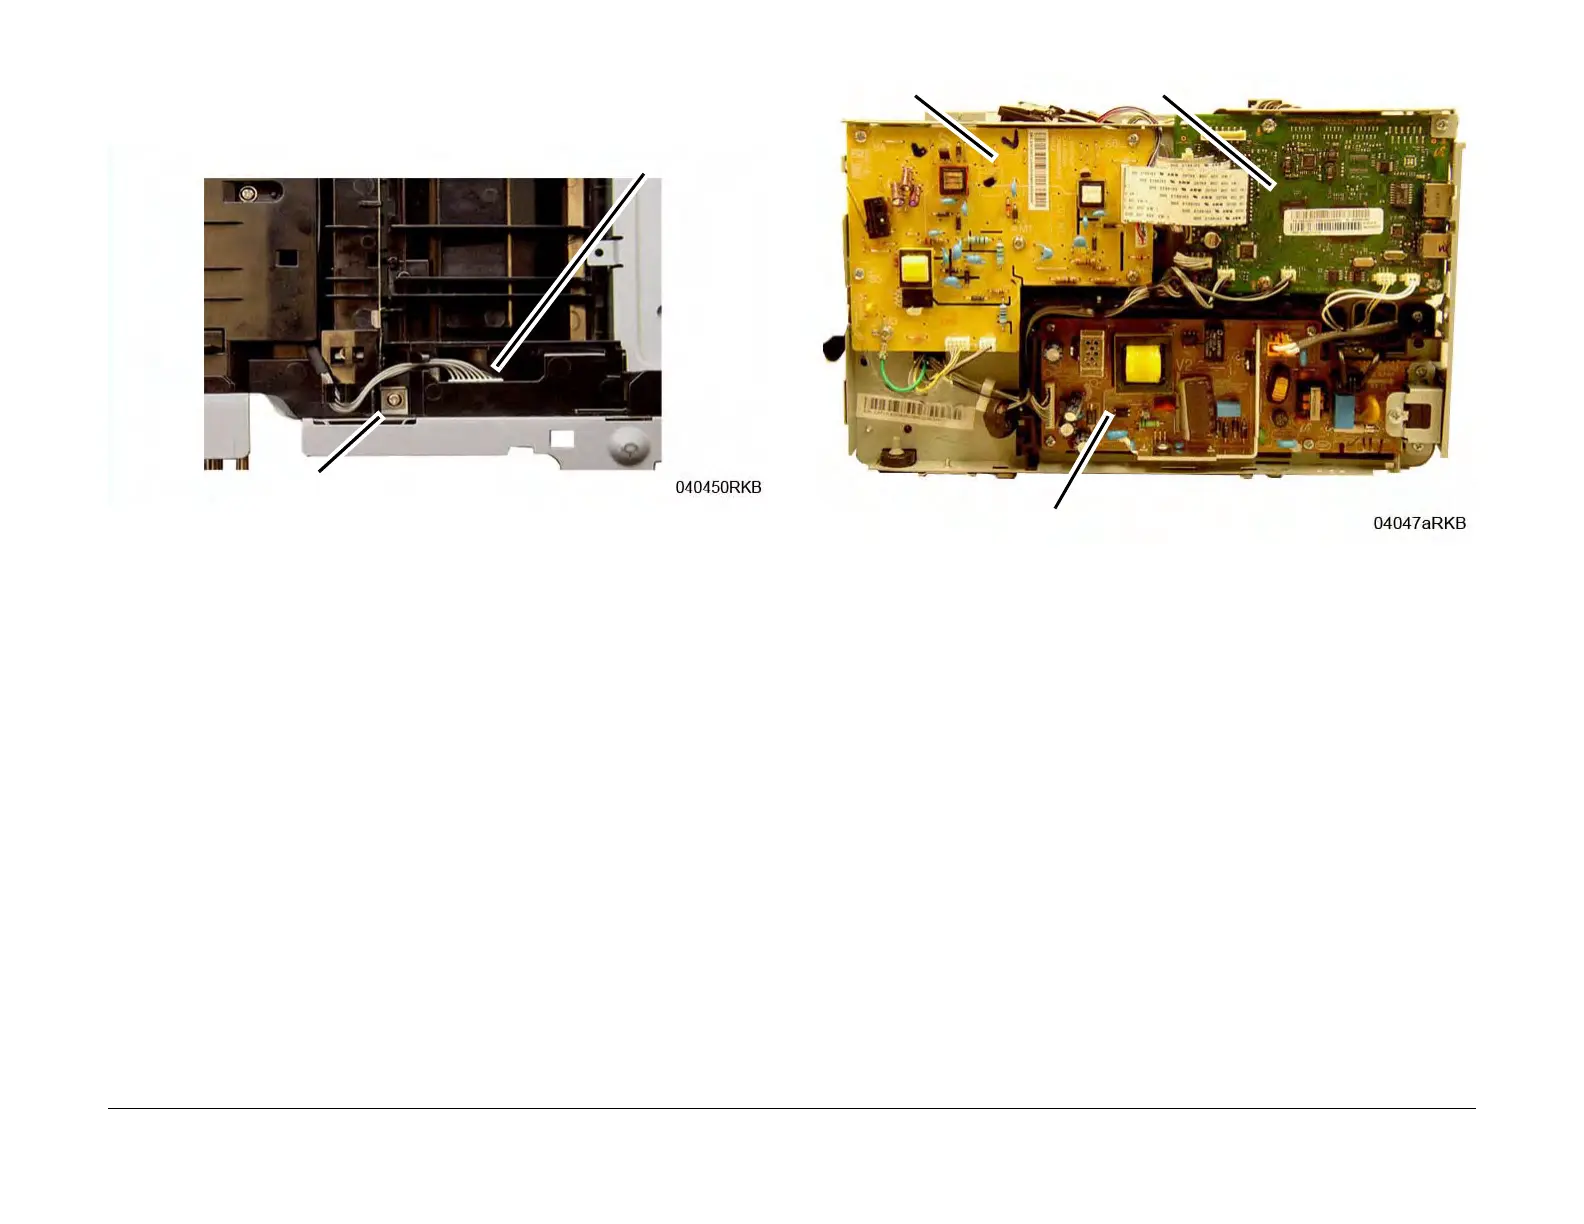
11. On the bottom of the Printer (Figure 8):
a. Disconnect the Drive Motor Connector.
b. Remove the ground screw (1).
Figure 8 Drive Motor Connector & Screw (Bottom View)
12. Remove the PWB’s (3), disconnect the connectors (Figure 9):
a. The HVPS PWB (6 screws), and remove the Spring Contacts (4) from the high volt-
age contact guide.
b. Remove the LVPS PWB (6 screws), and the insulation (black) pad behind the PWB.
c. Remove the Main PWB (5 screws)
Figure 9 PWB Removal
Connector
Screw
HVPS PWB
Main PWB
LVPS PWB