EasyManuals Logo

Xerox Phaser 3117 Service Manual

Xerox Phaser 3117
129 pages
To Next Page IconTo Next Page
To Previous Page IconTo Previous Page
Page #69 background imageLoading...
Page #69 background image
Disassembly and Reassembly
x
Service Manual
5-9
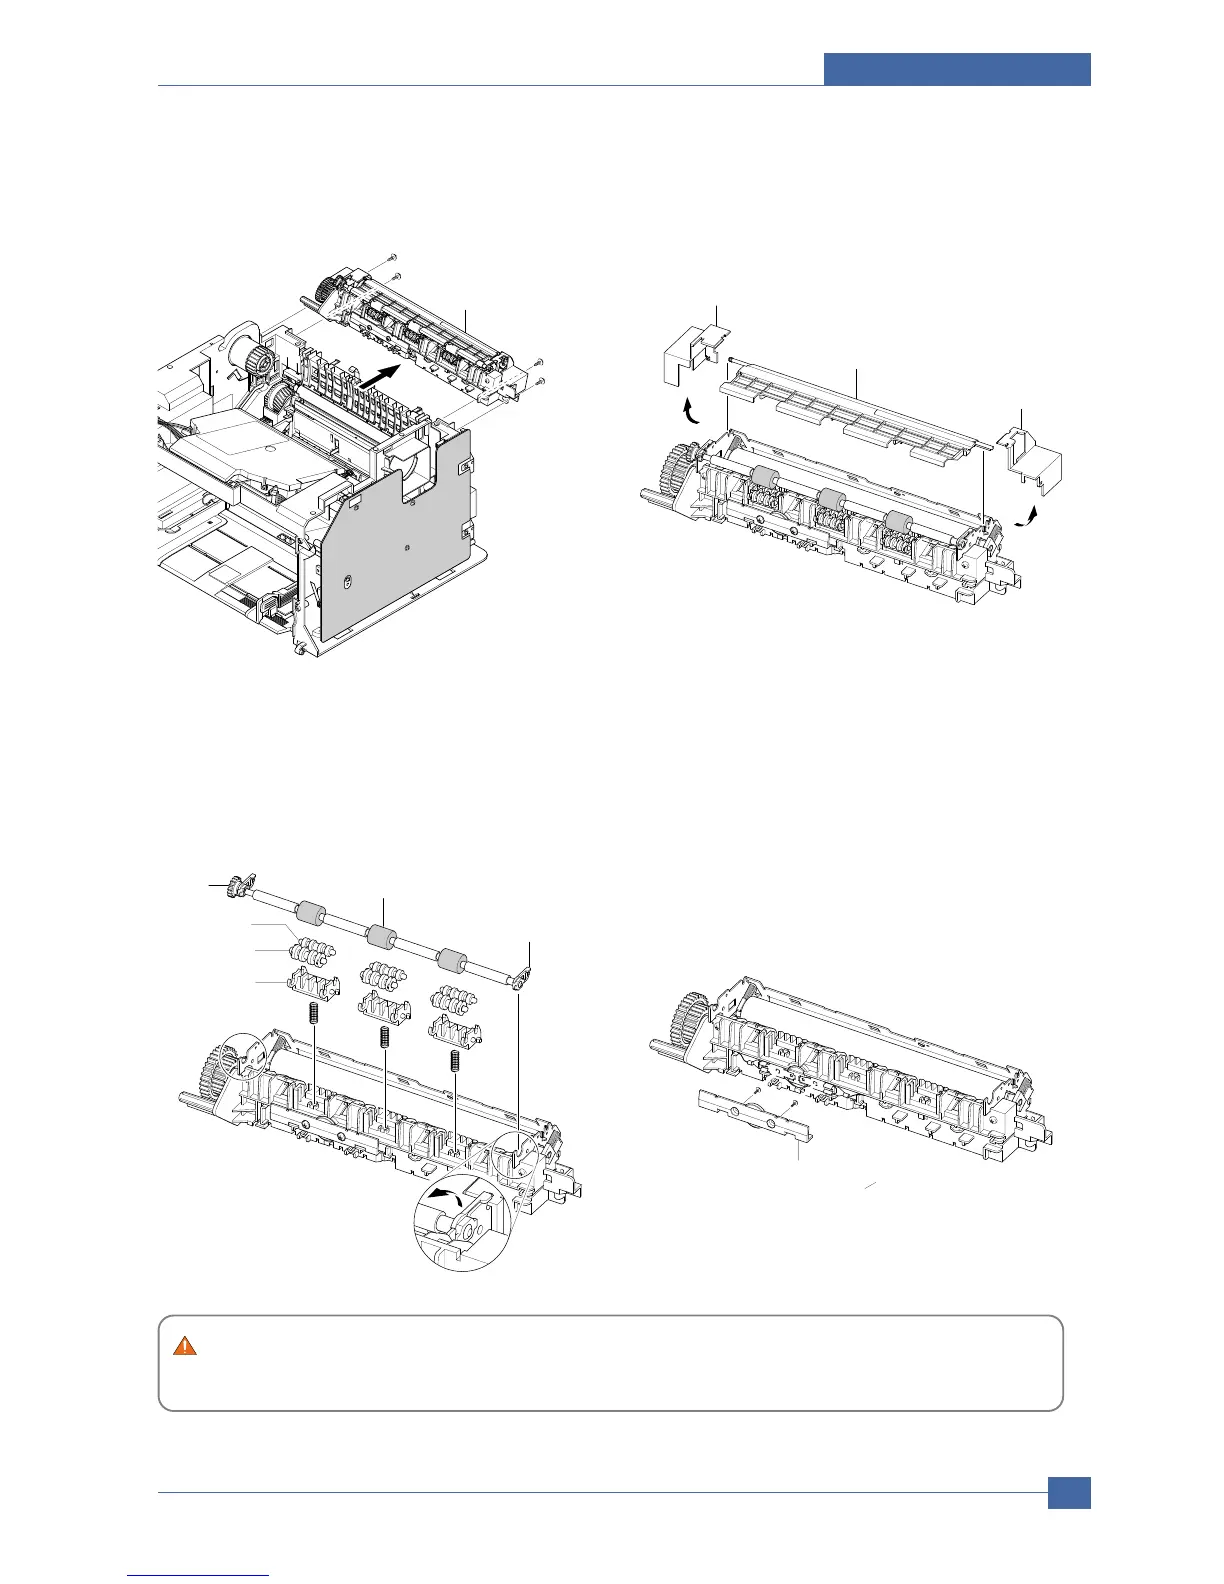
3.Separate the fuser by unscrewing 4 screws on the
frame.
(Screw x 4:Gold_M3,6003-000269)
4.After removing the Lamp Cover L/R, separate the
Fuser Dummy cover.
5.Separate the Exit roller F/Down and the exit gear
(DRV17)by turning the left/right holder connected to
the exit roller F/Down to the arrow direction.At this
time,roller_main,roller_FR, F/Down Holder,and
spring are separated with theses.
6.Remove the thermo cap by releasing 2 screws as
shown as below.
(Screw x 2:Black_M3,6003-000282)
Note : Under the condition that the fuser is connected to the frame,the exit roller F/Down can be separat-
ed.However,be careful that the Roller_Main,the Roller_FR,and F/Down Holder could get into the inner
frame due to the spring’ action.
Fuser
Exit Roller F/Down
Holder
Exit Gear
F/Down Holder
Roller_FR
Roller_Main
Thermo Cap
Fuser Dummy Cover
Lamp Cover_R
Lamp Cover_L

Table of Contents

Other manuals for Xerox Phaser 3117

Questions and Answers:

Question and Answer IconNeed help?

Do you have a question about the Xerox Phaser 3117 and is the answer not in the manual?

Xerox Phaser 3117 Specifications

General IconGeneral
Print TechnologyLaser
Print SpeedUp to 17 ppm
Paper Capacity150 sheets
ConnectivityUSB 2.0
Processor150 MHz
Memory8 MB
Paper Handling Output100 sheets
Print Resolution600 x 600 dpi
Media Sizes SupportedA4, Letter, Legal, Executive, A5, B5
Supported Operating SystemsWindows, Mac OS, Linux
First Page Out TimeLess than 10 seconds

Related product manuals