KCU105 Board User Guide www.xilinx.com 136
UG917 (v1.4) September 25, 2015
Appendix E: Board Setup
6. Install the top mounting bracket screw into the PC expansion cover retainer bracket to
secure the KCU105 board in its slot.
IMPORTANT: The KCU105 board is taller than standard PCIe cards. Ensure that the height of the card
is free of obstructions.
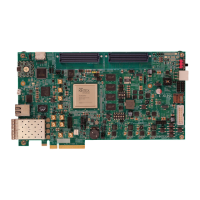
7. Connect the ATX power supply to the KCU105 board using the ATX power supply
adapter cable as shown in Figure E-1.
a. Plug the 6-pin 2 x 3 Molex connector on the adapter cable into J15 on the KCU105
board.
b. Plug the 4-pin 1 x 4 peripheral power connector from the ATX power supply into the
4-pin adapter cable connector.
CAUTION! Do NOT plug a PC ATX power supply 6-pin connector into J15 on the KCU105 evaluation
board. The ATX 6-pin connector has a different pin out than J15. Connecting an ATX 6-pin connector
into J15 damages the KCU105 evaluation board and voids the board warranty.
8. Slide the KCU105 board power switch SW1 to the ON position. The PC can now be
powered on.