12 www.xilinx.com Virtex-6 FPGA Connectivity Kit Getting Started
UG664 (v1.4) July 6, 2011
Getting Started with the Connectivity Targeted Reference Design Demo
• Software driver for 32-bit Windows and 32-bit Linux platforms:
• Configures the hardware design parameters
• Generates and consumes traffic
• Provides a Graphical User Interface (GUI) to report status and performance
statistics
Hardware Demonstration Setup Instructions
This section describes how to set up the hardware demonstration for the Virtex-6 FPGA
Connectivity TRD. This demonstration outlines a bridging function between PCIe and
XAUI protocols. It also provides accesses to an onboard DDR3 memory.
1. Equipment Checklist: The following equipment is required to run the hardware
demonstration:
• Virtex-6 FPGA Connectivity Kit
• PC system with a x8 PCIe slot on the motherboard, CD ROM drive, and a USB
port
• Monitor, keyboard, and mouse
2. Inadequate Equipment: Run the alternate demonstration.
If there is no access to any of the equipment in step 1, refer to Getting Started with the
Virtex-6 FPGA IBERT Reference Design, page 64 to alternately bring up the ML605
board included in the Virtex-6 FPGA Connectivity Kit. Otherwise, continue with the
PCIe to XAUI protocol demonstration in step 3.
3. Completion of Hardware Setup Guide Checkpoint:
If the instructions in the Virtex-6 FPGA Connectivity Kit Hardware Setup Guide have
already been completed to bring up the Virtex-6 FPGA Connectivity Kit, proceed to
Evaluating the Virtex-6 FPGA Connectivity TRD, page 33; otherwise, continue to
step 4.
4. Hardware Setup I: Board setup and configuration.
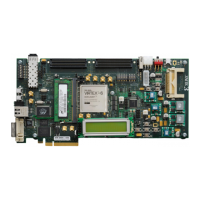
The ML605 board is shipped with the FMC Connectivity daughter card attached to the
FMC_HPC connector (see Figure 2). To run the Connectivity TRD demonstration, you
need to externally loop back the XAUI data through a CX4 loopback connector
provided in the connectivity kit.
a. Verify the switch settings are correct:
- Switch S1: 1=OFF, 2=OFF, 3=OFF, 4=ON
- Switch S2: 1 = ON, 2 = OFF, 3 = OFF, 4 = ON, 5 = ON, 6 = OFF
b. Verify that Jumper J42 has pins 3-4 shorted.
c. Plug in the CX4 loopback connector:
- Remove the plastic pin protector.
- Plug in the CX4 loopback connector on the FMC Connectivity daughter card’s
J2 connector (see Figure 3).
 Loading...