Virtex-6 FPGA Connectivity Kit Getting Started www.xilinx.com 65
UG664 (v1.4) July 6, 2011
Getting Started with the Virtex-6 FPGA IBERT Reference Design
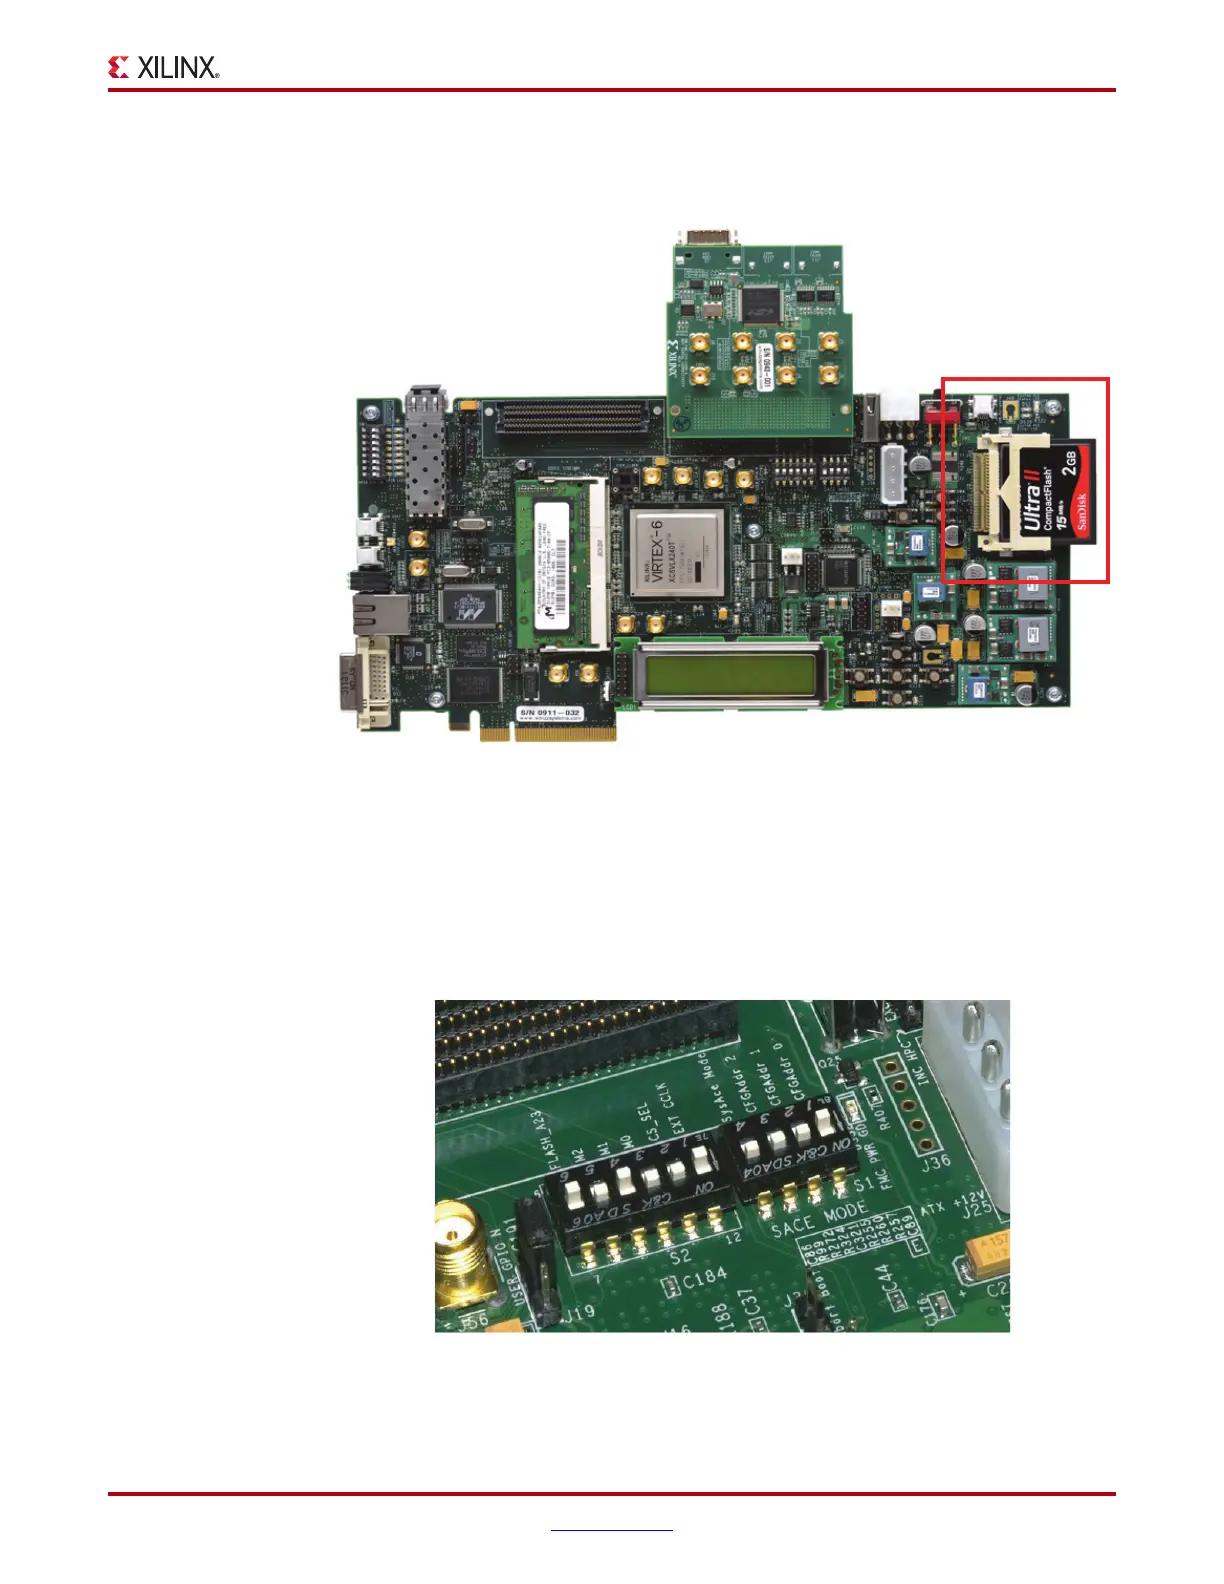
2. Board Setup I – Install the CompactFlash on the ML605 board:
Use the CompactFlash provided in the kit (see Figure 62).
3. Board Setup II – Configure the settings for DIP switches S1 and S2 to load the IBERT
design from the CompactFlash (see Figure 63), where X = Don’t care, 1 = ON, 0 = OFF):
a. Set S1 to 1110 (Position 4 is the most-significant bit, and Position 1 is the
least-significant bit).
b. Set S2 to 0101XX (Position 6 is the most-significant bit, and Position 1 is the
least-significant bit).
X-Ref Target - Figure 62
Figure 62: Installing the Included CompactFlash on the ML605 Board
X-Ref Target - Figure 63
Figure 63: Configuring the FPGA with the IBERT Design from CompactFlash
UG664_40_022210
 Loading...