5-9
ARRIVING ON SITE
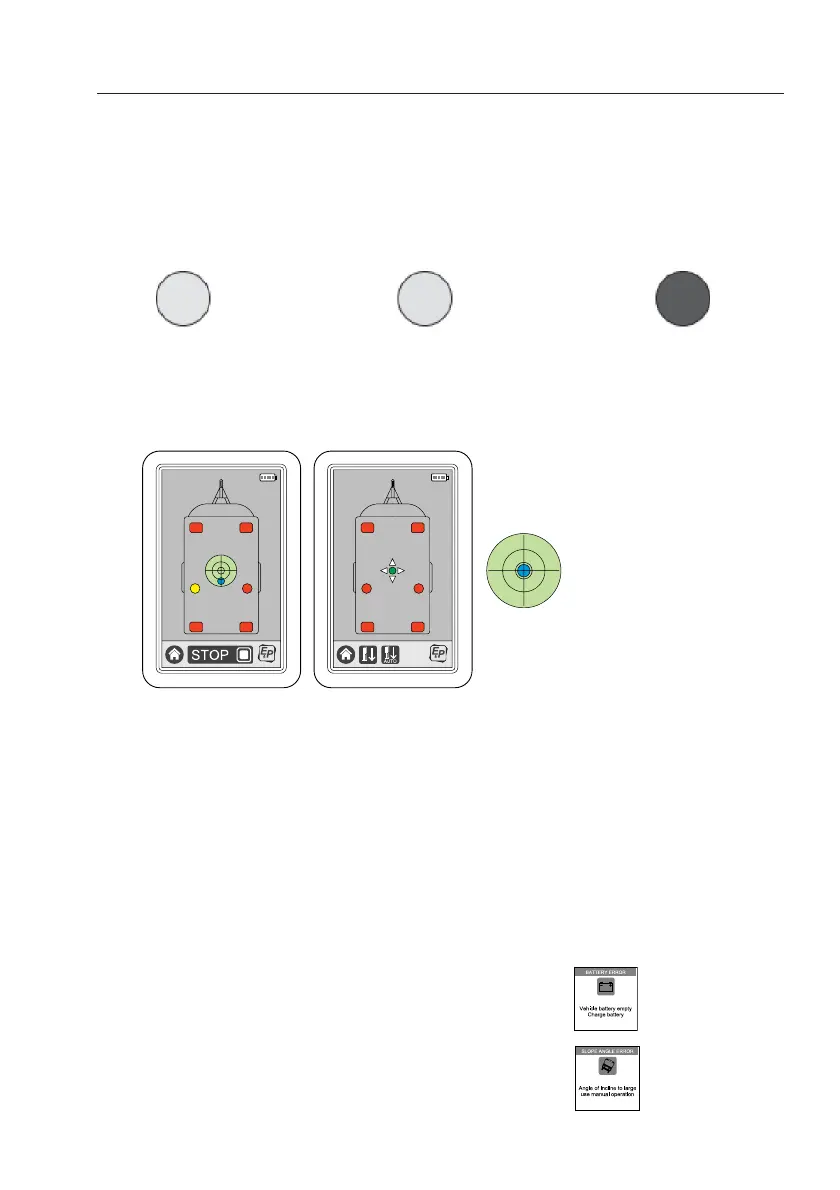
After pushing the “AUTO” button, on the bottom of the screen a “STOP BUTTON” appears.
During operating with this button you are able to stop the automatic levelling procedure. In case
you have stopped the procedure you have to press the button “retract all jacks” to start the
procedure again.
During this automatic levelling procedure you see the six GREY areas/boxes (indicating the
hydraulic jacks in withdrawn position) changing in colour from YELLOW (jacks in operation) to
RED (jacks fully extended to the ground).
Jack(s) in withdrawn position
Jack(s) in operation
Jack(s) in extended position
During this operation you will see a “BLUE CIRCLE” in the middle of the spirit level changing
position. When the vehicle is in a level position the BLUE area is located in the middle of the
spirit level.
When the automatic levelling procedure is complete, the “SPIRIT LEVEL” shows a blue circle
centered in the middle. Depending on the angle of the terrain and type of vehicle, the automatic
levelling procedure takes about 1 minute.
When ready, the touchscreen will switch OFF automatically.
Notes:
When the vehicle stands too skewed, the vehicle cannot be automatically levelled. Now, you
have two options: Stop the levelling procedure and place the vehicle on a flatter surface and start
again with automatic levelling procedure or let the vehicle stand as it is and go further with
manual levelling procedure (next chapter).
In case something is “wrong” to make the automatic levelling procedure able to work some
“warning slides” may appear on the touchscreen. The most common are:
When there is insufficient or no battery voltage, the warning slide
“LOW VOLTAGE” appears.
When the vehicle leans too steeply, the warning slide
“SLOPE TOO STEEP” appears.
LEVELLED POSITION