Appendixes62
System Set-Up
Warning: To ensure operator and paent safety, and compliance with
regulaons, connect and operate ForeSite SS only as described here:
1) Insert XSENSOR USB ash drive into PC USB port to install ForeSite SS
• Follow onscreen instrucon to view pre-loaded les on USB. If not
automacally prompted, navigate to USB drive on PC.
• Open folder called ForeSite SS Desktop Soware and run installaon le
called InstallForeSiteSSDesktop.
• Follow the onscreen installaon instrucons to install ForeSite SS on your
desktop.
• Launch ForeSite SS from the applicaon icon now displayed on your
desktop.
2) Inspect the sensor pad covering material and cable for signs of damage.
These include, but are not limited to, tears, punctures, cracked enclosures,
and/or exposed wiring. If damage is idened or suspected, contact
XSENSOR for repair (see Appendix 4)
Warning: Do not aempt live pressure imaging if the sensor pad is
damaged or soiled. Refer to the Maintenance secon of this user guide for
more informaon on cleaning.
3) Connect the SPK to the sensor pad cable connecon point (aka CONN)
as shown in Figure 1. The SPK and CONN are connected correctly when
the labels on each are both aligned, as shown. The alignment between
the two connecons is s to ensure reliable electrical connecvity. As
such, press the two together gently but rmly unl you hear a “click”. This
indicates that you have a secure and reliable connecon.
4) Connect the system components as shown in Figure 1.
Warning: To ensure operator and subject safety, only connect the sensor
pack to the X3 Pro Plaorm. Do not aempt to directly connect the sensor
pack to an unapproved PC.
5) Turn on the X3 Pro Plaorm by pressing the power buon unl the LED
turns on. The LED on the sensor pack should also turn on at the same me.
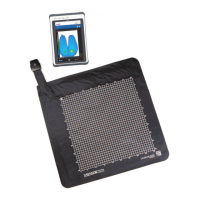
6) Place the sensor pad on the desired supporng surface, such as a chair or
a bed. Ensure that the sensor’s grid is facing towards the subject applying
the pressure.