ADPROPROE by Xtralis Installation Guide
27386_05 21
The same steps are used for commissioning both standard and wireless PRO E detectors. However, there
are some differences as mentioned below:
l DIP switches
l Connecting the RF transmitter to the receiving panel
l Custom data interface
l Final commissioning procedure
Please refer to the PRO E guide for site layout, mounting, alignment, software settings, etc.(see the ADPRO
PRO E PIR System Setup Guide, document no. (26571), Use of ADPRO PRO E-Tool Software section).
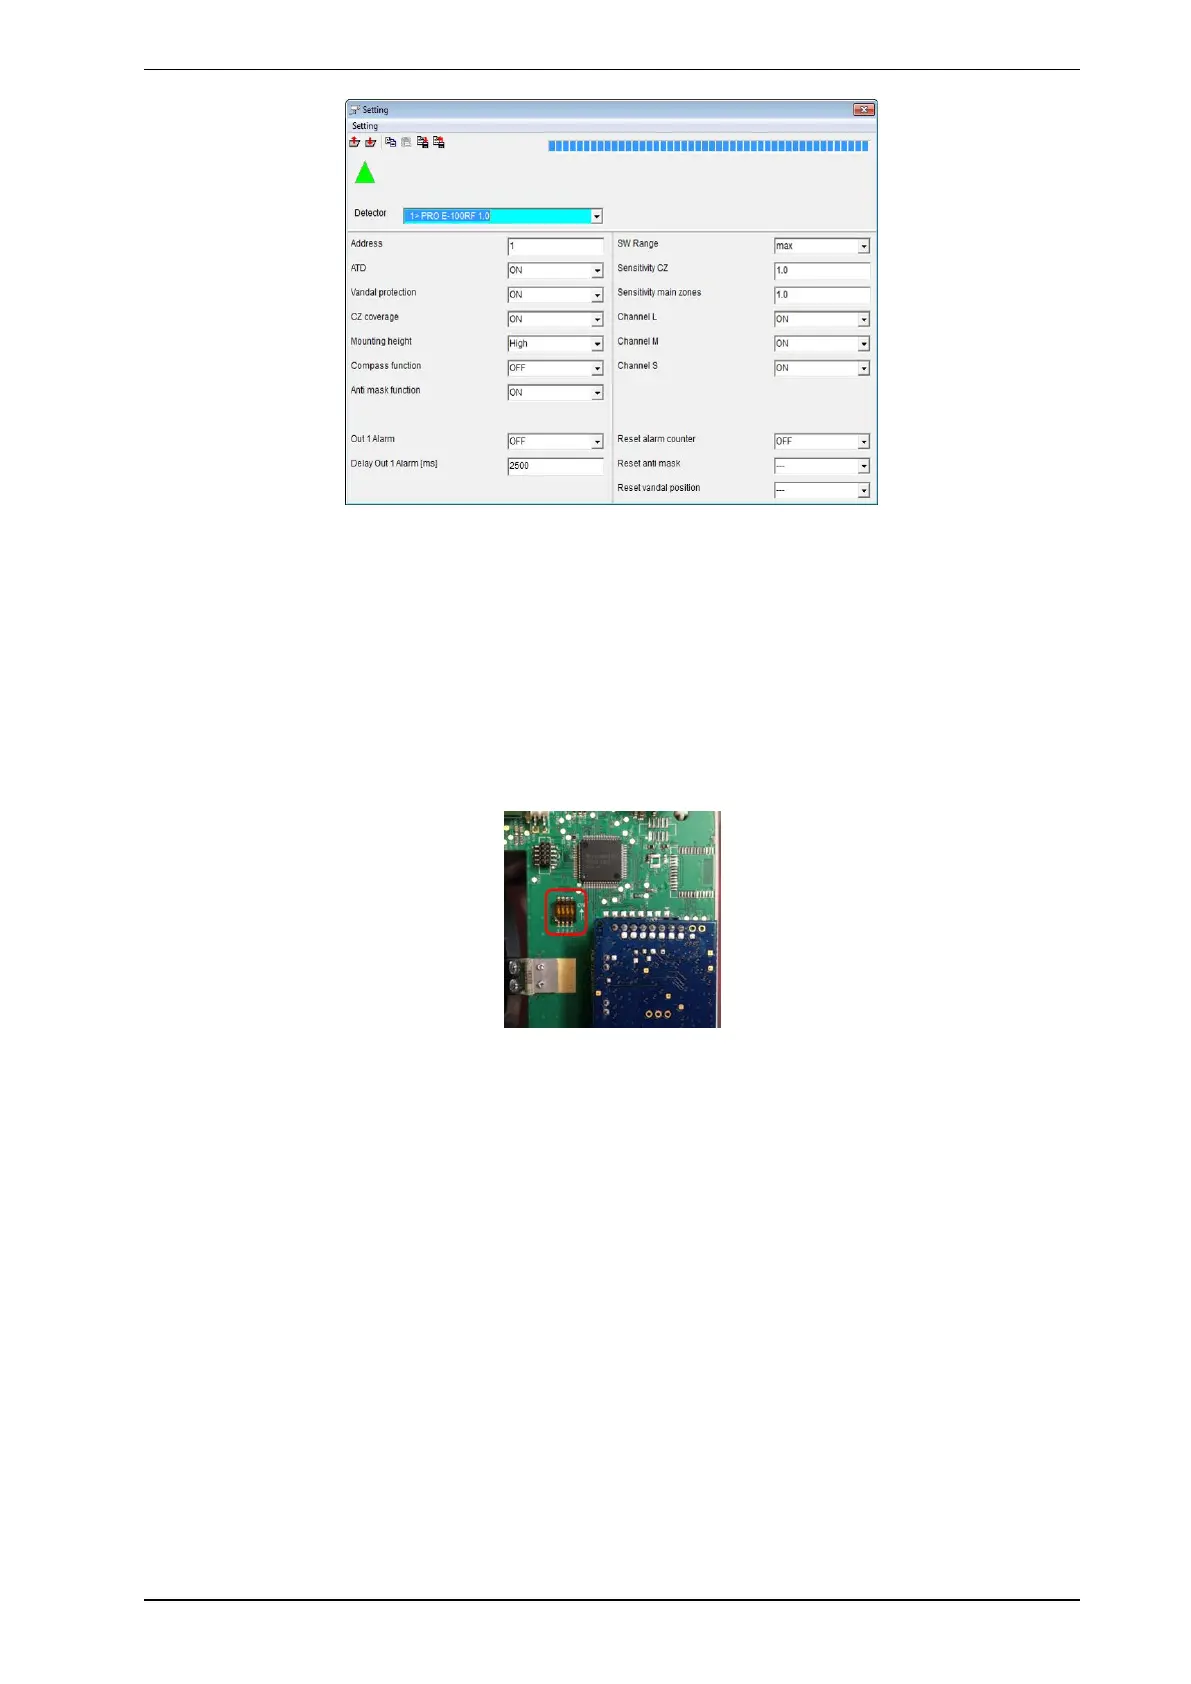
As with the standard detectors, it is always recommended to use the SW interface for fine tuning, but since
the specific RF interface might not be always at hand, DIP switches can be used as well:
DIP 2 DIP 1 Function
off off SW-Mode/ Sensitivity according to SW settings (default: 100%)
off on HW-Mode/ Sensitivity 60%
on off HW-Mode/ Sensitivity 80%
on on HW-Mode/ Sensitivity 120%
DIP 3: ATD on/off (if DIP 1&2 are set to a HW mode setting)
DIP 4: Pulse count on/off for PRO E-18WRF; (if DIP 1&2 are set to a HW mode setting)