CL Editor Owner’s Manual
39
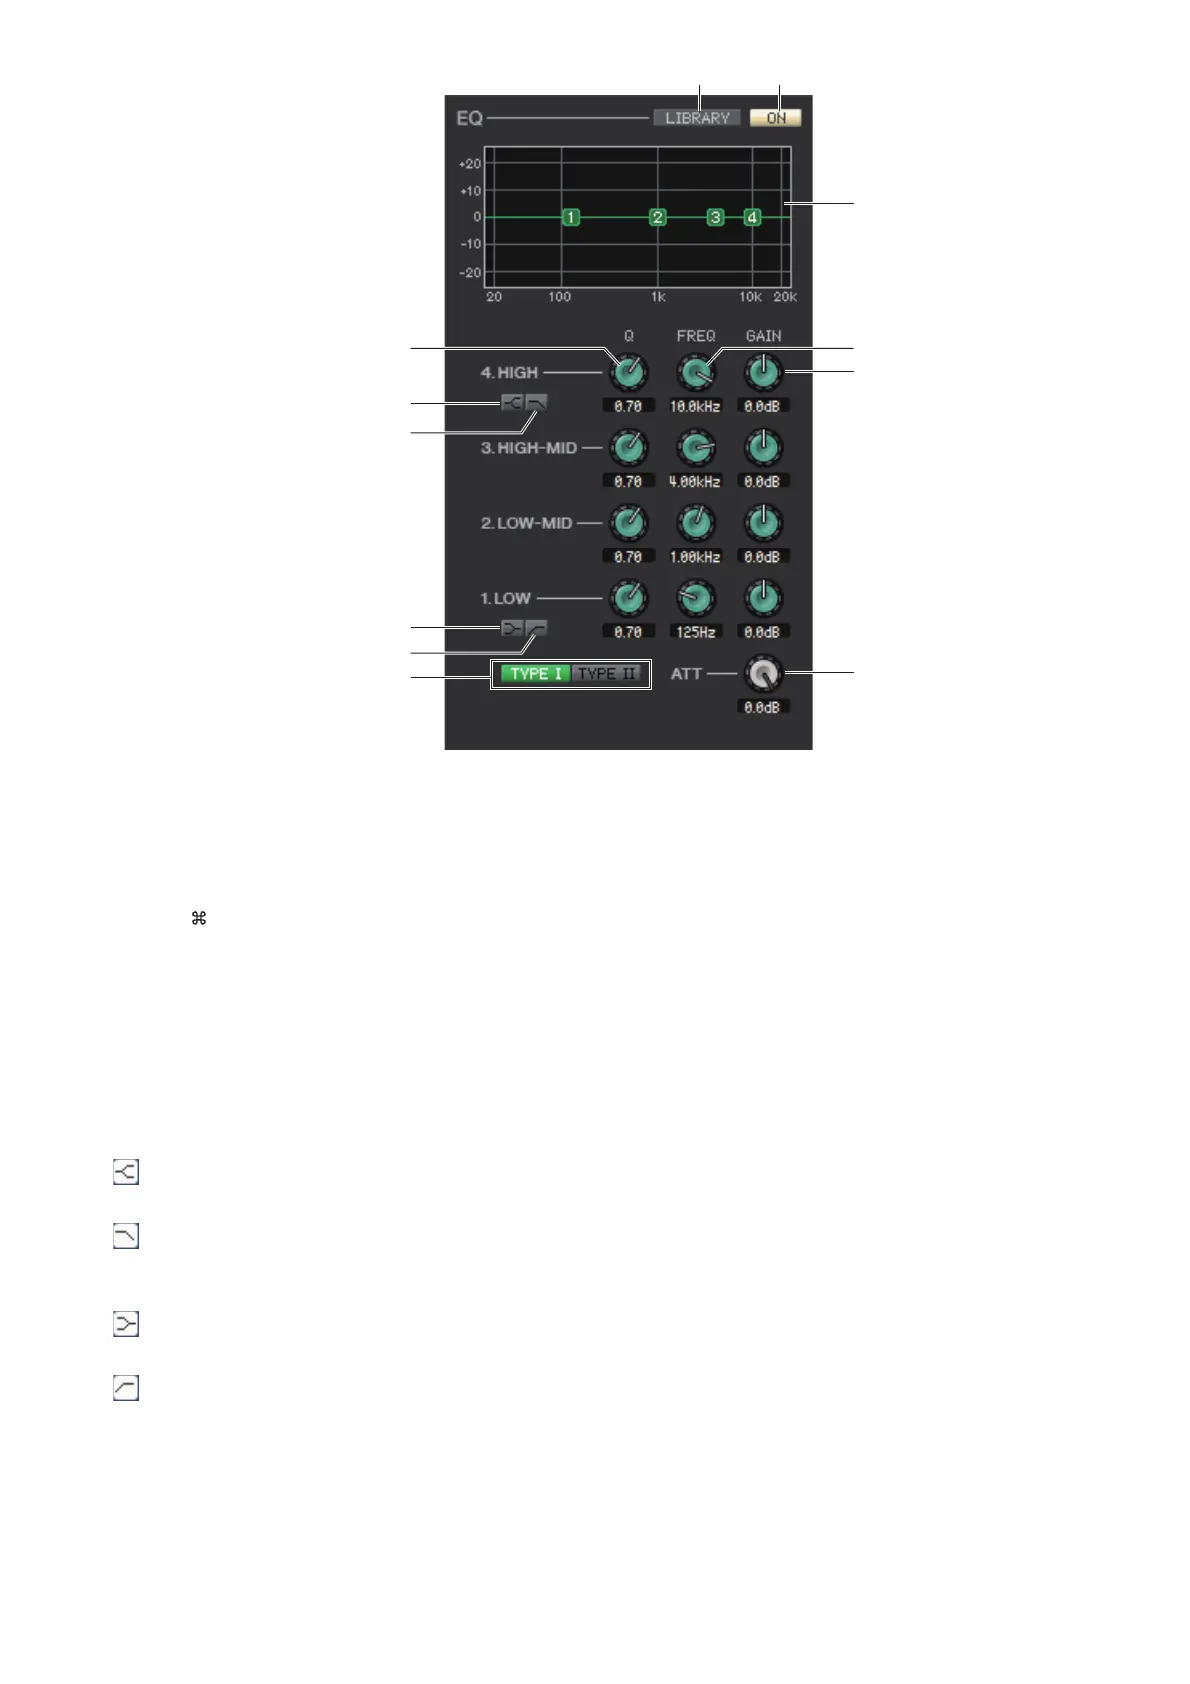
❏ EQ (Equalizer)
1 LIBRARY
Accesses the OUTPUT EQ page of the Library window.
2 ON
Switches the EQ on/off.
3 EQ graph
Indicates the response for the EQ of the currently selected channel. To reset the EQ to flat response, hold down the
<Ctrl>(< >) key of your computer keyboard and click the graph.
4 Q
These knobs adjust the Q level of the frequency range selected in the EQ graph.
5 FREQ (FREQUENCY)
These knobs adjust the center frequency for the four bands LOW, LO-MID, HI-MID, and HIGH.
6 GAIN
These knobs adjust the Q, center frequency, and boost/cut amount for the four bands LOW, LO-MID, HI-MID, and
HIGH.
7 HIGH shelving
If this button is on, the HIGH EQ will be switched to a shelving type (the Q knob of the HIGH EQ will disappear.)
8 LPF (Low Pass Filter)
If this button is on, the HIGH EQ will function as a low pass filter. The Q knob of the HIGH EQ will disappear, and the
GAIN knob will act as the low pass filter on/off switch.
9 (LOW shelving)
If this button is on, the LOW EQ will be switched to a shelving type (the Q knob of the LOW EQ will disappear.)
0 HPF (High Pass Filter)
If this button is on, the LOW EQ will function as a high pass filter EQ. The Q knob of the LOW EQ will disappear, and
the GAIN knob will act as the high pass filter on/off switch.
A TYPE I/TYPE II (EQ type)
Selects either TYPE I or TYPE II as the EQ type.
B ATT (Attenuation)
Adjusts the amount of attenuation for the signal level of pre EQ.
21
3
6
B
5
7
9
8
A
0
4
 Loading...