32 support@yardistrystructures.com
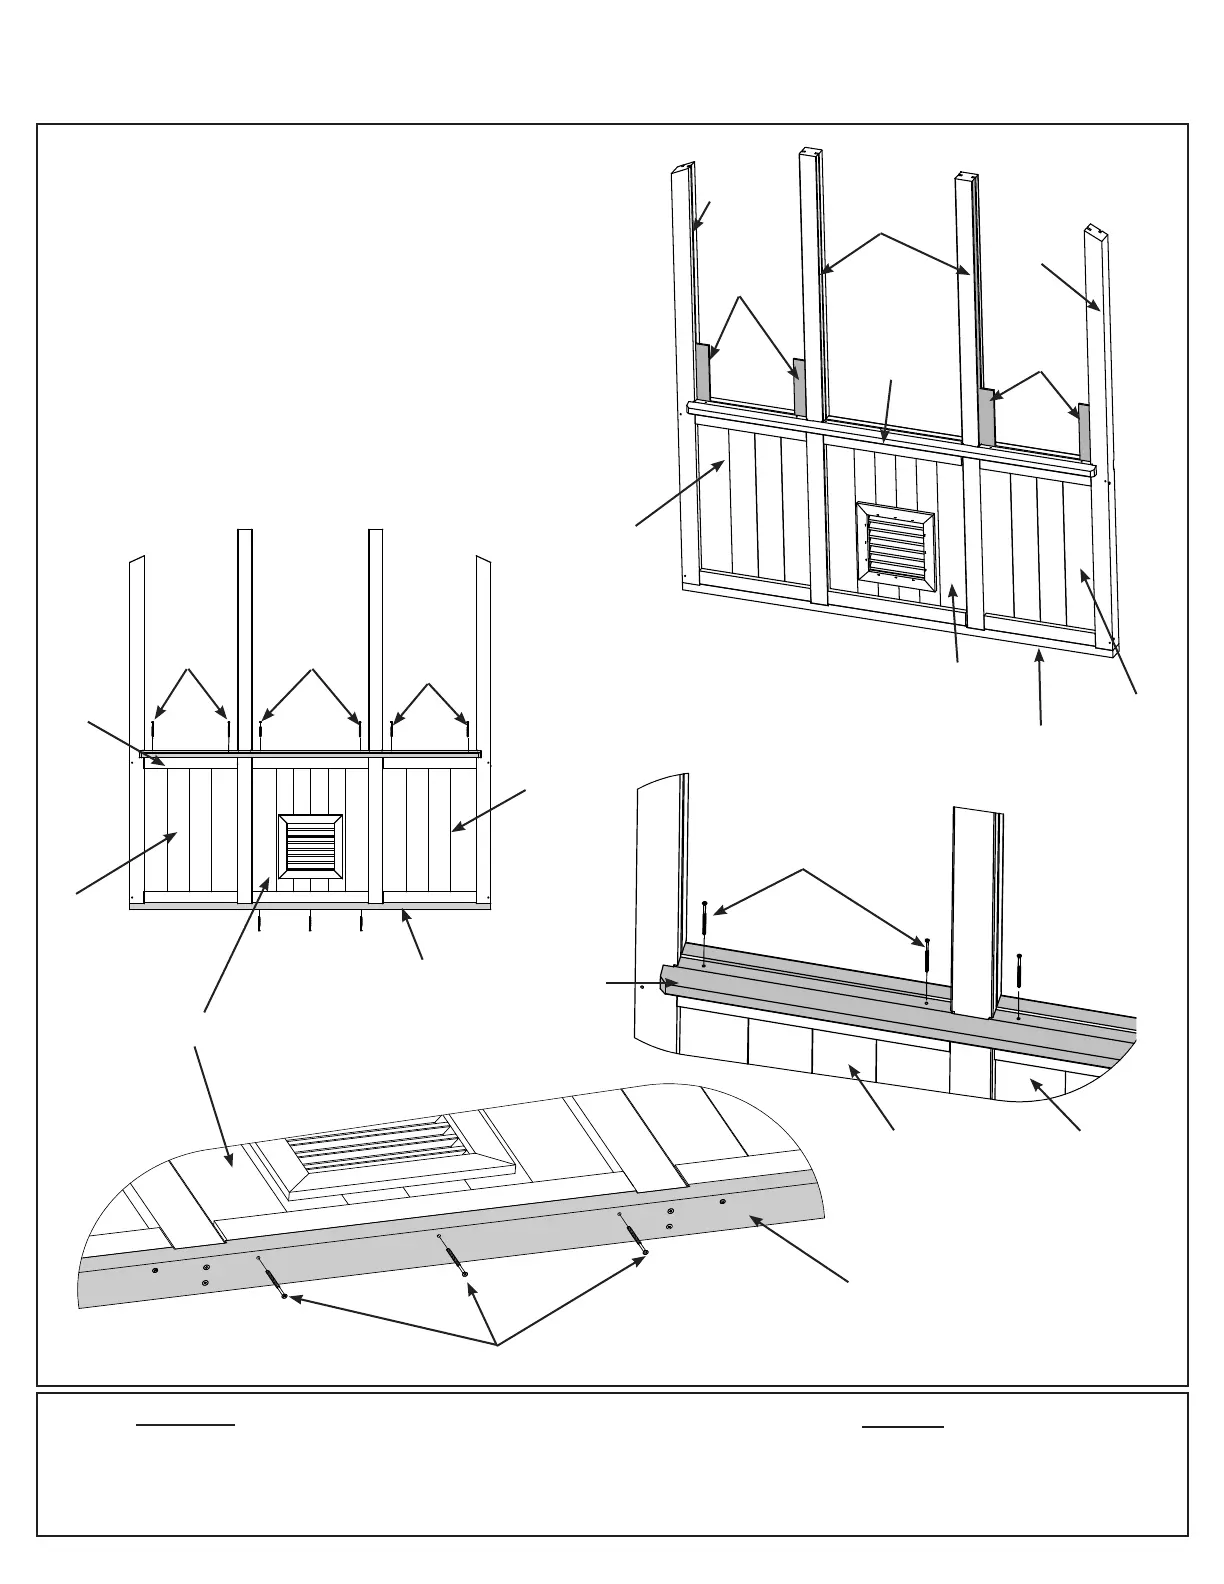
PLACE THE GUIDE SPACERS IN
GROOVES OF EACH POST AND IN
THE TOP FACE GROOVE OF THE
BACK WALL SILL
G: Attach (1120) Back Base to (1155) Vent Wall Panel
with three #8 x 3” Wood Screws. (F3.10 and F3.12)
H: Place one (1106) Back Wall Sill on top of (1155) Vent
around each (1113) Back Post. Use (1188) Guide Spacer
in the grooves of each post and (1106) Back Wall Sill to
line up Posts. Attach (1106) Back Wall Sills to (1147)
FB Panels and (1155) Vent Wall Panel with two #8 x 3”
Wood Screws per panel. Remove (1188) Guide Spacers.
(F3.10, F3.11 and F3.13)
Hardware
9 x #8 x 3” Wood Screw
Wood Parts
1 x (1106) Back Wall Sill
(1188) Guide
Spacer
(1106) Back
Wall Sill
(1147)
FB Panel
Guide Spacers to sit
in grooves of Left and
Right Posts, Back Posts
and Back Wall Sill to
align posts correctly,
then to be removed.
Step 3: Back Wall Assembly
Part 5
F3.10
F3.11
F3.13
F3.12
(1113)
Back Post
(1120) Back Base
(1109)
Right Post
(1108)
Left Post
(1188) Guide
Spacer
#8 x 3” Wood Screw
#8 x 3” Wood Screw
#8 x 3”
Wood
Screw
#8 x 3”
Wood
Screw
#8 x 3”
Wood
Screw
(1147)
FB Panel
(1147)
FB Panel
(1147)
FB Panel
(1147)
FB Panel
(1106) Back
Wall Sill
(1106) Back
Wall Sill
(1155) Vent
Wall Panel
(1155) Vent
Wall Panel
(1155) Vent
Wall Panel
(1120) Back
Base
(1120) Back Base