4 Start-Up Programming
72 YASK AWA TOEPYAIL1E01A YASKAWA AC Drive L1000E Quick Start Guide
Starting Auto-Tuning
WARNING! Sudden Movement Hazard. The drive and motor may start unexpectedly during Auto-Tuning, which could result in death or
serious injury. Ensure the areas surrounding the drive, motor and load are clear before proceeding with Auto-Tuning.
WARNING! Electrical Shock Hazard. High voltage will be supplied to the motor when Stationary Auto-Tuning is performed even with
the motor stopped, which could result in death or serious injury. Do not touch the motor until Auto-Tuning has been completed.
WARNING! When performing Rotational Auto-Tuning for motor data or PG encoder offset, always uncouple the motor from the
mechanical system (remove ropes from traction sheave). Performing Rotational Auto-Tuning with the mechanical system connected to
the motor can cause hazardous situations, injury to personnel and damage to the equipment.
NOTICE: Rotational Auto-Tuning will not function properly if a holding brake is applied on the load. Ensure the motor can freely spin
before beginning Auto-Tuning. Failure to comply could result in improper operation of the drive.
Enter the required information from the motor nameplate. Press to proceed to the Auto-Tuning start display.
Note: These instructions continue from Step 6 in “Enter Data from the Motor Nameplate”.
■ Parameter Settings during Induction Motor Auto-Tuning: T1
The T1- parameters are used to set the Auto-Tuning input data for induction motor tuning.
Note: For motors operating in the field weakening range, first perform the Auto-Tuning with the base data. After Auto-Tuning is
complete, change E1-04, Maximum Output Frequency, to the desired value.
T1-01: Auto-Tuning Mode Selection
Sets the type of Auto-Tuning to be used. Refer to Auto-Tuning for Induction Motors on page 68 for details on the
different types of Auto-Tuning.
Setting 0: Rotational Auto-Tuning
Setting 1: Stationary Auto-Tuning 1
Setting 2: Stationary Auto-Tuning for Line-to-Line Resistance
Setting 4: Stationary Auto-Tuning 2
T1-02: Motor Rated Power
Sets the motor rated power according to the motor nameplate value.
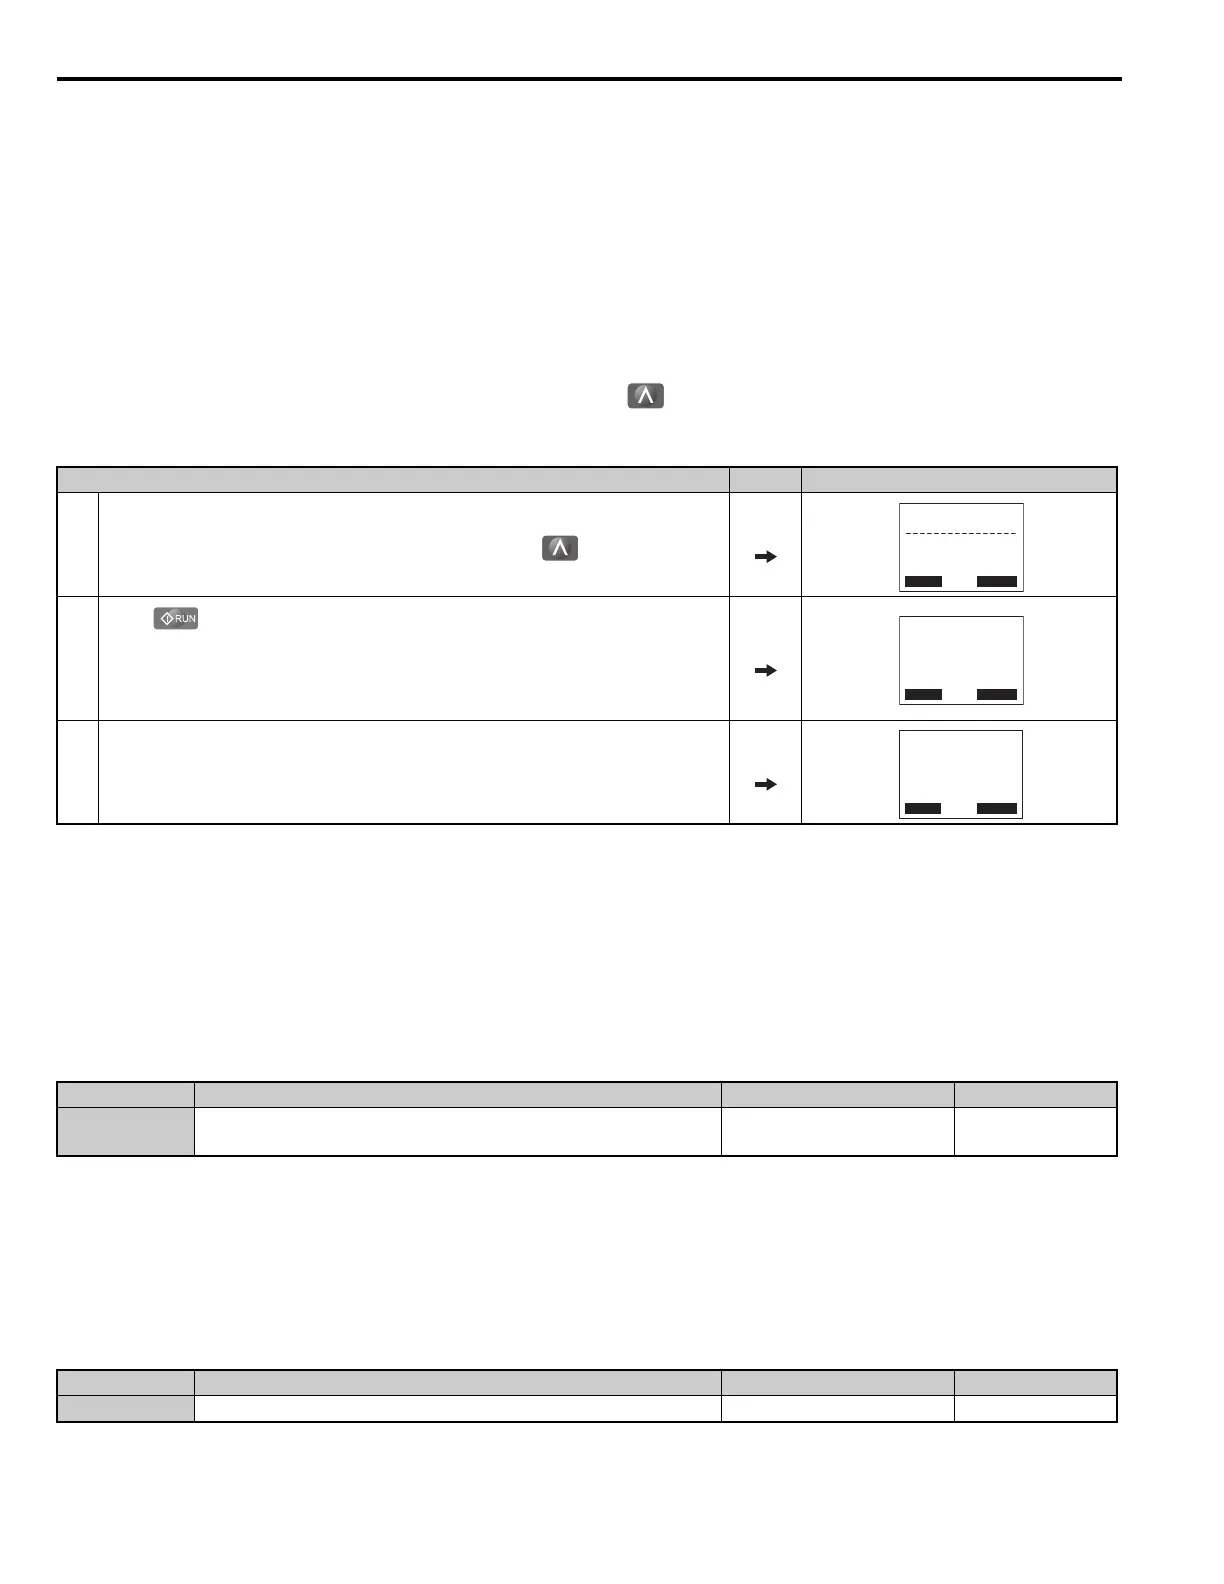
Step Display/Result
1.
After entering the data listed on the motor nameplate, press to confirm.
2.
Press to activate Auto-Tuning. The drive begins by injecting current into the
motor for about 1 min, and then starts to rotate the motor.
Note: The first digit on the display indicates which motor is undergoing Auto-Tuning
(motor 1 or motor 2). The second digit indicates the type of Auto-Tuning being
performed.
3. Auto-Tuning finishes in approximately one to two minutes.
No. Parameter Name Setting Range Default
T1-01 Auto-Tuning Mode Selection
2 (V/f)
0 to 2, 4 (OLV, CLV)
2 (V/f)
1 (OLV, CLV)
No. Parameter Name Setting Range Default
T1-02 Motor Rated Power 0.00 to 650.00 kW Determined by o2-04
- A.TUNE -
0.00 Hz/ 0.00A
Tuning Ready ?
DRV
Auto-Tuning
ESC FWD
Press RUN key
- A.TUNE -
X.XX Hz/ X.XXA
DRV
Tune Proceeding
Rdy
FWD
- MODE -
End
Tune Successful
DRV
FWD RESET