| Getting Started | 24
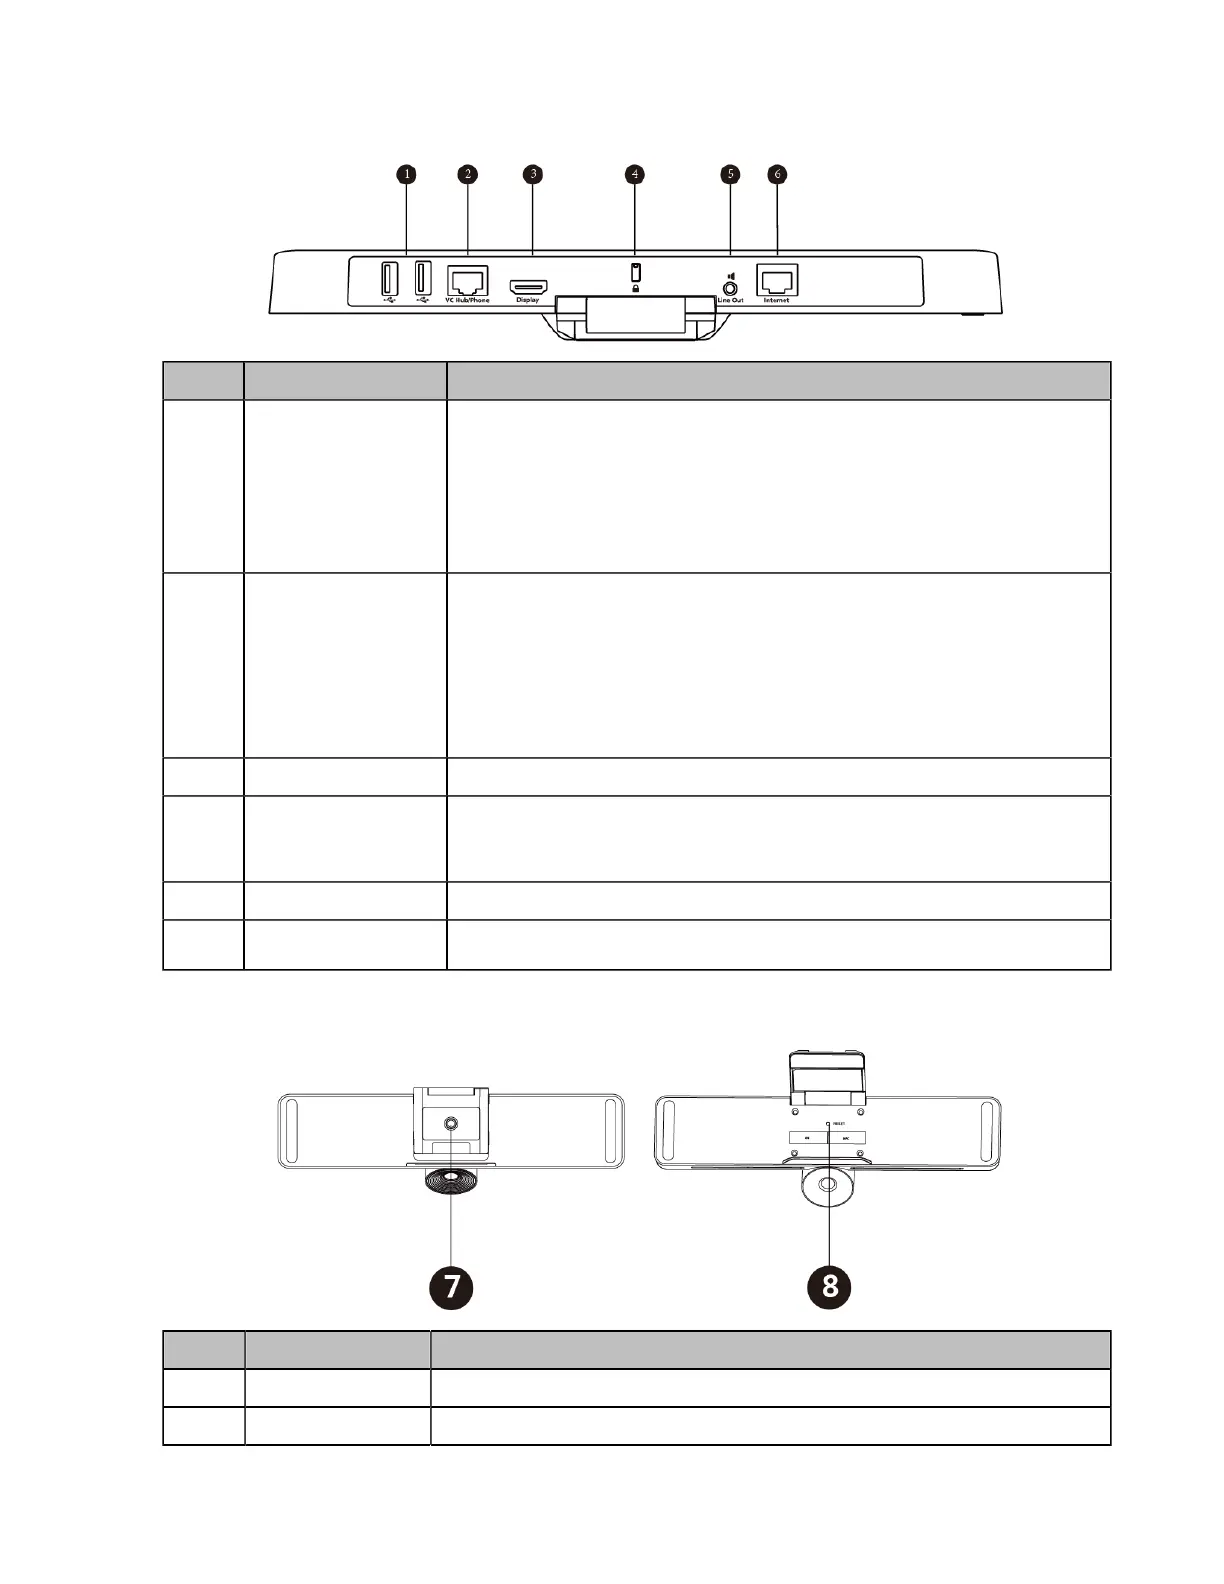
Rear Panel of VC200/VC200-E
Port Name Description
1 USB
• Connect to a USB flash drive for storing screenshots, recording
videos or capturing packets. If you insert multiple USB flash drives to
the VCS endpoint simultaneously, only the last USB flash drives you
insert can be identified by the endpoint.
• Insert a PSTN box CPN10 for connecting to the PSTN (Public
Switched Telephone Network).
2 VC Hub/Phone
• If you want to use wired sharing to present, connect this port to the
Codec port on the VCH50 video conferencing hub/to the PoE port on
the VCH51 video conferencing hub.
• If you need an audio device, connect this port to the Internet port on
the CP960 Conference phone.
• Connect to VCM34/VCM38.
3 Display Connect to a monitor for displaying video images.
4 Security Slot Allow you to connect a universal security cable to the VCS endpoint,
so you can lock the VCS endpoint down. The VCS endpoint cannot be
removed when locked.
5 Line Out Connect to an audio output device via an audio cable (3.5mm).
6 Internet
Connect to the PoE via the network cable.
Bottom Panel of VC200/VC200-E
Port Name Description
7 VESA Fix VC200 to the TV stand or a tripod via a 1/4”-20 UNC screw.
8 Reset Key Reset the VCS endpoint to factory defaults.
 Loading...