Administrator’s Guide for SIP-T2 Series/T19(P) E2/T4 Series/T5 Series/CP860/CP920 IP Phones
358
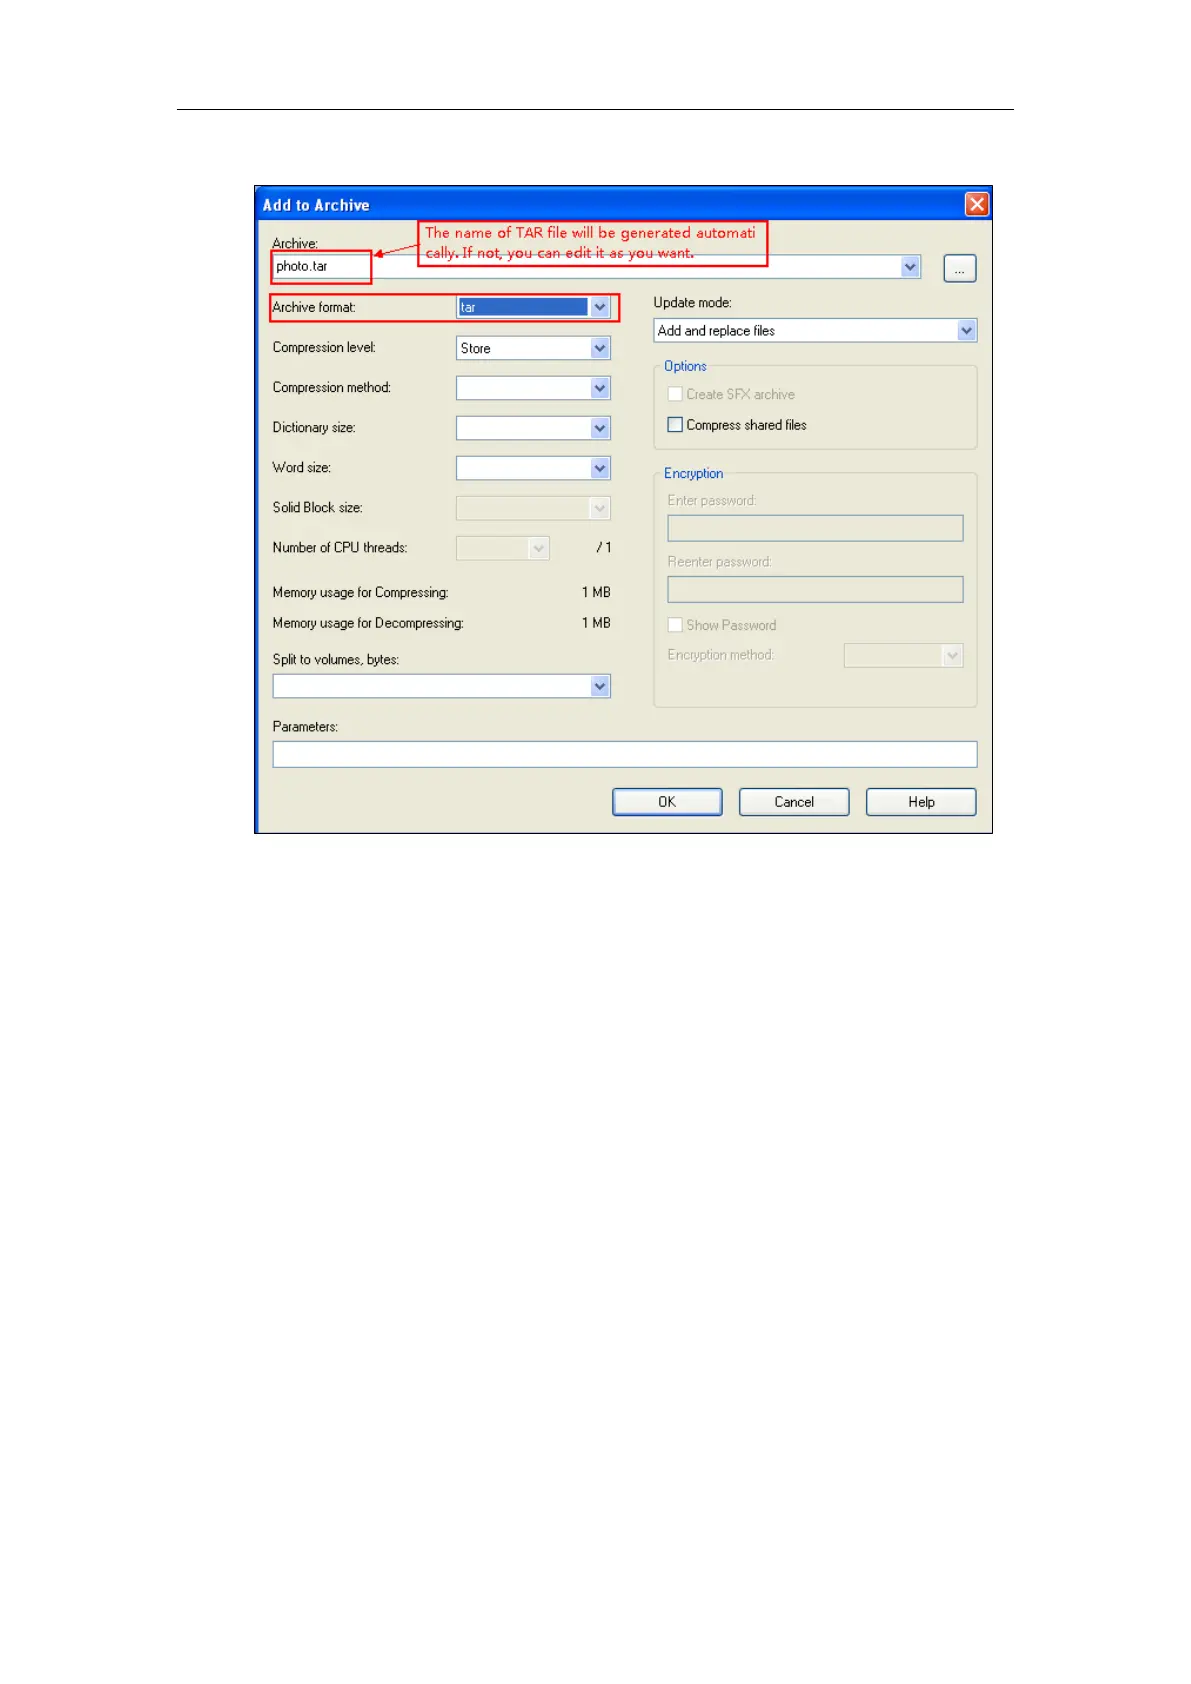
7. Select tar from the pull-down list of Archive format.
8. Click the OK button.
A photo.tar file is generated in the directory C:\Program Files\photo.
9. Place this file to the provisioning server (e.g., 192.168.10.25).
Customizing a Local Contact File
To customize a local contact file:
1. Open the template file using an ASCII editor.
2. For each group that you want to add, add the following string to the file. Each starts on a
separate line:
<group display_name="" ring=""/>
3. For each contact that you want to add, add the following string to the file. Each starts on a
separate line:
<contact display_name="" office_number="" mobile_number="" other_number="" line=""
ring="" group_id_name="" default_photo=""/>
4. Specify the values within double quotes.
For example:
<group display_name="Friend" ring="Splash.wav"/>
<contact display_name="Lily" office_number="1020" mobile_number="1021"
other_number="1112" line="1,2" ring="Ring1.wav" group_id_name="Friend"
 Loading...


