Configuring Basic Features
359
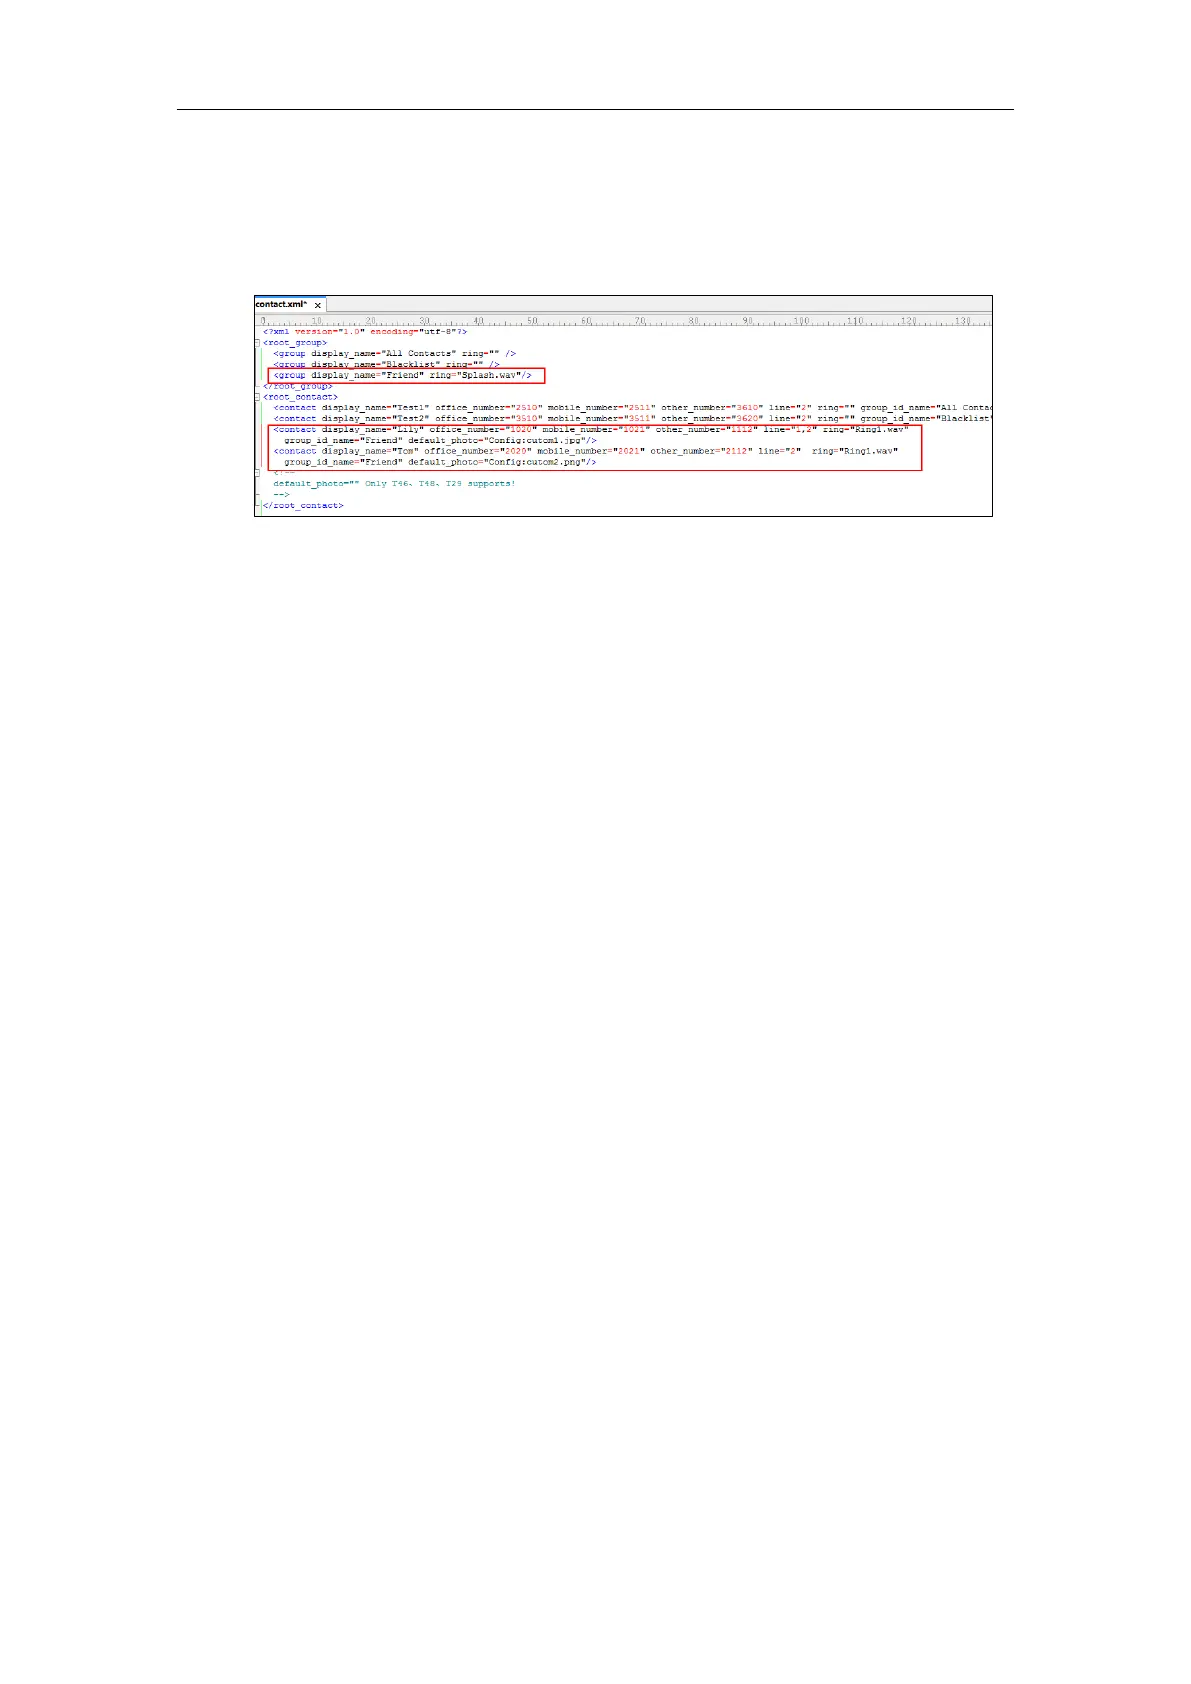
default_photo="Config:cutom1.jpg"/>
<contact display_name="Tom" office_number="2020" mobile_number="2021"
other_number="2112" line="2" ring="Ring1.wav" group_id_name="Friend"
default_photo="Config:cutom2.png"/>
5. Save the change and place this file to the provisioning server.
6. Specify the access URL of the custom local contact template in the configuration files.
There are three methods to specify custom avatar for contacts:
Method 1:
local_contact.data.url = tftp://192.168.10.25/contact.xml
local_contact.photo.url = tftp://192.168.10.25/cutom1.jpg
local_contact.photo.url = tftp://192.168.10.25/cutom2.png
During the auto provisioning process, the IP phone connects to the provisioning server
“192.168.10.25”, and downloads the local contact file “contact.xml” and avatar pictures
(“cutom1.jpg” and “cutom2.png”).
Method 2:
local_contact.data.url = tftp://192.168.10.25/contact.xml
local_contact.image.url = tftp://192.168.10.25/photo.tar
For more information on generating a contact avatar file “photo.tar”, refer to Preparing the
Tar Formatted File on page 357.
During the auto provisioning process, the IP phone connects to the provisioning server
“192.168.10.25”, and downloads the local contact file “contact.xml” and avatar file
“photo.tar”.
Method 3:
If the local contact file (ContactData.xml) and custom avatars (photo.tar) are compressed as
a tar formatted file (e.g., Contact.tar), you can only configure the following parameter to
upload contacts and avatars:
local_contact.data_photo_tar.url = tftp://192.168.10.25/Contact.tar
For more information on generating “photo.tar” and “Contact.tar”, refer to Preparing the
Tar Formatted File on page 357.
 Loading...