X ranges from 1 to 6, Y ranges from 1 to 20, 22 to 40 (Ext key 21 cannot be configured).
Web User Interface:
Dsskey->Line Key/Programable Key->Label
Phone User Interface:
Menu->Features->DSS Keys->Line Key X->Label
Description:
(Optional.) Configures the short label displayed on the LCD screen for line key.
Note: It is only applicable to SIP-T52S IP phones.
Web User Interface:
Dsskey->Line Key->Short
Phone User Interface:
Menu->Features->DSS Keys->Line Key X->Short Label
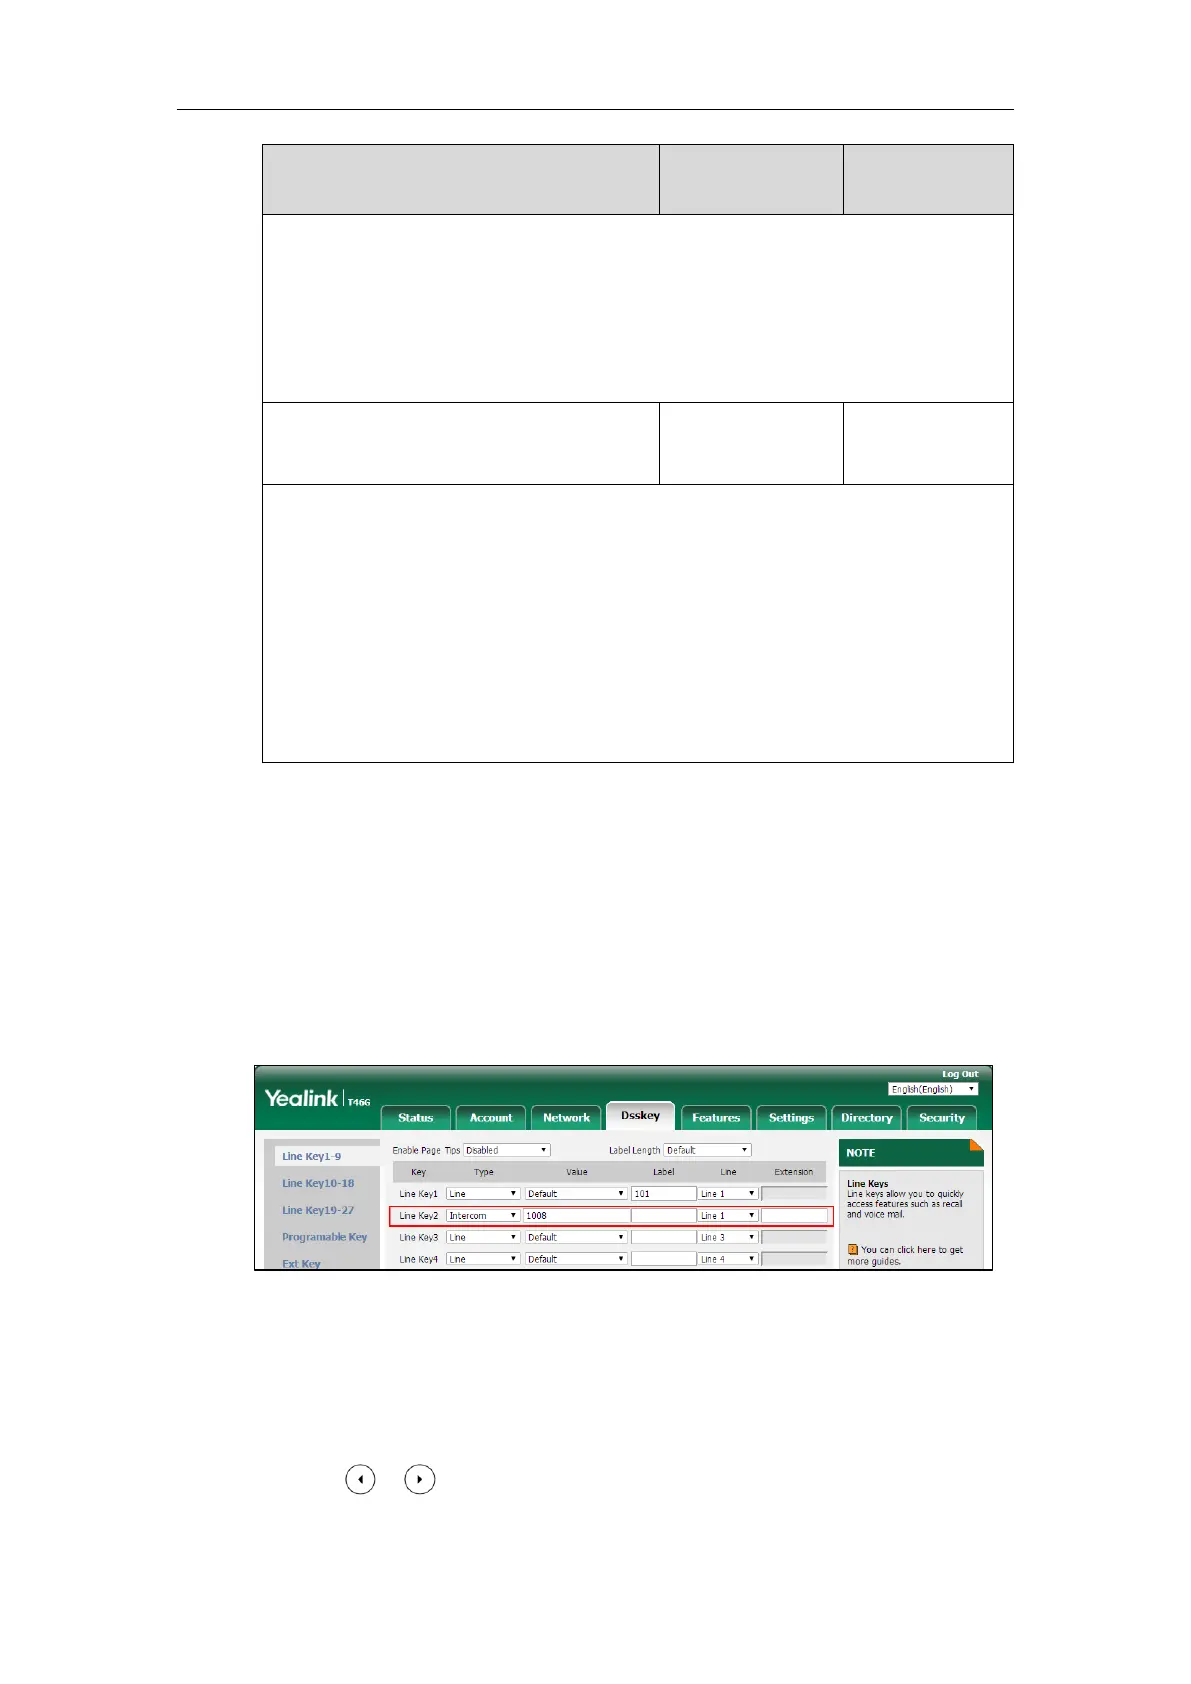
To configure an intercom key via web user interface:
1. Click on Dsskey->Line Key (or Programable Key).
2. In the desired DSS key field, select Intercom from the pull-down list of Type.
3. Enter the remote extension number in the Value field.
4. (Optional.) Enter the string that will appear on the LCD screen in the Label field.
5. Select the desired line from the pull-down list of Line.
6. (Optional.) Enter the directed call pickup code in the Extension field.
7. Click Confirm to accept the change.
To configure an intercom key via phone user interface:
1. Press Menu->Features->DSS Keys.
2. Select the desired DSS key.
3. Press or , or the Switch soft key to select Intercom from the Type field.
4. Select the desired line from the Account ID field.
 Loading...