12 IM 04P02B01-02E
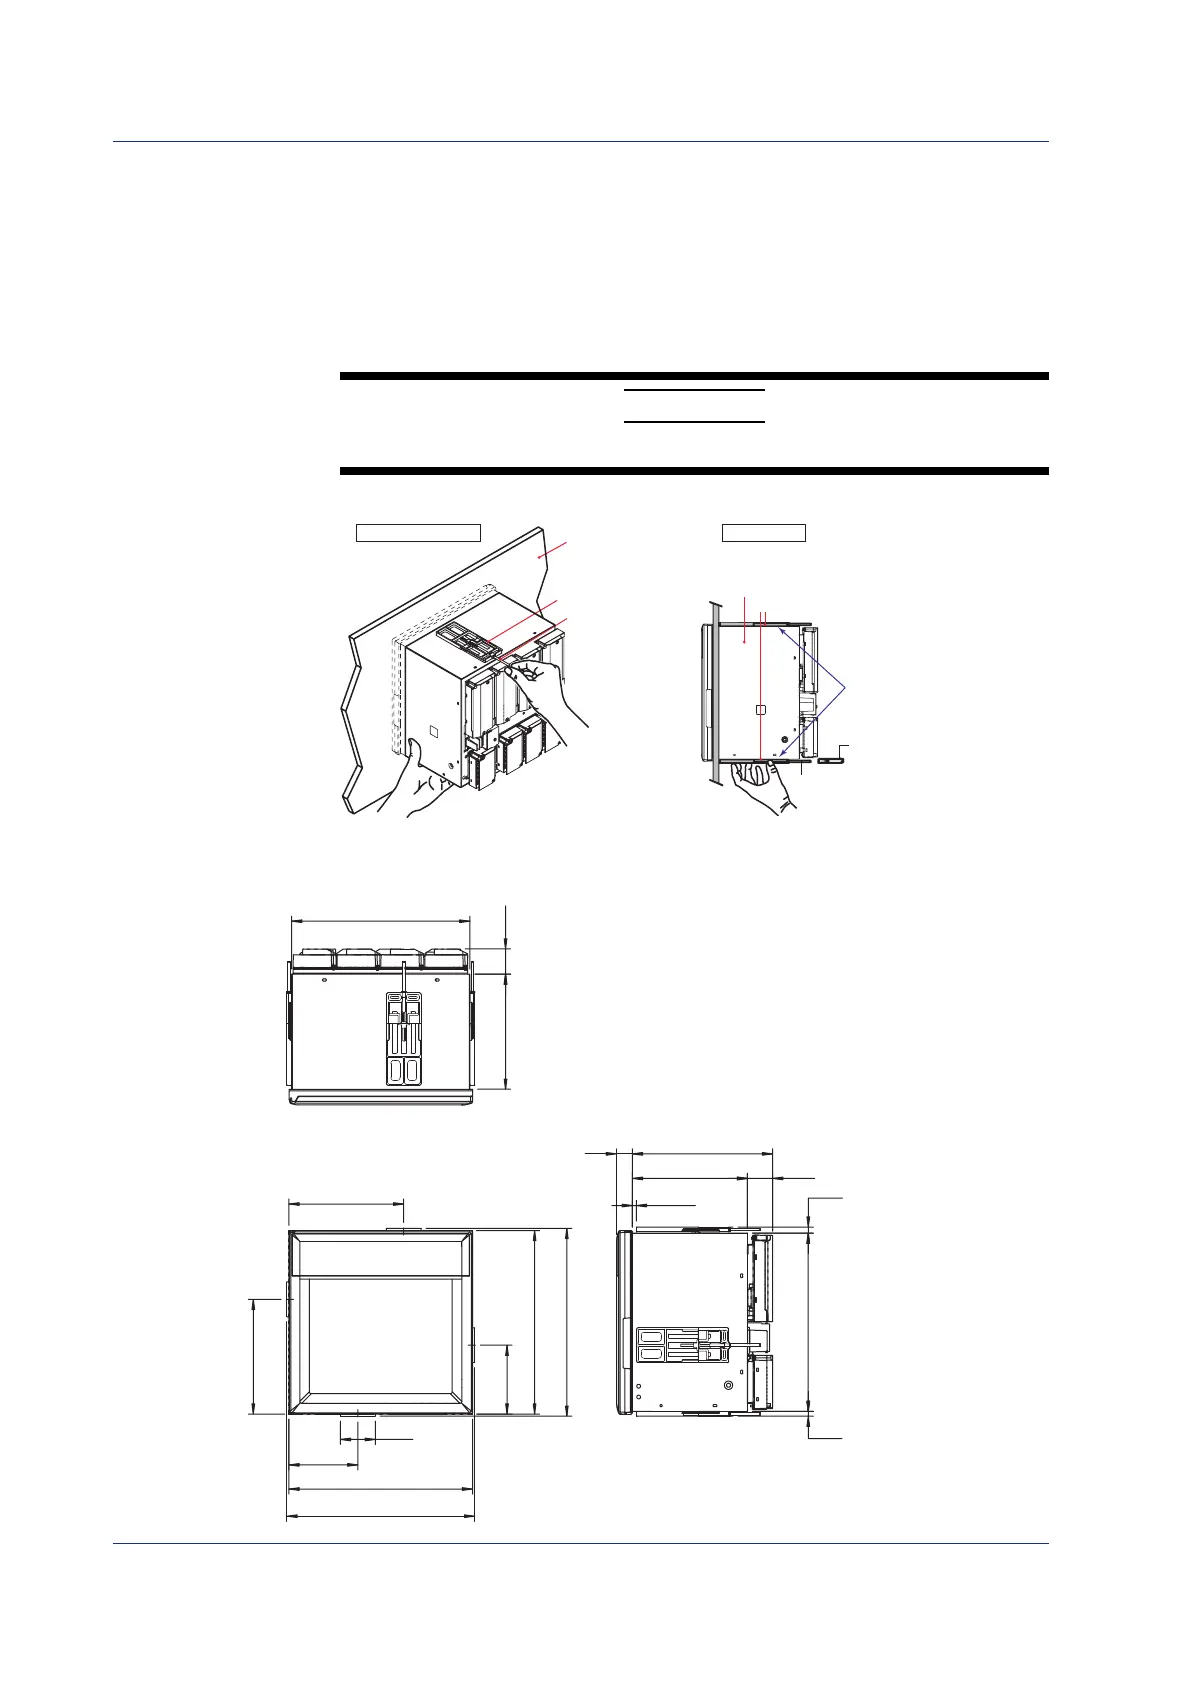
• Mount the recorder to the panel according to the procedure below.
• First, attach the two mounting brackets and temporarily fasten the
attachment screws.
• Next, fix the recorder in place by tightening the attachment screws with the
appropriate torque. When the recorder is approximately perpendicular to
the panel as you fasten the screws, press the mounting bracket against
the case so that they are in contact with each other.
CAUTION
Tightening the screws too much can deform the case or damage the bracket.
Panel Mounting Diagram
(The figure shows the case when the mounting brackets are used on the top
and bottom of the case.)
Screw temporarily Fix in place
Front
Panel
Panel
Mounting bracket
Mounting
bracket
Torque driver
(flat blade)
Attachment screw
Case
In contact
with
each other
Attachment
screw
External Dimensions
(Dimensions before attaching
the mounting bracket)
(Dimensions after attaching
the mounting bracket)
Unit: mm (approx. inch)
Unless otherwise specified, tolerance is ±3%
(however, tolerance is ±0.3 mm when below 10 mm).
39.5
(1.56)
180.5
(7.11)
279.6
(11.01)
180
(7.09)
108
(4.25)
180
(7.09)
108
(4.25)
(0.94)
+1
0
279.6
(11.01)
+1
0
54.6 (2.15)
288 (11.34)
294.6 (11.6)
288 (11.34)
294.6 (11.6)
220 (8.66)
180.5 (7.11)
39.5 (1.56)
9.4 (0.37)
2 to 26
(panel thickness)
7.5 (0.3)
24
Installing/Wiring the Recorder
 Loading...