Do you have a question about the YOKOGAWA DL850 ScopeCorder and is the answer not in the manual?
Lists features excluding communication interface.
Explains how to operate the instrument.
Details handling precautions and basic operations.
Covers communication interface features and usage.
Explains Real Time Math option features and usage.
Lists standard accessories supplied with the instrument.
Describes the contents of the manual CD.
Explains the meaning of symbols used on the instrument and in the manual.
Specifies the intended use of the instrument as a waveform measuring device.
Advises checking the instrument's physical condition before use.
Emphasizes using the correct power supply voltage matching the instrument's rating.
Stresses using the supplied power cord and plug for safety.
Highlights the importance of connecting the protective earth terminal for electric shock prevention.
Warns against disconnecting or altering protective grounding.
Advises against operating the instrument in flammable atmospheres.
Stresses grounding the instrument before external connections.
Provides specific precautions when using the DC power supply model.
Details precautions when connecting and using input modules.
Outlines precautions for using various types of probes with the instrument.
Explains how measurement categories vary with installed modules.
Provides guidance on selecting a suitable installation location for the instrument.
States limitations regarding the operating environment and potential interference.
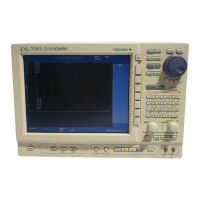
Describes the physical layout and components of the instrument's panels.
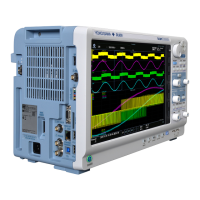
Explains the function of various keys and control knobs on the front panel.
Details the different display modes and information shown on the instrument's screen.
Illustrates the overall system setup, including connections to peripherals and modules.
Explains settings for vertical and horizontal display of waveforms and measurement items.
Covers trigger modes, types, and conditions for waveform acquisition.
Details how waveforms are captured, stored, and processed, including record length and modes.
Describes waveform display options like zooming, X-Y plots, and snapshots.
Explains features for waveform analysis, computation, and GO/NO-GO determination.
Outlines essential safety and general precautions for handling the instrument.
Provides guidelines for correctly installing the instrument in its operating environment.
Describes the procedure and precautions for installing various input modules.
Details how to connect power sources and operate the instrument's power switch.
Explains how to connect different types of probes and their precautions.
Details the process of phase correction for probes to ensure measurement accuracy.
Explains how to connect measurement leads to various modules and related precautions.
Describes how to connect thermocouples for temperature measurements.
Explains how to connect bridgeheads for strain measurements.
Details the connection of logic probes to the logic input module.
Explains how to connect acceleration sensors for measurements.
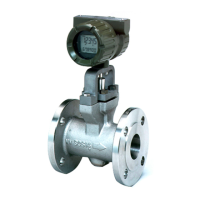
Describes sensor connections for frequency measurements.
Guides on connecting wires to the 16-channel voltage input module.
Explains connecting wires to the 16-channel temperature/voltage input module.
Details cable connections for monitoring CAN bus signals.
Explains cable connections for monitoring CAN & LIN bus signals.
Describes how to attach the supplied front panel sheet.
Explains how to load roll paper into the optional built-in printer.
Explains how to use the instrument's keys, soft keys, and jog shuttle for operation.
Details methods for entering numerical values and character strings using the keypad or keyboard.
Covers connecting and using USB keyboards and mice with the instrument.
Explains how to set and synchronize the instrument's internal clock.
Describes the auto setup feature for automatically configuring measurement settings.
Explains how to reset the instrument's settings to factory defaults.
Details the calibration process for ensuring measurement accuracy.
Explains how to start and stop waveform acquisition using the START/STOP key.
Describes how to access and navigate the instrument's built-in help system.
Explains the external trigger input terminal and its specifications.
Details the trigger output terminal and its signal formats and timing.
Describes the external clock input terminal for synchronizing sampling.
Explains the video output terminal for connecting an external monitor.
Covers GO/NO-GO determination and external start/stop input functionality.
Describes the IRIG signal input for time synchronization.
Provides specifications for the instrument's signal input capabilities.
Details specifications related to the instrument's triggering functions.
Specifies the selectable time ranges and accuracy for the horizontal axis.
Covers specifications for the instrument's display screen and resolution.
Lists and describes the various features of the instrument.
Provides specifications for the Fast Fourier Transform (FFT) functionality.
Details the specifications of the optional built-in printer.
Covers specifications for memory cards and internal/external hard disk storage.
Specifies USB port capabilities and compatible peripheral devices.
Lists specifications for auxiliary input/output terminals.
Details specifications for PC connectivity via USB and Ethernet.
Provides overall specifications for the instrument, including environmental and safety standards.
Lists detailed specifications for each available plug-in input module.
Provides specifications for different types of logic probes.
Details the specifications for the 16-channel scanner box.
Shows the physical dimensions of the instrument and its DC power model.
Shows relationships for a specific module installation.
Details relationships for specific record lengths.
Details relationships for specific record lengths.
Details relationships for higher record lengths.
Shows relationships when a specific module is not installed.
Explains sample rate relationships for a specific module.
Explains sample rate relationships for a CAN bus module.
Explains sample rate relationships for a CAN & LIN bus module.
Shows maximum record lengths based on displayed channels and model options.
Indicates the maximum number of history acquisitions possible per module.
Lists the maximum sample rates for hard disk recording based on channel count.
Lists default settings for channels using the HS10M12 module.
Lists default settings for channels using the HS1M16 module.
Lists default settings for channels using the NONISO_10M12 module.
Lists default settings for channels using the HV (with RMS) module.
Lists default settings for channels using UNIVERSAL modules.
Lists default settings for channels using the TEMP/HPV module.
Lists default settings for channels using STRAIN modules.
Lists default settings for channels using the ACCL/VOLT module.
Lists default settings for channels using the FREQ module.
Lists default settings for channels using the HS100M12 module.
Lists default settings for channels using the 16CH VOLT module.
Lists default settings for channels using the 16CH TEMP/VOLT module.
Lists default settings for channels using the LOGIC module.
Lists default settings for CAN MONITOR module channels.
Lists default settings for CAN & LIN module channels.
Default setting for the START/STOP operation.
Default setting for the time division.
Default settings for waveform acquisition parameters.
Default settings for the dual capture function.
Default settings for file operations like saving waveforms and images.
Default settings for menu operations and display options.
Default settings for display parameters like format and graticule.
Default settings for X-Y display mode.
Default trigger mode setting.
Default trigger position and delay settings.
Default settings for simple and enhanced trigger modes.
Default settings for cursor measurements.
Default settings for automated measurement parameters.
Default settings for GO/NO-GO determination.
Default settings for the history function.
Default settings for waveform math operations.
Default settings for FFT analysis.
Default settings for waveform zoom functions.
Default settings for waveform search functions.
Default settings for print menu operations.
Default settings for utility functions like system configuration and network.
Maps DL850/DL850V functions to specific USB keyboard key combinations.
Shows the overall block diagram of the DL850/DL850V instrument.
Illustrates the signal acquisition data path.
Depicts the main components and connections of the CPU.
Explains the path of input signals through the instrument.
Shows the internal block diagrams for various plug-in modules.
Lists detailed technical specifications for the HV 100 kS/s module.
| Maximum Sampling Rate | 100 MS/s |
|---|---|
| Power Supply | 100 to 240 VAC, 50/60 Hz |
| Resolution | 16-bit |
| Operating Temperature | 5 to 40°C |
| Bandwidth | 20 MHz |
| Input Types | Voltage, Temperature, Strain, Acceleration, Frequency, Logic, Current |
| Interfaces | Ethernet, USB, GP-IB |
| Trigger Modes | Edge, Window, Pattern |
| Number of Channels | Up to 128 (with multiple input modules) |
| Memory Capacity | Up to 2 G points (with /M4 option) |