IM 05P01C31-15EN page 1/12
Contents
1. Safety Precautions
2. ModelandSufxCodes
3. How to Install
4. HardwareSpecications
5. HowtoConnectWires
6. TerminalWiringDiagrams
Introduction
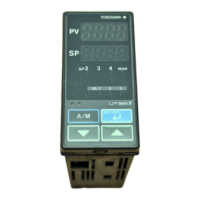
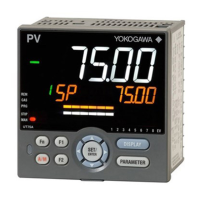
ThankyouforpurchasingtheUT55A,UT52ADigitalIndicatingController.
Thisoperationguidedescribesthebasicoperationsrelatedtothesingle-loopcontrol
functionoftheUT55AandUT52A.Theguideshouldbeprovidedtotheenduserof
this product.
Besuretoreadthisoperation guidebeforeusingtheproductin ordertoensure
correctoperation.Fordetailsofeachfunction,refertoUser’smanual.
Beforeusingtheproduct,refertothetableofModelandSufxCodestomakesure
thatthedeliveredproductisconsistentwiththemodelandsufxcodesyouordered.
Alsomakesurethatthefollowingitemsareincludedinthepackage.
•DigitalIndicatingController(themodelyouordered) ..............................x1
• Set of Brackets ........................................................................................x1
•TerminalCover(L4502XPforUT55A/L4502XQforUT52A) ..................x1
•UnitLabel(L4502VZ) ..............................................................................x1
•TagLabel(L4502VE)(Onlywhenordered.) ............................................x1
l
TargetReaders
Thisguideisintendedforthefollowingpersonnel;
• Engineersresponsibleforinstallation,wiring,andmaintenanceoftheequipment.
• Personnelresponsiblefornormaldailyoperationoftheequipment.
1. Safety Precautions
Thefollowingsymbolis usedontheinstrument.It indicatesthepossibilityofinjury
totheuserordamagetotheinstrument,andsigniesthattheusermustrefertothe
operationguideoruser’smanualforspecialinstructions.Thesamesymbolisused
intheoperationguideanduser’smanualonpagesthattheuserneedsto referto,
togetherwiththeterm“WARNING”or“CAUTION.”
Calls attention to actions or conditions that could cause serious
or fatal injury to the user, and indicates precautions that should be
taken to prevent such occurrences.
Calls attention to actions or conditions that could cause injury to
the user or damage to the instrument or property and indicates pre-
cautions that should be taken to prevent such occurrences.
Theequipmentwhollyprotectedbydoubleinsulationorreinforcedinsulation.
Functionalgroundingterminals
(Donotusethisterminalasaprotectivegroundingterminal).
Note
Identiesimportantinformationrequiredtooperatetheinstrument.
■ Warning and Disclaimer
(1) YOKOGAWAmakesnowarrantiesregardingtheproductexceptthosestatedin
theWARRANTYthatisprovidedseparately.
(2) Theproductisprovidedonan"asis"basis.YOKOGAWAassumesnoliabilityto
anypersonorentityforany lossordamage,directorindirect, arisingfromthe
useoftheproductorfromanyunpredictabledefectoftheproduct.
■ Safety,Protection,andModicationoftheProduct
(1)Inorderto protectthesystemcontrolled bythisproductand theproductitself,
andtoensuresafeoperation, observethesafetyprecautionsdescribedin the
operationguide.Useof theinstrumentina mannernotprescribedherein may
compromise the product's functions and the protection features inherent in the
device.Weassumenoliabilityforsafety,orresponsibilityfortheproduct'squality,
performanceorfunctionalityshouldusersfailtoobservetheseinstructionswhen
operatingtheproduct.
(2)Installation ofprotectionand/orsafetycircuits withrespecttoa lightning
protector;protectiveequipmentforthesystemcontrolledbytheproductandthe
productitself;foolprooforfail-safedesignofaprocessorlineusingthesystem
controlledbytheproductortheproductitself;and/orthedesignandinstallation
ofotherprotectiveandsafetycircuitsaretobeappropriatelyimplementedasthe
customer deems necessary.
(3) Besuretousethespare partsapprovedbyYOKOGAWAwhen replacingparts
orconsumables.
(4) Thisproductisnotdesigned ormanufacturedtobeused incriticalapplications
thatdirectlyaffectorthreatenhumanlives.Suchapplicationsinclude nuclear
powerequipment,devicesusingradioactivity,railwayfacilities,aviation
equipment,airnavigationfacilities,aviationfacilities,and medicalequipment.
Ifsoused,it istheuser’sresponsibilitytoinclude inthesystemadditional
equipmentanddevicesthatensurepersonnelsafety.
(5) Modicationoftheproductisstrictlyprohibited.
(6)
Thisproductisintendedtobehandledbyskilled/trainedpersonnelforelectricdevices.
(7)ThisproductisULRecognizedComponent.InordertocomplywithULstandards,
end-productsarenecessarytobedesignedbythosewhohaveknowledgeofthe
requirements.
l
Power Supply
Ensure that the instrument’s supply voltage matches the voltage
of the power supply before turning ON the power.
l
Do Not Use in an Explosive Atmosphere
Do not operate the instrument in locations with combustible
or explosive gases or steam. Operation in such environments
constitutes an extreme safety hazard. Use of the instrument in
environments with high concentrations of corrosive gas (H
2
S,
SO
X
, etc.) for extended periods of time may cause a failure.
l
Do Not Remove Internal Unit
The internal unit should not be removed by anyone other than
YOKOGAWA's service personnel. There are dangerous high voltage
parts inside. Additionally, do not replace the fuse by yourself.
l
Damage to the Protective Construction
Operation of the instrument in a manner not specified in the
operation guide may damage its protective construction.
This instrument is an EMC class A product. In a domestic environ-
ment this product may cause radio interference in which case the
user needs to take adequate measures.
2. ModelandSufxCodes
■ UT55A «Detailed Code Model»
Model Sufxcode
Option
code
Description
UT55A
DigitalIndicatingController(Powersupply:100-240V
AC)(providedwith3DIsand3DOs)
Fixedcode -NNN Always"-NNN”(fordetailedcodemodel)
Displaylanguage(*1)
-1
English(Default.Canbeswitchedtootherlanguagebythesetting.)
-2
German(Default.Canbeswitchedtootherlanguagebythesetting.)
-3
French(Default.Canbeswitchedtootherlanguagebythesetting.)
-4
Spanish(Default.Canbeswitchedtootherlanguagebythesetting.)
Casecolor
0 White(Lightgray)
1 Black(Lightcharcoalgray)
Output1(*2)(*3)
-A Analogoutput(current/voltagepulse)
-R Relayoutput(c-contact)
-U Universaloutput(current/voltagepulse/relay)
-T Triac output
-P Position proportional output
Output2(*2)(*3)
A Analogoutput(current/voltagepulse)
R Relayoutput(c-contact)
U Universaloutput(current/voltagepulse/relay)
T Triac output
N None
Retransmissionoutput /RT Retransmissionoutputor15VDCpowersupply
Heaterbreakalarm(*3) /HA Heaterbreakalarm
E1terminalarea(*4)
/R1
Remote(1additionalaux.analog)inputand1additionalDI
/U1 1additionaluniversalinput(TC/RTD/DCV/mA)
/X1 5additionalDIs
/Y1 5additionalDOs
/W1 2additionalDIsand2additionalDOs
E2terminalarea(*4)
/A2 1additionalaux.analoginputand1additionalDI
/X2 5additionalDIs
/Y2 5additionalDOs
/W2 2additionalDIsand2additionalDOs
E3terminalarea(*4)(*5)
/CH3 RS485communication(Max.38.4kbps,2-wire/4-wire)
/CC3 CC-Linkcommunication(withModbusmasterfunction)
/PD3
PROFIBUS-DPcommunication(withModbusmasterfunction)
/DN3
DeviceNetcommunication(withModbusmasterfunction)
/ET3 Ethernetcommunication(withserialgatewayfunction)
/X3 5additionalDIs
/Y3 5additionalDOs
/W3 2additionalDIsand2additionalDOs
E4terminalarea(*4)(*5)
/A4 1additionalaux.analoginputand1additionalDI
/C4 RS485communication(Max.19.2kbps,2-wire/4-wire)
/L4 24VDClooppowersupply
/AC4
1additionalaux.analoginput,1additionalDI,and
RS485communication(Max.19.2kbps,2-wire)
/LC4
24VDClooppowersupplyandRS485communication
(Max.19.2kbps,2-wire)
/X4 5additionalDIs
/Y4 5additionalDOs
/W4 2additionalDIsand2additionalDOs
Power supply /DC Powersupply24VAC/DC
Additionaltreatment(*6) /CT Coating
*1: English,German,French,andSpanishareavailablefortheguidedisplay.
*2: Forheating/coolingoutput,bothOutput1andOutput2shouldbespecified.
Notavailable
whenOutput2is“N”.Forpositionproportionaloutput,specify“-P”forOutput1and“N”forOutput2.
*3: The/HAoptioncanbespecifiedonlywhenthecodeforOutput1and2is“-AN”,“-RN”,“-UN”or“-TN.”
*4: OnlyoneoptionisavailableforeachterminalareaofE1toE4.
*5: The/L4and/LC4optionsforE4terminalareacanbespecifiedonlywhentheE3terminal
areaoptionisnotspecifiedorspecifiedanyof/CH3,/X3,/Y3or/W3.
*6: Whenthe/CToptionisspecified,theUT55Adoesnotconformtothesafetystandards(UL
andCSA)andCEmarking(Productswith/CToptionarenotintendedforEEA-market).
■ UT52A «Detailed Code Model»
Model Sufxcode
Option
code
Description
UT52A
DigitalIndicatingController(Powersupply:100-240V
AC)(providedwith3DIsand3DOs)
Fixedcode -NNN Always"-NNN”(fordetailedcodemodel)
Displaylanguage(*1)
-1
English(Default.Canbeswitchedtootherlanguagebythesetting.)
-2
German(Default.Canbeswitchedtootherlanguagebythesetting.)
-3
French(Default.Canbeswitchedtootherlanguagebythesetting.)
-4
Spanish(Default.Canbeswitchedtootherlanguagebythesetting.)
Casecolor
0 White(Lightgray)
1 Black(Lightcharcoalgray)
Output1(*2)(*3)(*4)
-A Analogoutput(current/voltagepulse)
-R Relayoutput(c-contact)
-U Universaloutput(current/voltagepulse/relay)
-T Triac output
-P Position proportional output
Output2(*2)(*3)(*4)(*5)
A Analogoutput(current/voltagepulse)
R Relayoutput(a-contact)
U Universaloutput(current/voltagepulse/relay)
N None
Retransmissionoutput /RT Retransmissionoutputor15VDCpowersupply
Heaterbreakalarm(*3) /HA Heaterbreakalarm
E1terminalarea(*5)(*6)
/R1
Remote(1additionalaux.analog)inputand1additionalDI
/U1 1additionaluniversalinput(TC/RTD/DCV/mA)
/L1 24VDClooppowersupply
/CH1 RS485communication(Max.38.4kbps,2-wire/4-wire)
/RCH1
Remote(1additionalaux.analog)input,1additionalDI,
andRS485communication(Max.38.4kbps,2-wire)
/LCH1
24VDClooppowersupplyandRS485communication
(Max.38.4kbps,2-wire)
/X1 5additionalDIs
/Y1 5additionalDOs
/W1 2additionalDIsand2additionalDOs
Power supply /DC Powersupply24VAC/DC
Additionaltreatment(*7) /CT Coating
*1: English,German,French,andSpanishareavailablefortheguidedisplay.
*2: Forheating/coolingoutput,bothOutput1andOutput2shouldbespecified.
Notavailable
whenOutput2is“N”.Forpositionproportionaloutput,specify“-P”forOutput1and“N”forOutput2.
*3: The/HAoptioncanbespecifiedonlywhenthecodeforOutput1and2is“-AN”,“-RN”,“-UN”or“-TN.
*4: WhenthecodeforOutput1is"-R"or"-U"andOutput2is"R"or"U",Output1ischanged
from the contact point c to the contact point a.
WhenthecodeforOutput1isspecifiedto"-T",only"A"or"N"isavailableforOutput2.
*5: The/L1or/LCHoptioncanbespecifiedonlywhenthecodeforOutput2is“N.”
*6: OnlyoneoptionisavailableforE1terminalarea.
*7: Whenthe/CToptionisspecified,theUT52Adoesnotconformtothesafetystandards(UL
andCSA)andCEmarking(Productswith/CToptionarenotintendedforEEA-market).
■ Accessories (sold separately)
Thefollowingisanaccessorysoldseparately.
• LL50AParameterSettingSoftware
Model Sufxcode Description
LL50A -00 ParameterSettingSoftware
• ExternalPrecisionResistor
Model Sufxcode Description
X010 SeetheGeneralSpecications(*) ResistanceModule
*:Necessarytoinputthecurrentsignaltothevoltageinputterminal.
• TerminalCover
ForUT55A:ModelUTAP001;ForUT52A:ModelUTAP002
• Manuals
*Manualscanbedownloadedfromawebsite.URL:http://www.yokogawa.com/ns/ut/im/
• Brackets
Partnumber:L4502TP(2pcsforupperandlowersides)
• OperationGuideforSingle-loopControl(thisdocument)x6(A3size)
(InstallationandWiring,InitialSettings,Operations,andParameters)
3. How to Install
■ Installation Location
Theinstrumentshouldbe installedinindoorlocationsmeeting thefollowing
conditions:
• Instrumented panel
Thisinstrumentisdesignedtobemountedin aninstrumentedpanel.Mountthe
instrumentinalocationwhereitsterminalswillnotinadvertentlybetouched.
• Well ventilated locations
Mounttheinstrumentinwellventilated locationstopreventtheinstrument’s
internaltemperaturefromrising.
However,makesure thattheterminalportions arenotexposed towind.
Exposuretowindmaycause thetemperaturesensoraccuracy todeteriorate.To
mountmultipleindicatingcontrollers,see theexternaldimensions/panelcutout
dimensionswhichfollow.Ifmountingotherinstrumentsadjacenttotheinstrument,
complywiththesepanelcutoutdimensionstoprovidesufcientclearancebetween
the instruments.
• Locations with little mechanical vibration
Installtheinstrumentinalocationsubjecttolittlemechanicalvibration.
• Horizontal location
Mounttheinstrumenthorizontallyandensurethatitislevel,withnoinclinationto
therightorleft.
Front panel
of controller
Keep this angle
within 30°
Rear of
controller
30°
Note
Iftheinstrumentis movedfromalocation withlowtemperature andlowhumidity
toaplacewith hightemperatureand highhumidity,orifthetemperaturechanges
rapidly,condensation willresult.Moreover,inthe caseofthermocoupleinputs,
measurementerrorswillresult.Toavoidsuchasituation,leavetheinstrumentinthe
newenvironmentunderambientconditionsformorethan1hourpriortousingit.
Donotmounttheinstrumentinthefollowinglocations:
• Outdoors
• Locations subject to direct sunlight or close to a heater
Installtheinstrumentinalocationwithstabletemperaturesthatremainclosetoan
averagetemperatureof23°C.Donotmountitinlocationssubjecttodirectsunlight
orclosetoaheater.Doingsoadverselyaffectstheinstrument.
• Locations with substantial amounts of oily fumes, steam, moisture, dust, or
corrosive gases
Thepresenceofoily fumes,steam,moisture,dust, orcorrosivegases adversely
affectstheinstrument.Donotmounttheinstrumentinlocationssubjecttoanyof
thesesubstances.
• Areasnearelectromagneticeldgeneratingsources
Donotplacemagnetsortoolsthatgeneratemagnetismneartheinstrument.Ifthe
instrumentisusedinlocationsclose toastrongelectromagneticeldgenerating
source,themagneticeldmaycausemeasurementerrors.
• Locationswherethedisplayisdifculttosee
TheinstrumentusesanLCDforthe displayunit,andthiscan bedifculttosee
fromextremelyobliqueangles.Mounttheinstrumentinalocationwhereitcanbe
seenasmuchaspossiblefromthefront.
• Areasclosetoammablearticles
Absolutelydonotplacethe instrumentdirectly
onflammablesurfaces.Ifsuch acircumstanceis
unavoidableandtheinstrument mustbeplacedclose
toaammableitem,provideashieldforitmadeof1.43
mm thick plated steel or 1.6 mm thick unplated steel
withaspaceofatleast 150mmbetweenitandthe
instrumentonthetop,bottom,andsides.
• Areas subject to being splashed with water
Be sure to turn OFF the power supply to the controller before in-
stalling it on the panel to avoid an electric shock.
www.yokogawa.com/ns
YOKOGAWA ELECTRIC CORPORATION
Network Solutions Business Division
2-9-32, Naka-cho Musashino-shi, Tokyo 180-8750 JAPAN
YOKOGAWA CORPORATION OF AMERICA
Head office and for product sales
2 Dart Road, Newnan, Georgia 30265, USA
YOKOGAWA EUROPE B.V.
Headquarters
Euroweg 2, 3825 HD Amersfoort, THE NETHERLANDS
All Rights Reserved, Copyright © 2010 Yokogawa Electric Corporation
150 mm150 mm
150 mm
150 mm
Operation
Guide
IM 05P01C31-15EN
UT55A, UT52A
Digital Indicating Controller
(Panel Mounting Type)
Operation Guide for Single-loop Control
This operation guide describes installation, wiring, and other tasks required to make the
controller ready for operation.
6th Edition : Mar. 2016
Installation and Wiring
For details of the each function, refer to the electronic manual. M
anuals can be
downloaded or viewed at the following URL.
Functional
Enhancement
http://www.yokogawa.com/ns/ut/im/
«Detailed Code Model»