Page 39
TO GET ASSISTANCE, CALL: 919-774-7667
ZENITH PUMPS
Trouble-shooting & Common Questions
• 12 VDC power is not correct when a 3-wire sensor is
used. Measure J3 connector Pin 1 to Pin 12 by a multi-
meter, make sure it is 12 VDC
• Feedback jumper settings on “Control Board” do not
match the feedback sensor you have on hand. Check
and change the jumper settings on the “Control
Board”:
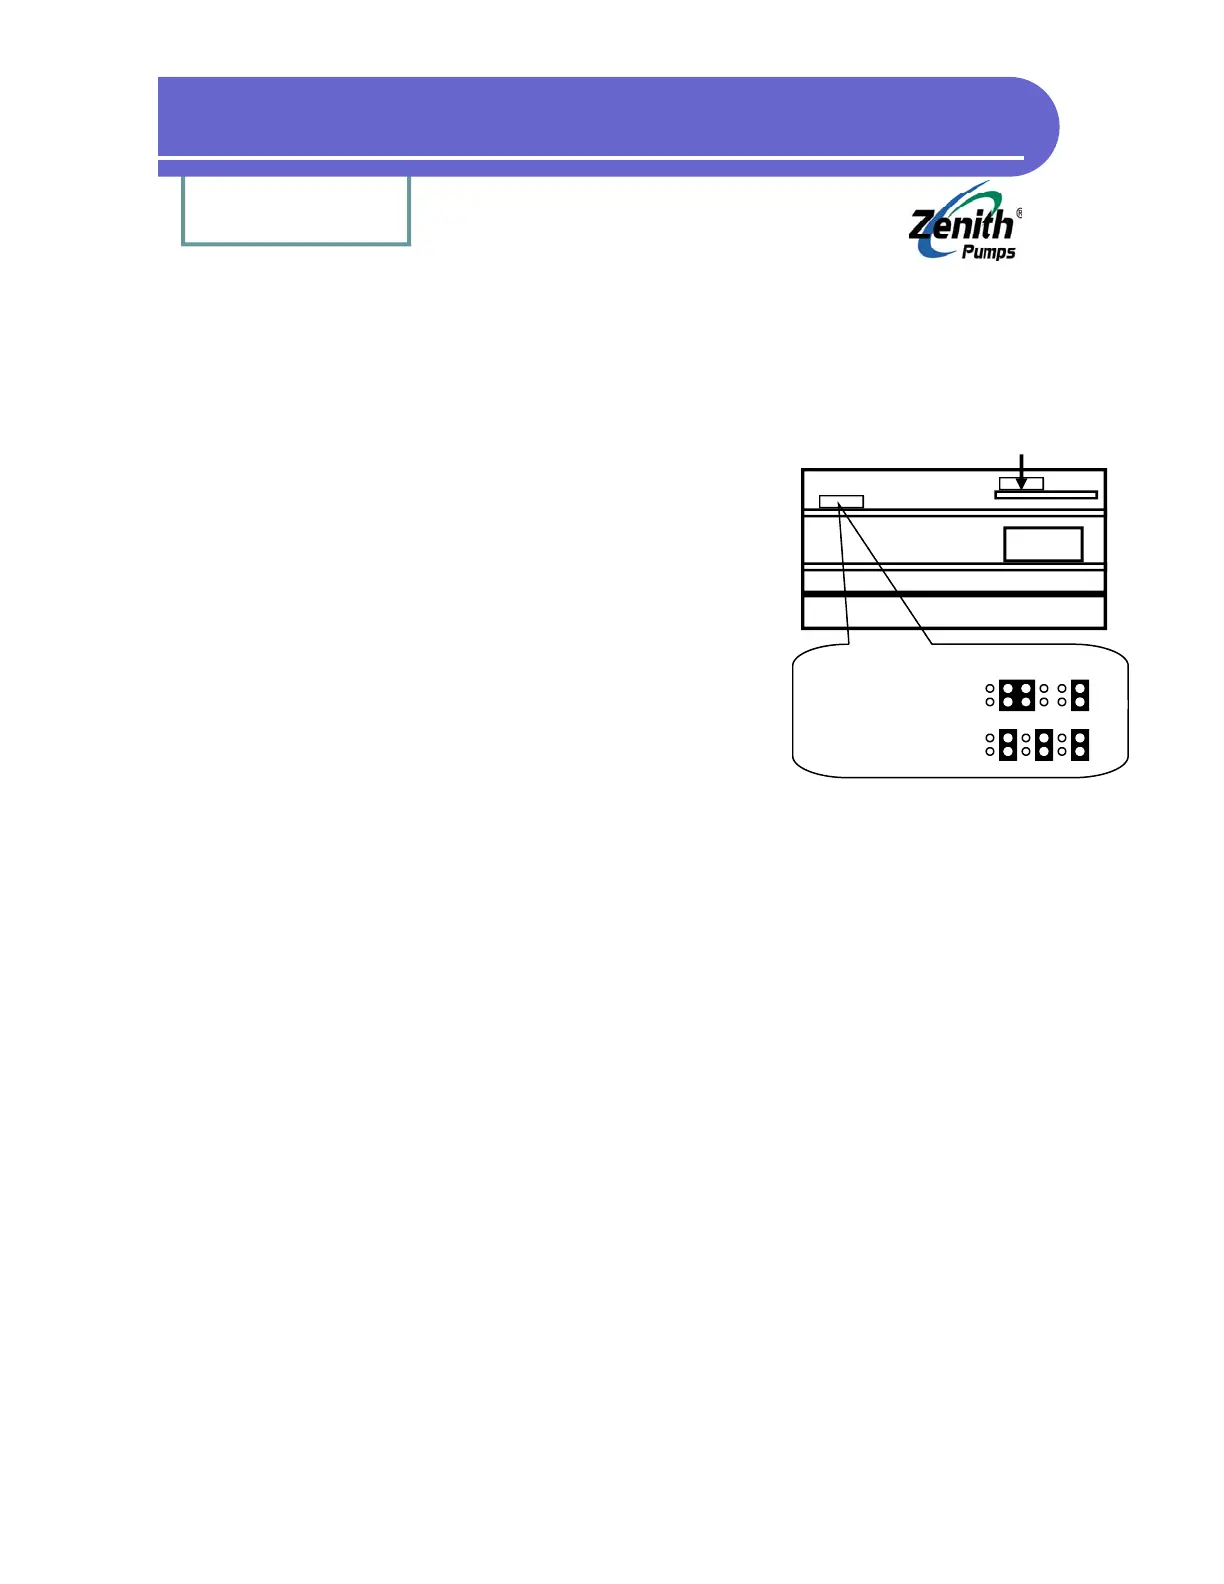
1. Loosen up 6 screws on the back panel, and 2
screws located on the heat sink of ZeDrive
2. Remove the back panel. Face the back of Ze-
Drive and place ZeDrive so that the heat sink
points down
3. There are 2 boards inside of ZeDrive. When
you place ZeDrive as shown in step 2, the top
board is the “Control Board”, and the bottom
one is “Drive Board”
4. Locate Feedback Jumper as shown at left
5. Depend the type of sensor you have, please check the feedback jumper settings as
shown at the left
3. System Always Runs at Full Speed:
Refer to 2—”No Feedback Signal”
4. System Can Not Run Below 30 RPM or 40 RPM:
Refer to 2—”No Feedback Signal”
5. System Never Runs:
• Check the jumpers on J3 connector
Pin 11 - Pin 12
Pin 13 - Pin 12
Pin 14 - Pin 15
• The 2 power fuses located on the “Drive Board” are blown out. To locate “Drive Board”,
please refer to 1—”No Feedback Signal”
6. System Can Not Run up to Max. Speed:
• Check Code 11 for the max. speed limit of the motor (typically 1800 rpm)
7. System Can Not Run Slow Enough:
• Check Code 10 for the min. speed limit of the motor (typically 0 rpm)
8. System Speed Does Not Match Set Speed:
• Verify the values for the following codes:
Code 61 = 1 (“Primary Active Output Format” set to “Master”)
Code 20 = 1800 / Gear Ratio (Maximum Reducer Speed in RPM)
Analog I/O Board
(Not this jumper)
Heat Sink
Transformer
Jumper 1
(Feedback)
Feedback Jumper Location
3-wire Sensor (default):
Left
2-wire Sensor:
Left