Figure 37. Tyre Replacement Orientation
1
I
N
S
I
D
E
Towards
Body
I
N
S
I
D
E
I
N
S
I
D
E
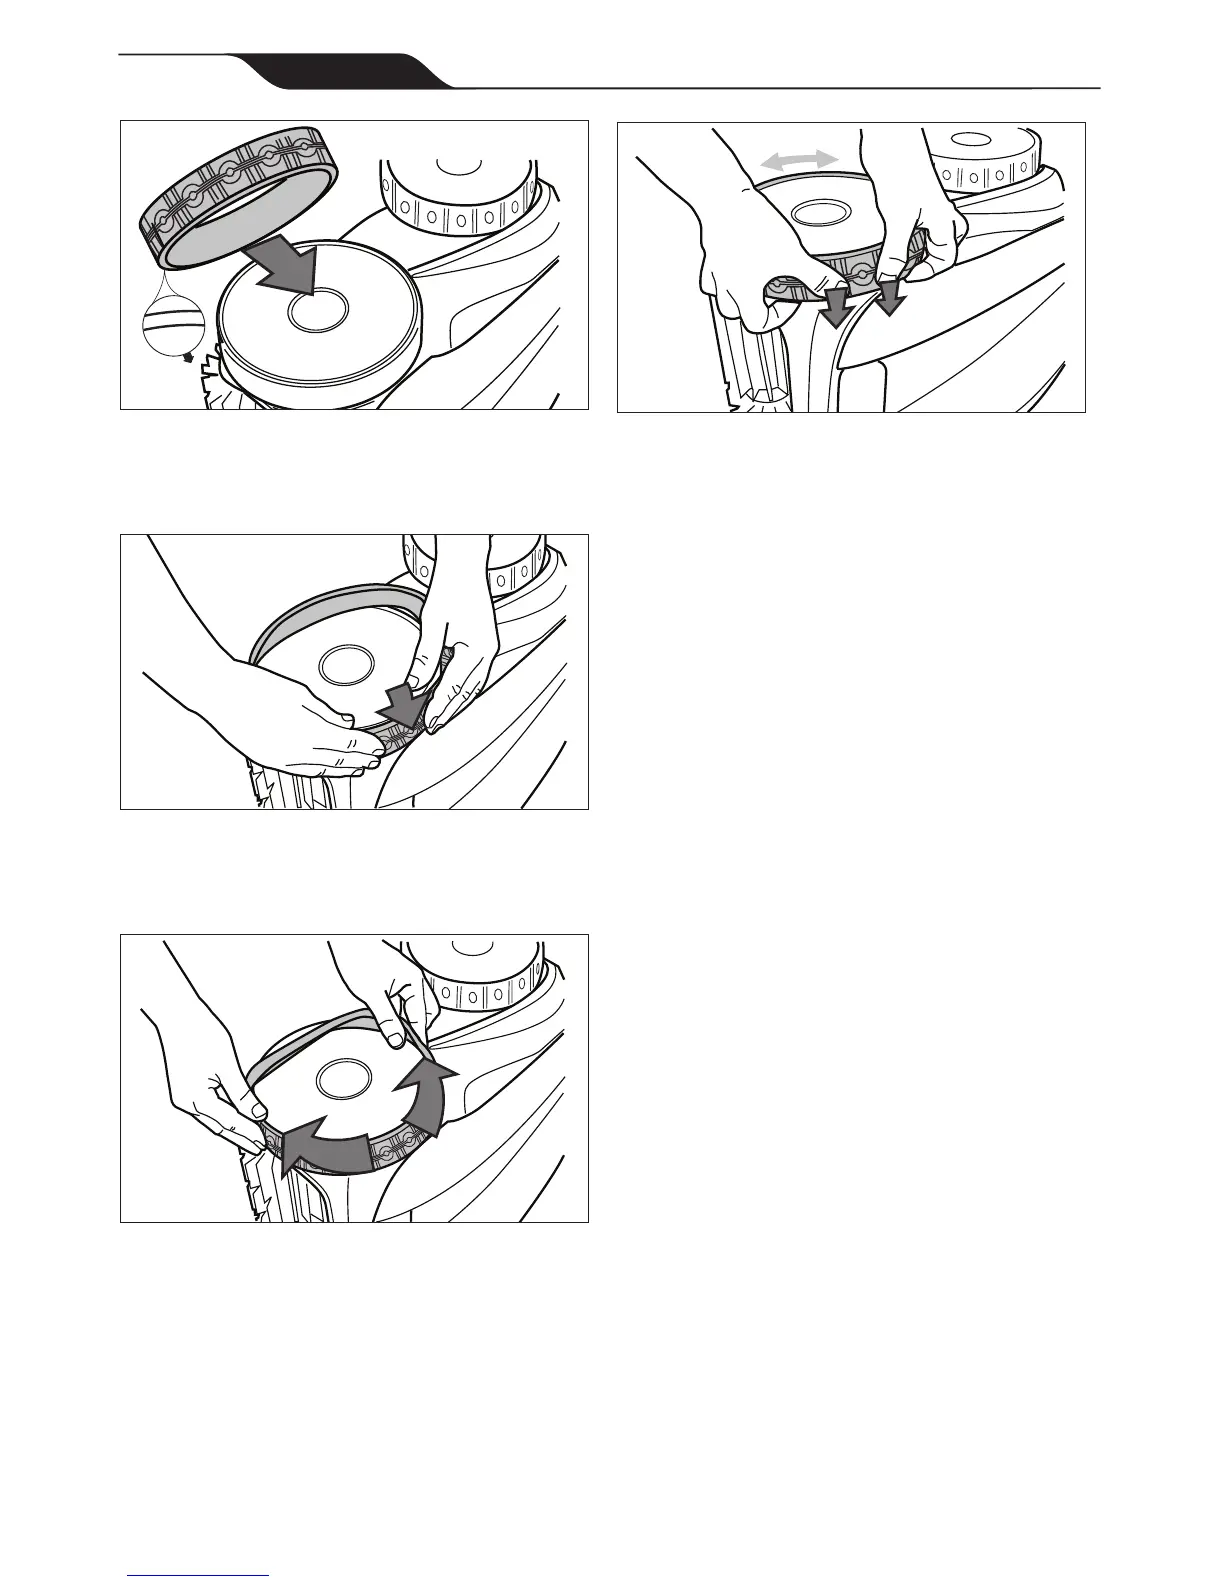
4. Push one side of the tyre on to the wheel and
ttheribofthetyreinthegrooveofthewheel
(Figure 38).
2
Figure 38. Start on One Side of the Tyre
5. Work the tyre onto the wheel and verify the
rib of the tyre is positioned properly within the
groove of the wheel (Figure 39).
3
Figure 39. Work the Tyre On Around the Wheel
6.
Push and position the rib of the inner side of
the tyre in the groove of the wheel (
Figure 40).
If needed, turn the wheel gently to help with
installation.
4
Figure 40. Push the Tyre into Place on the Wheel
Section 7. Spare Parts
The complete spare parts list and exploded
view is available on the Zodiac website at
www.zodiac.com.au