Page 25
Step 3
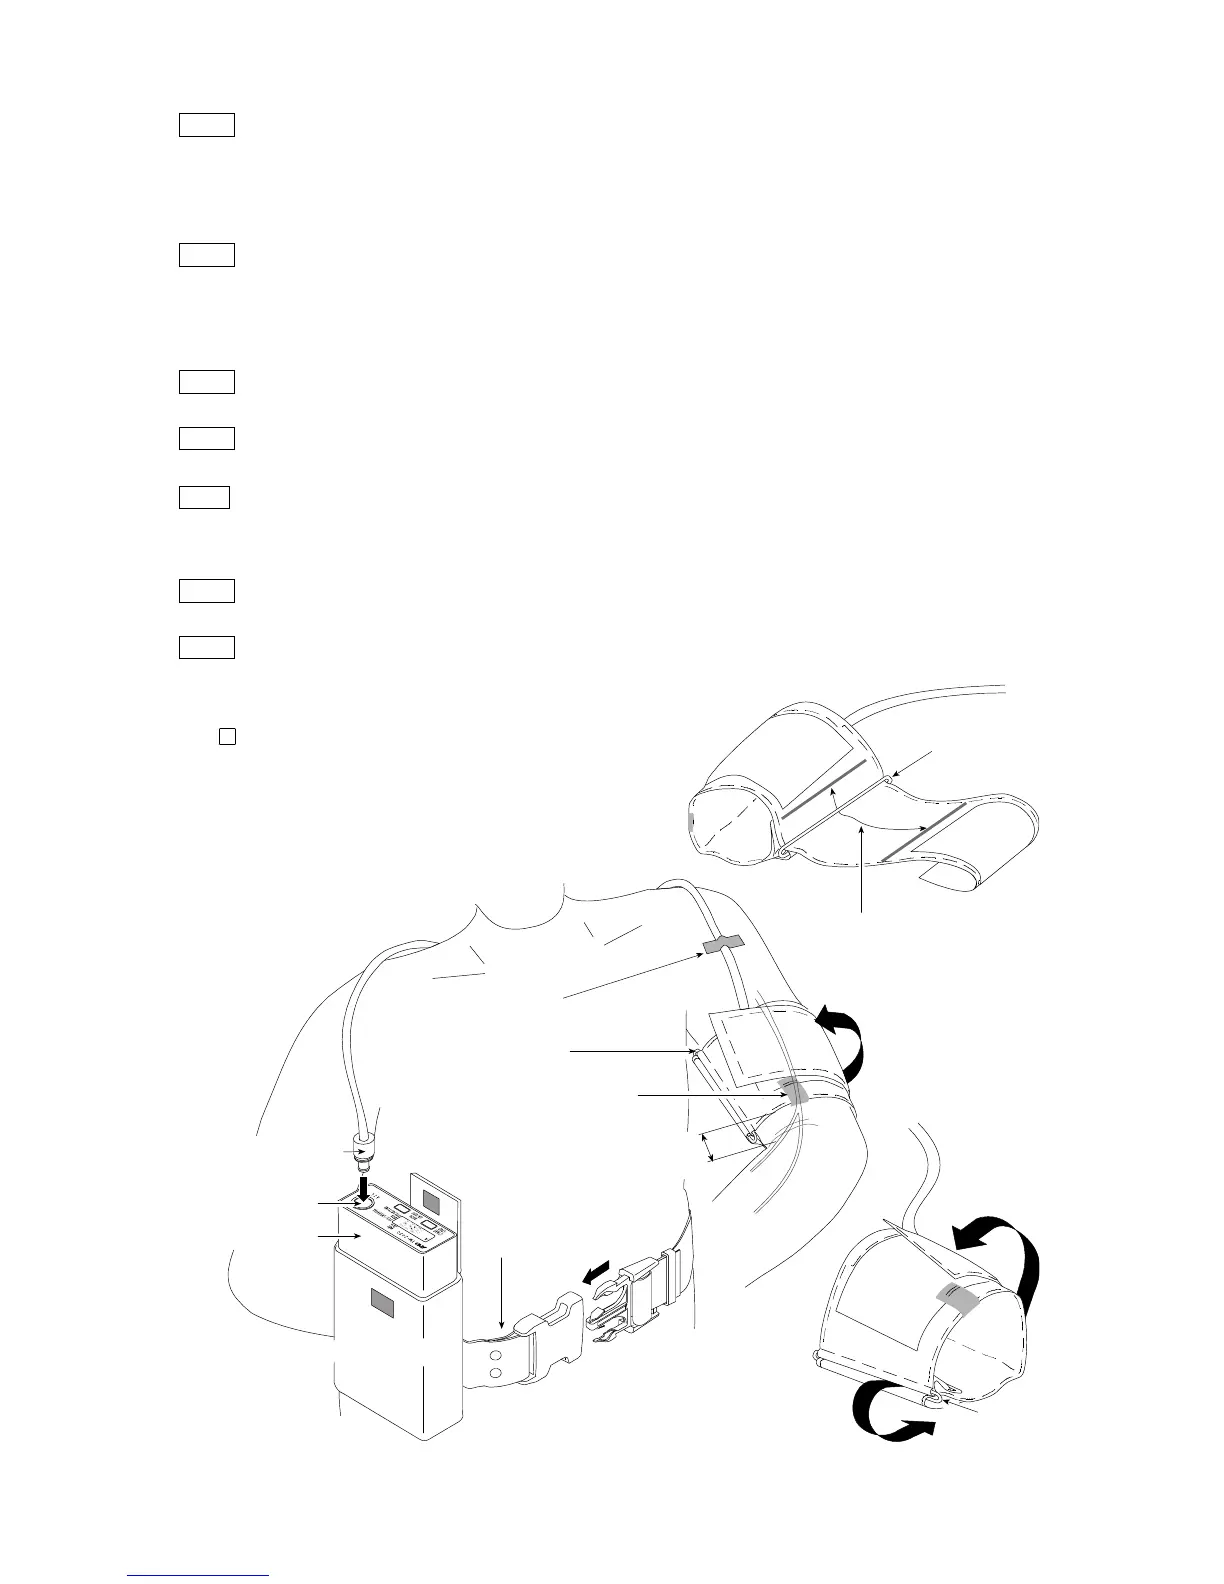
Attach the cuff directly against the skin so that the yellow mark is directly over
the brachialis artery and space it one inch above the inside of the elbow and
the lower edge of the cuff.
Step 4 Wrap the cuff so that the ring is within the slide range, it is flat and does not
slip down, but has room to insert two fingers. (If the ring is not within the
slide range, you need a proper cuff.)
Step 5 Position the air hose over the shoulder and affix it on the patient using adhesive tape.
Step 6 Assemble the belt and carrying case.
Step 7 Position the belt so that the carrying case is on the right (left) side of the patient,
when a patient attaches left (right) arm cuff.
Step 8 Connect the air hose plug to the air socket.
Step 9 Place the recorder into the carrying case.
Caution
Do not disturb the cuff or air hose
during the measurement because
the recorder measures small
pressure variations.
Slide Range of Ring
Tape
Ring
Ring
Cuff
Yellow mark
Appox. 3 cm ~ 5cm
(Approx. 1in.~ 2ins.)
Air socket
Main body
Air hose plug
Carrying case
Belt
Artery
Ring
Cuff