9
Humidity Readings
Range:
0-100% RH
Accuracy@77°F (25°C):
+/-2% RH (10-90% RH)
Response Time:
Less than 4 seconds
Environmental Limits
Operating:
34-125°F (1.1-51.6°C)
Shipping:
-40-140°F (-40-60°C)
Humidity:
0-95% RH non-condensing
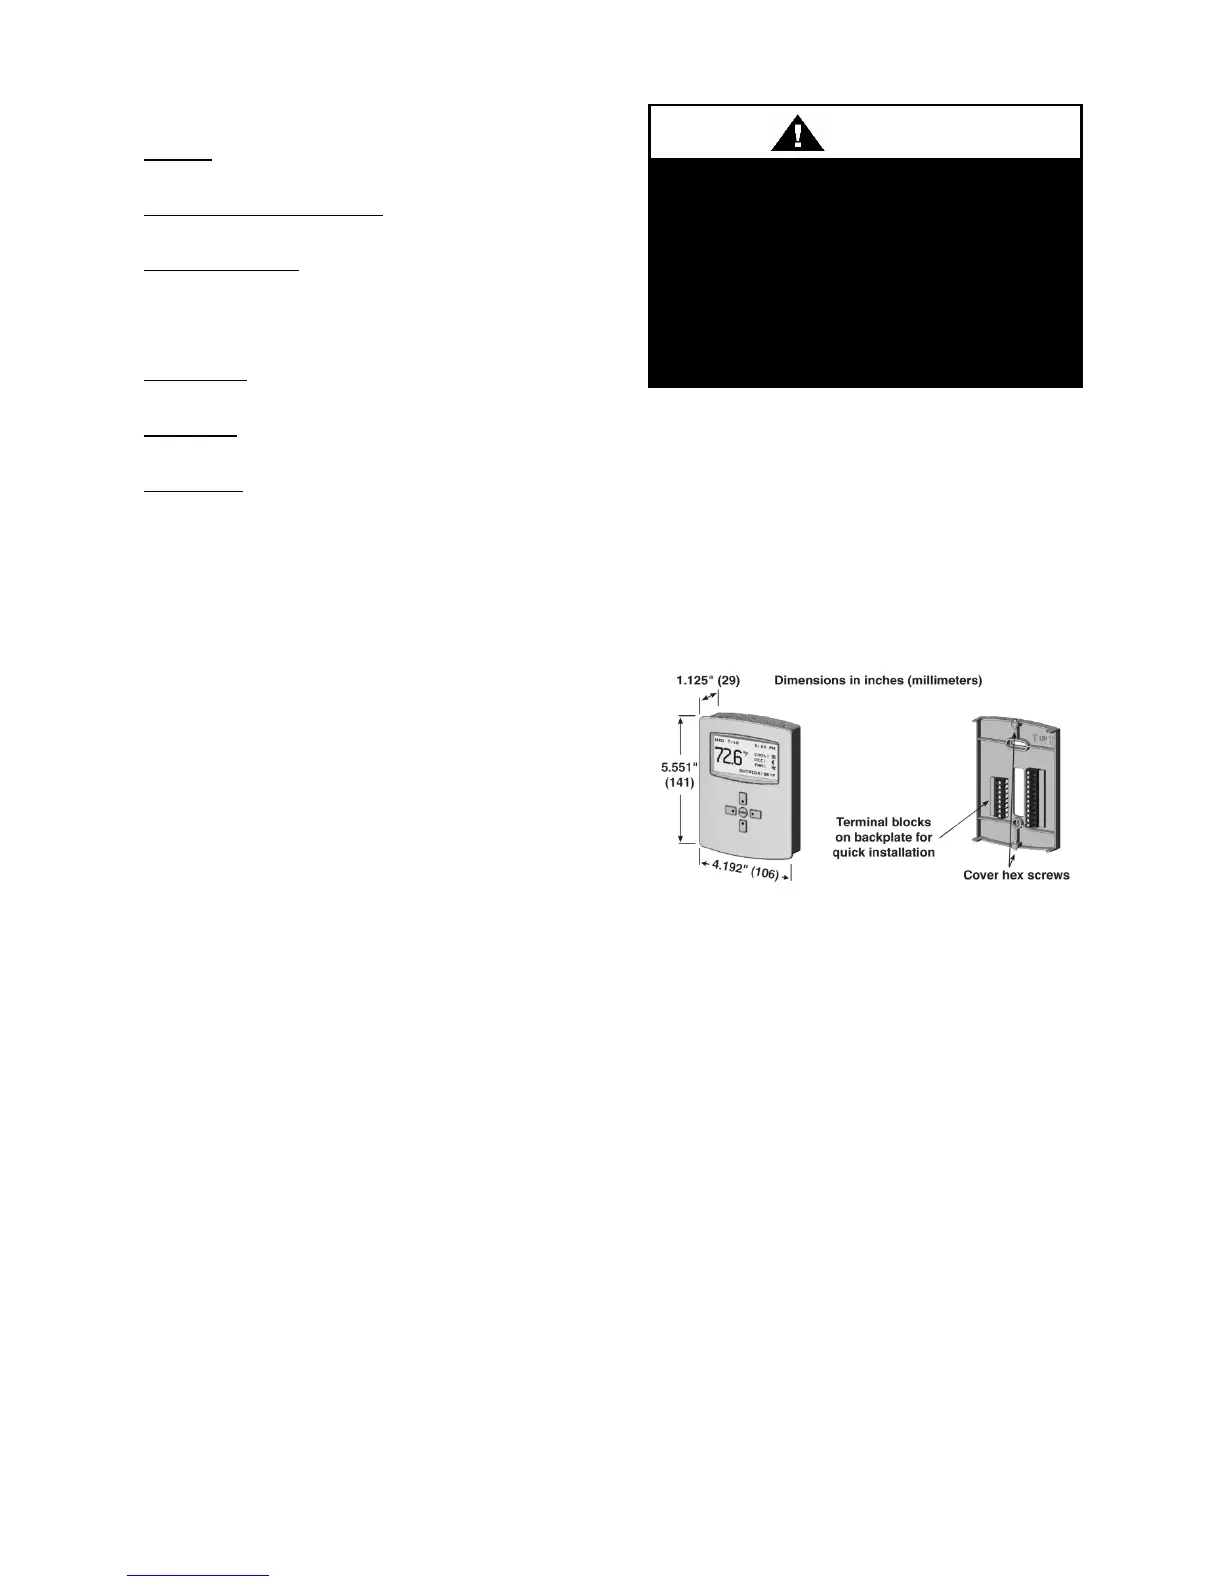
Installation
Locating and Mounting the Controller
For optimum performance controller should
be mounted on an interior wall 4-5 feet
above the floor away from heat sources,
sunlight, windows, air vents and air
circulation obstructions.
1. Complete rough-in wiring at each
location prior to controller installation.
2. Hex screws at the bottom and top of the
controller backplate must be turned
clockwise until clear of the controller
cover to allow removal of the cover.
3. Route wiring through the backplate.
4. With the embossed UP toward the
ceiling, fasten the 2x4 backplate directly
to a vertical 2x4 inch wall handy box. A
4x4 inch backplate attachment is also
provided for horizontal 2x4 handy box
and 4x4 handy box applications.
5. Make the appropriate connections to the
terminal block.
6. Place controller cover over the backplate
while being careful not to pinch or
dislodge any wiring. Turn the hex
screws counterclockwise until they
engage the cover and hold it in place.
Figure 1 - Dimensions and Connections
To prevent mounting screw heads
from touching the circuit board in the
controller use only the mounting
screws provided with the controller.
Using screws other than the type
supplied may damage the controller.