25
Write-protection activation via device software
Write-protection via device software is possible. Please refer to
Section 8 “Operation” of this manual, under “Menu: Device
Setup”.
IMPORTANT (NOTE)
A brief interruption in the power supply results in initialization
of the electronics (program restarts).
Range and span consideration
The LMT Series data sheets provide all the information
concerning the range and span limits in relation to the model
and sensor codes.
URL Upper Range Limit of a specific sensor. This represents
the measured value’s highest set point that the
transmitter can be adjusted to.
LRL Lower Range Limit of a specific sensor. This represents
the lowest value of the measured value that the
transmitter can be adjusted to measure.
URV Upper Range Value. The measured value’s highest value
by which the transmitter is calibrated.
LRV Lower Range Value. The lowest value of the measured
value to which the transmitter is calibrated.
SPAN The algebraic difference between the Upper and Lower
Range Values. The minimum span is the minimum value
that can be used without degradation of the specified
performance.
The transmitter can be calibrated with any range between the
LRL and the URL with the following limitations:
LRL < LRV < (URL – CAL SPAN)
CAL SPAN > MIN SPAN
URV < URL
Configuration types
Level transmitters can be configured as follows:
• Configuration of the parameters for the lower and upper
range values (via Zero and Span push buttons), without an
integral HMI using the local push buttons.
• Configuration of the level transmitter using the integral HMI
with keypad (menu-controlled)
• Configuration with a handheld terminal
Configuring the transmitter without an
integral HMI
LMT Series level transmitters allow local adjustments via the
onboard non-intrusive push buttons, when selected. The push
buttons are located under the identification nameplate. To gain
access to the local adjustments, release the attaching screws
on the nameplate and rotate the identification plate clockwise.
The lower range value and span parameters can be set directly
on the transmitter, using the external push buttons.
The transmitter is calibrated by the manufacturer, based on the
order information. The tag plate contains information on the
“lower range value” and the “upper range value” set. In general,
the following applies:
WARNING
Operating the control buttons with a magnetic screwdriver
is not permitted.
LRV and URV configuration using local push buttons
• Apply the level for the lower range value and wait until the
signal has stabilized.
• Press the “Z” button. This sets the zero level position.
• Apply the level for the upper range value and wait until the
signal has stabilized.
• Press the “S” button. This sets the span level position. If
required, reset the damping to its original value.
Record the new settings. The respective parameter is stored in
the non-volatile memory 10 seconds after the “Z” or “S” button
is pressed.
IMPORTANT (NOTE)
This configuration does not affect the physical process level
(PV value), also shown on the digital display or user interface.
After performing a change, check the device configuration.
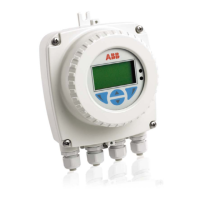
Configuring the transmitter using the
optional integral HMI - Through the Glass
(TTG) (L2 option)
The integral HMI is connected on the LMT Series
communication board. It can be used to visualize the process-
measured variables as well as to configure the display and the
transmitter.
The TTG technology allows the user to activate the keypad on
the HMI without the need of opening the windowed cover of
the transmitter. The capacitive pickups detect the presence of
the user’s finger in front of the respective button, activating
the specific command. At the transmitter power-on, the HMI
automatically calibrates its sensitivity. It is mandatory for the
proper functioning of the TTG HMI that the cover is sufficiently
tightened at power-on.
In case the cover has been removed to access the
communication board, it is recommended to power off and
power on the transmitter once the windowed cover has been
set in place and properly tightened.