AM Series Boiler Heat Exchanger Maintenance & Replacement
Technical Instruction Document
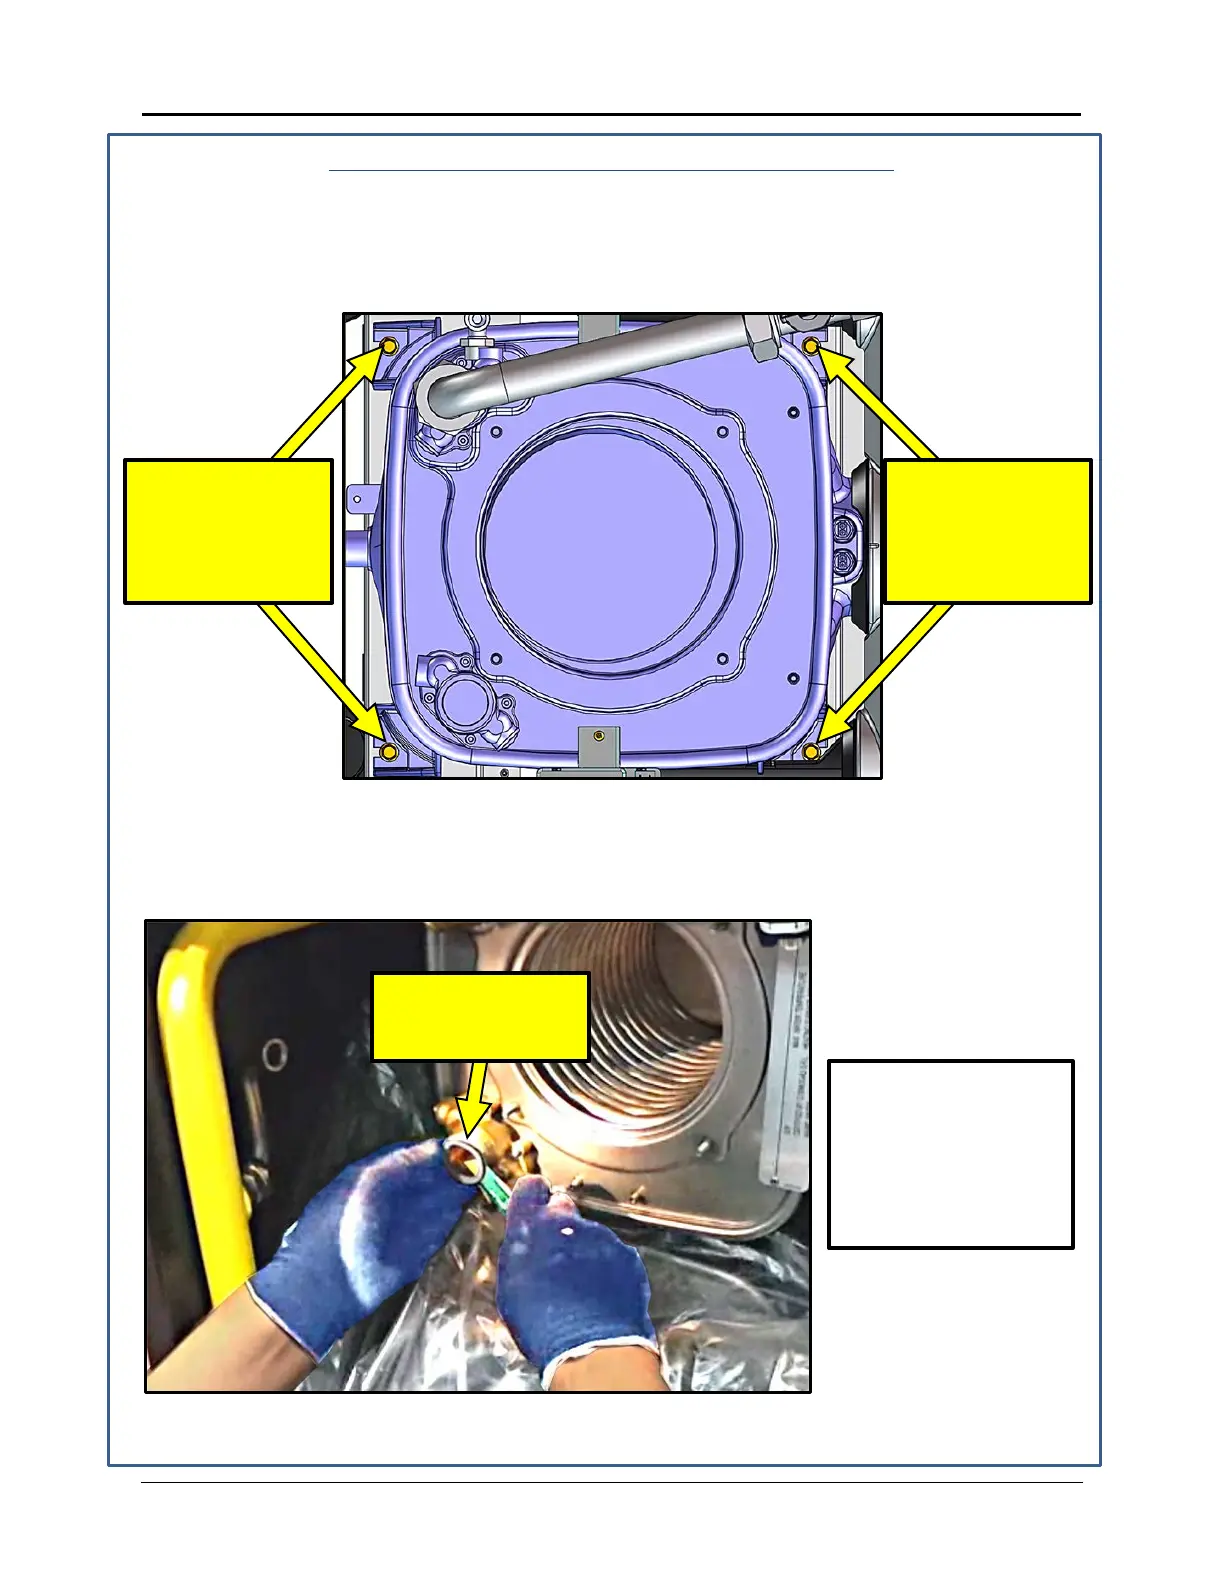
Installing of the Heat Exchanger - Continued
12. Install and tighten the upper and lower bolts on the left side, as indicated in Figure 4-11,
using the 19” long 10mm nut driver.
13. Tighten the upper and lower bolts on the right side, as indicated in Figure 4-11, using the
19” long 10mm nut driver.
Figure 4-11: Affixing the Heat Exchanger to the Unit Rear
14. If the heat exchanger is NOT being replaced, use a knife to cut off the old return inlet gasket
from the water supply inlet connection, and completely scrape clean of all old gasket
residue. See Figure 4-12.
Figure 4-12: Removing the Old Water Supply Inlet Gasket
STEP 14: REMOVE
OLD WATER SUPPLY
NOTE!
This instruction only
applies if the heat
exchanger is being
serviced but NOT
replaced.
STEP 13: TIGHTEN
THE TWO BOLTS
ON RIGHT WITH 19”
LONG 10mm NUT
DRIVER.
STEP 12: INSTALL &
TIGHTEN THE TW O
BOLTS ON LEFT
WITH 19” LONG
10mm NUT DRIVER.
TID-0132_99 AERCO International, Inc. • 100 Oritani Dr. • Blauvelt, NY 10913 Page 24 of 36
Ph.: 800-526-0288 01/18/2015
 Loading...