20
10
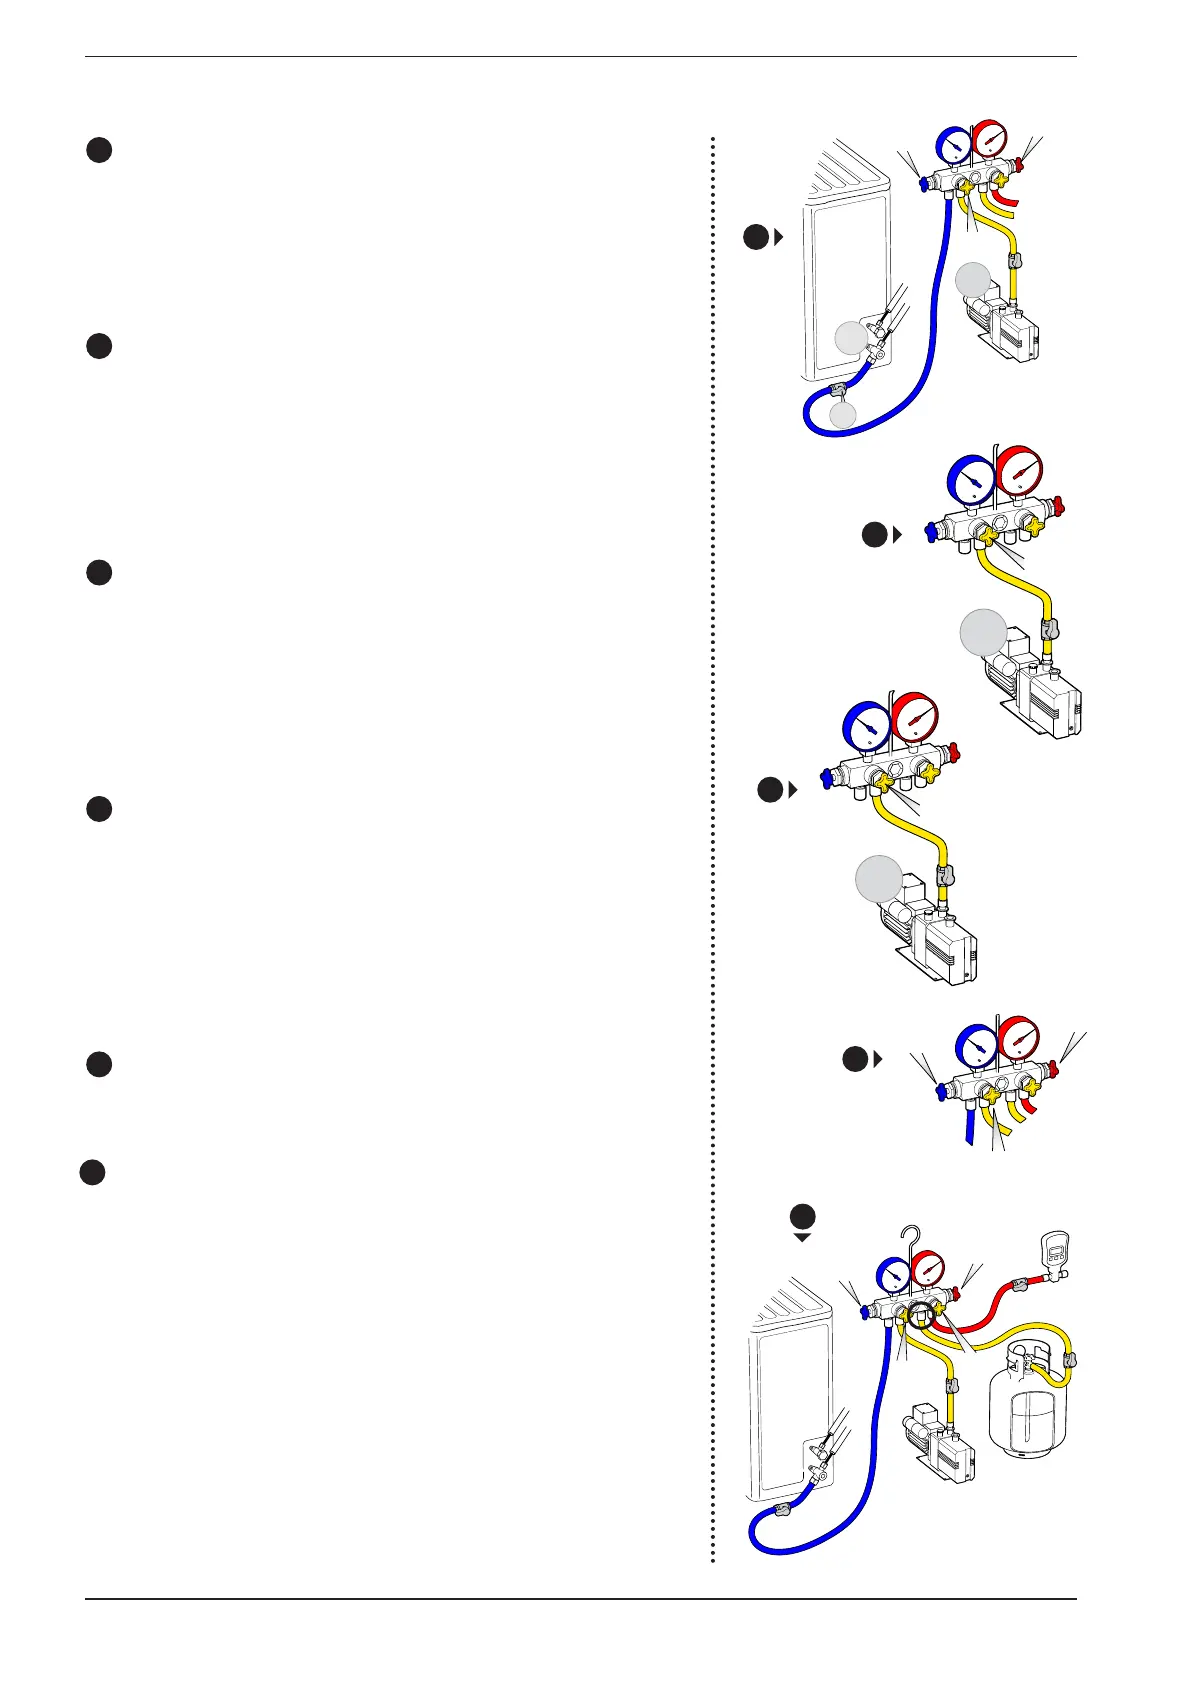
CREATING A VACUUM ON THE REFRIGERANT LINES; If the connection hose seal test is
positive, and no leaks are found, you can proceed to create a vacuum on the refriger-
ant lines connecting the condensing unit to the evaporator unit.
LOW
VAC
3
5
ON
OPEN
HIGH
4
OPEN
LOW
HIGH
VAC
REF
3
4
5
6
LOW
HIGH
VAC
3
4
5
VAC
5
OFF
VAC
5
ON
11
Creating a vacuum on the refrigerant lines
- Switch the vacuum pump back on,
- Open the cock on the hose side and open the brass cocks on the outdoor unit.
-
The cocks marked “LOW”, “VAC” and “HIGH” on the pressure gauge unit should be kept
open.
- Wait for a few minutes (Note: a good sign that the vacuum is being created is the
change in the noise emitted by the pump).
12
When the vacuum pump shows a sufficient level of vacuum, wait a few minutes and
then proceed with the following operations:
- Close the yellow cock marked “VAC”.
- Switch off the vacuum pump.
- Check that the vacuum gauge does not show a drop in the vacuum level compared
with when the pump was operating.
13
If the vacuum level reading does not change (an indication that the cooling circuit is
not leaking):
- Switch the vacuum pump back on.
- Open the cock marked “VAC”.
- Continue to create the vacuum for a few minutes.
14
Close the cocks marked “LOW”, “VAC” and “HIGH”.
- Wait a few minutes and then switch on the unit in Cooling mode.
15
TOPPING UP THE REFRIGERANT GAS; Depending on the length of the lines, if the installa-
tion needs topping up with refrigerant gas, proceed as follows:
- Switch on the unit in Cooling mode.
- Leave the LP hose connected to the pressure gauge unit.
- The cock marked “VAC” should be kept closed.
- Connect the cylinder of refrigerant gas to the hose connected to the pressure gauge
unit connection (see the connection circled in the figure).
- Open the tap on the cylinder (which must be fitted with an immersed hose).
- Bleed the air from the hose leaving the connection on the pressure gauge unit slightly
loose until the gas does not flow out, then slowly tighten the connection.
- Open the cock marked “LOW”.
- Position the cylinder on electronic scales.
- Open the cock marked “REF” in short bursts, in order to add the required amount of
refrigerant..
11
12
13
14
15