Installation
Agilent 5800 and 5900 ICP-OES User's Guide 31
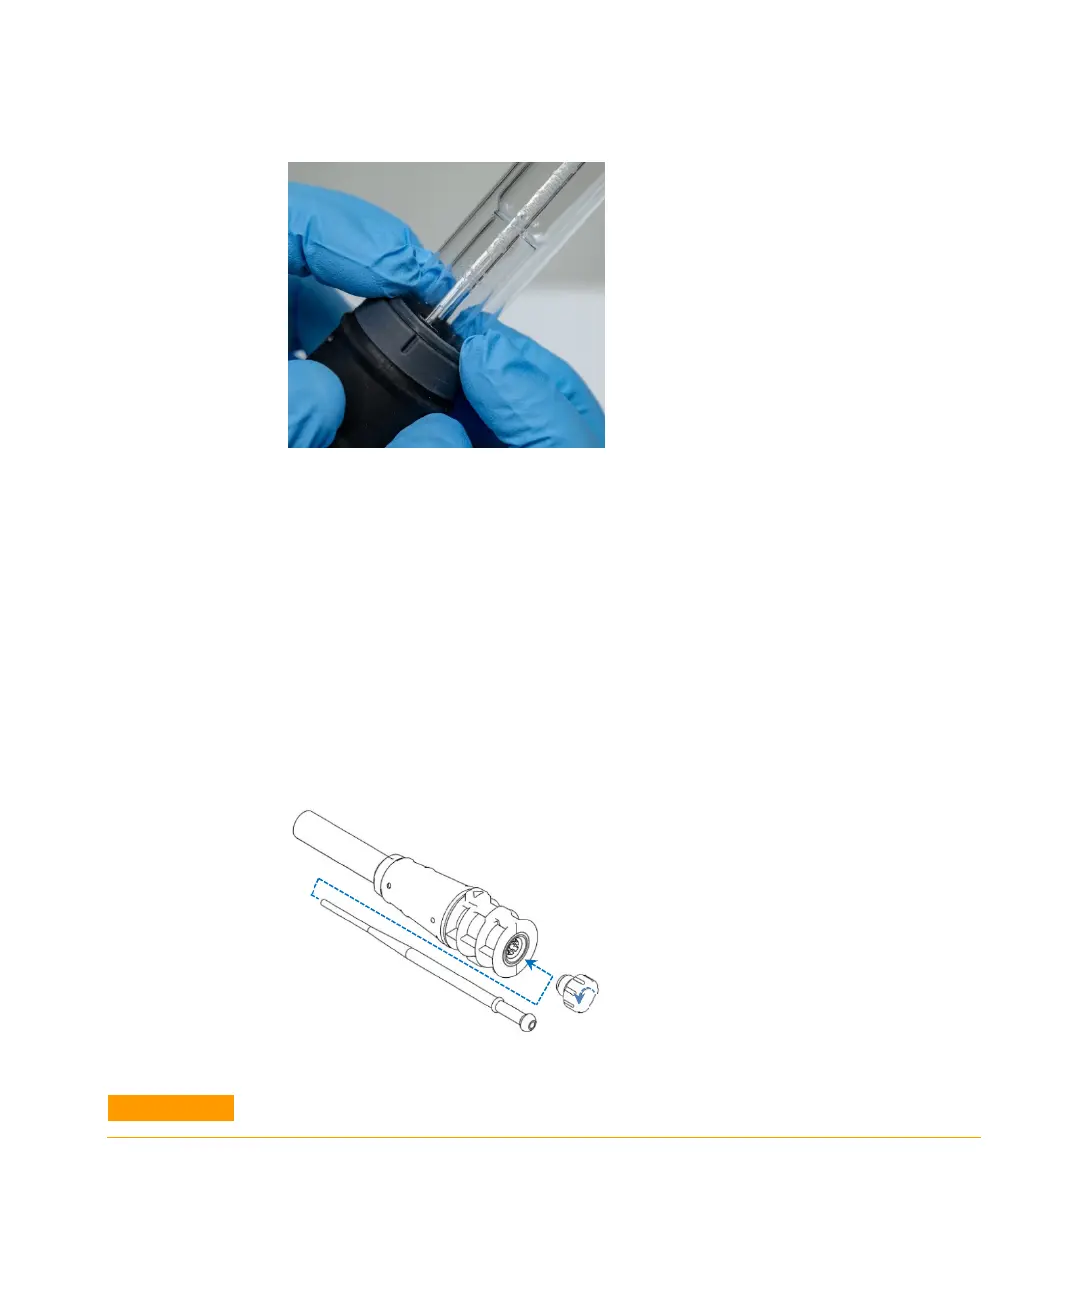
Figure 8. Ensure the seal is properly seated by pressing firmly on the top edges
Assembly of the fully demountable torch
To assemble the torch:
1 Unscrew the locking nut on the torch base.
2 Place the top seal back on the top of the torch base and ensure this is properly
seated by pressing firmly on the top edges.
3 Insert the tube-set into the torch body and position it so that the groove on the
torch body aligns with the “T” alignment mark on the tube-set. Press the outer
tube-set fully into the torch body. See Figure 7 and Figure 8.
4 Fully insert the injector through the base of the torch body until the bulge
contacts the retaining arm and “clicks” into position.
5 Replace the locking nut and tighten to secure the injector.
CAUTION
Hand tighten only. Do not overtighten or use a wrench for leverage.
1
2