130
more than you need, because you can always remove the unused portion
later by using the EDIT A SOUND function. A good length for snare
drums and toms is 1.0 to 1.5 seconds. A good starting length for cymbals
is 1.5 to 3.0 seconds. To learn more about common sampling times for
various drums, load one of the preset sounds disks, then inspect the
various sampling times using the EDIT A SOUND function.
5. Move the cursor to the PRE-RECORD(MSECS) field and select a
pre-record time of 1 millisecond or more. This is the amount of time which
will be recorded before the record threshold is exceeded, preventing the
attack of the sound from being cut off.
6. Move the cursor to the HEAR INPUT field. This selects whether or not
the signal at the sampling input is heard in the stereo outputs. If you are
sampling with a microphone in the same room as the speakers, select NO to
avoid audio feedback. Otherwise, select YES to hear the incoming signal in
the stereo mix.
7. Move the cursor to the FADEOUT(MSECS) field. This sets the amount
of time it will take for the sample to fade down at the end of the sampling
time. This eliminates the need to manually fade down the level at the end of
the sample. Since the fadeout will always end exactly at the end of the
sample, this setting actually sets the position within the sound at which the
decay will begin. This setting may also be adjusted after sampling, both from
this screen and the EDIT A SOUND screen. A good starting value for this
field is 1/2 of the sampling time.
8. Move the cursor to the THRESHOLD field. This sets the audio level
which must be exceeded before sampling starts. The range is 0 to 100% of
the total input signal level. A good setting to start with is 5%. If the input
signal has much background noise, you may need to increase this value.
However, because of the PRE-RECORD feature, a high record threshold
setting will not cause the attack of the sound to be cut off.
9. Connect the audio signal to the REC IN jack on the rear panel. Use a
standard 1/4" phone jack here. However, this is a balanced input, so you
may optionally connect a balanced signal if you have one. To connect a
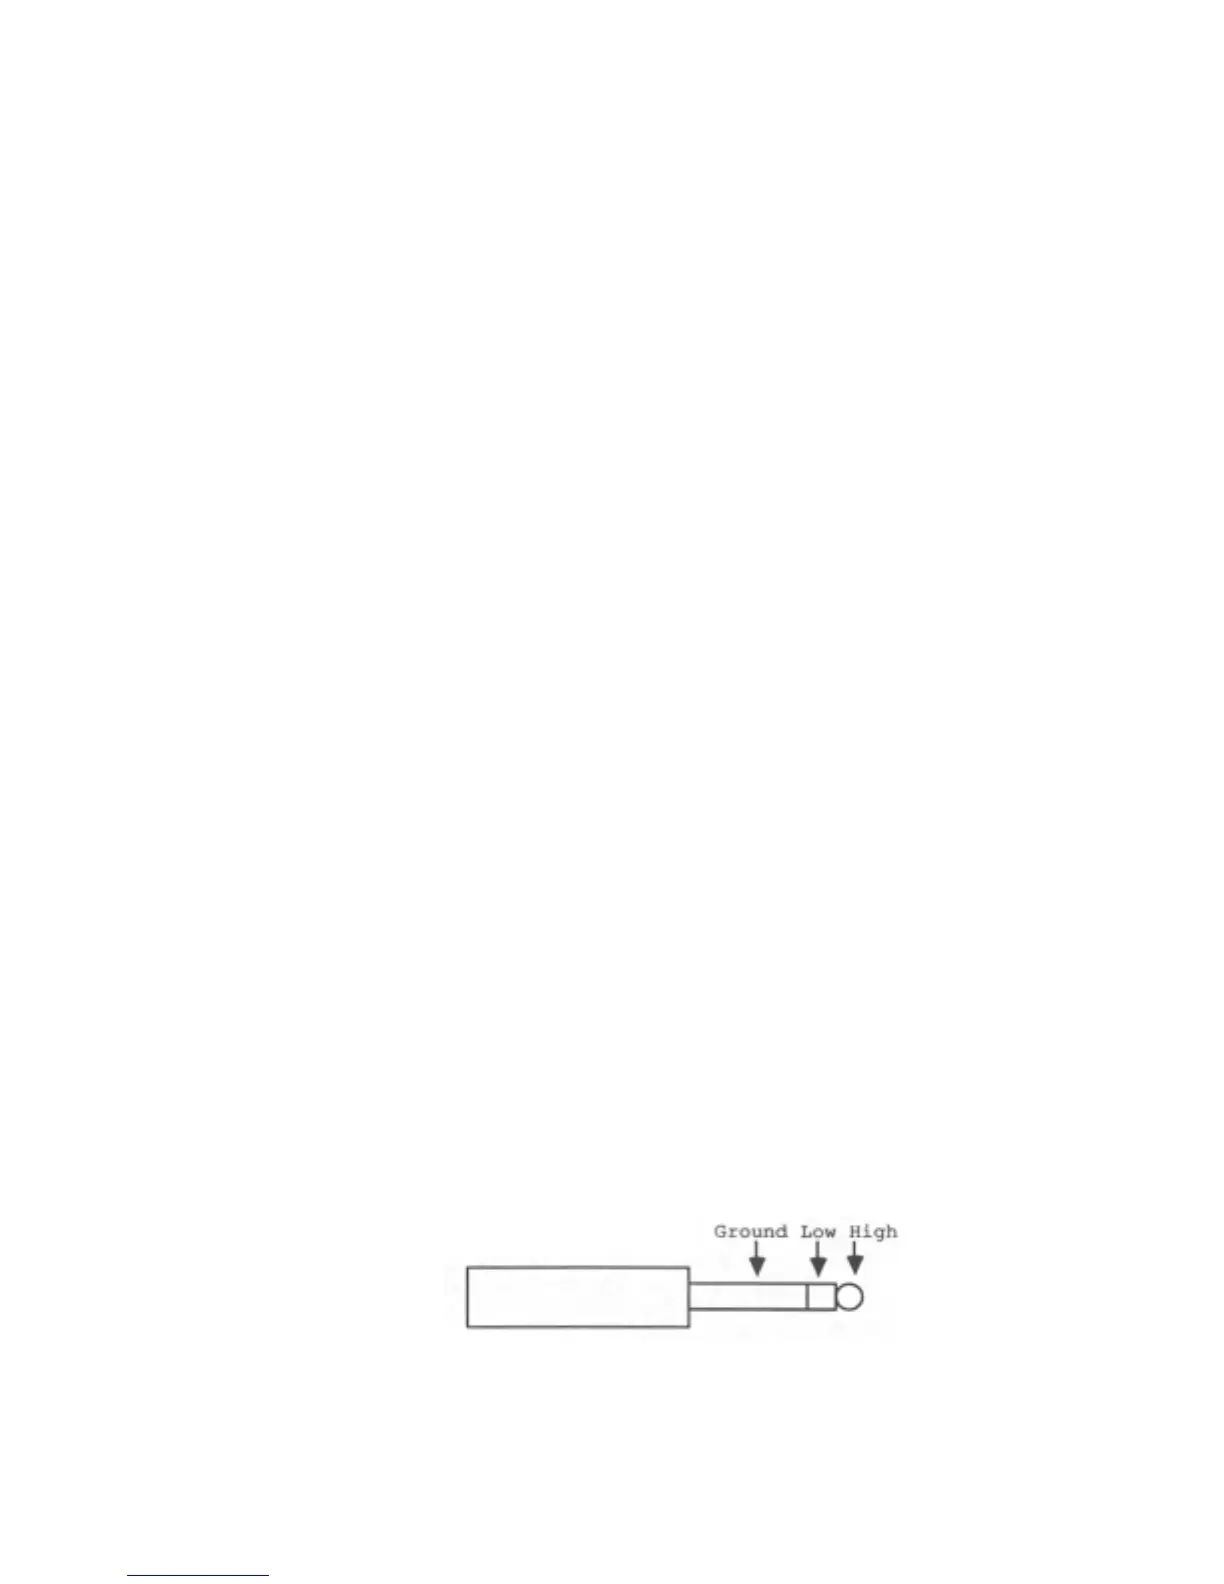
balanced signal, use a stereo (3 conductor) phone jack wired as follows:
10. Now, let's set the record level. First, set the GAIN switch on the rear
panel. For most applications, use the LO setting. Move the cursor to the
RECORD LEVEL field and set the record level by adjusting the DATA
CONTROL and watching the audio level