TPI Configuration and Usage
22
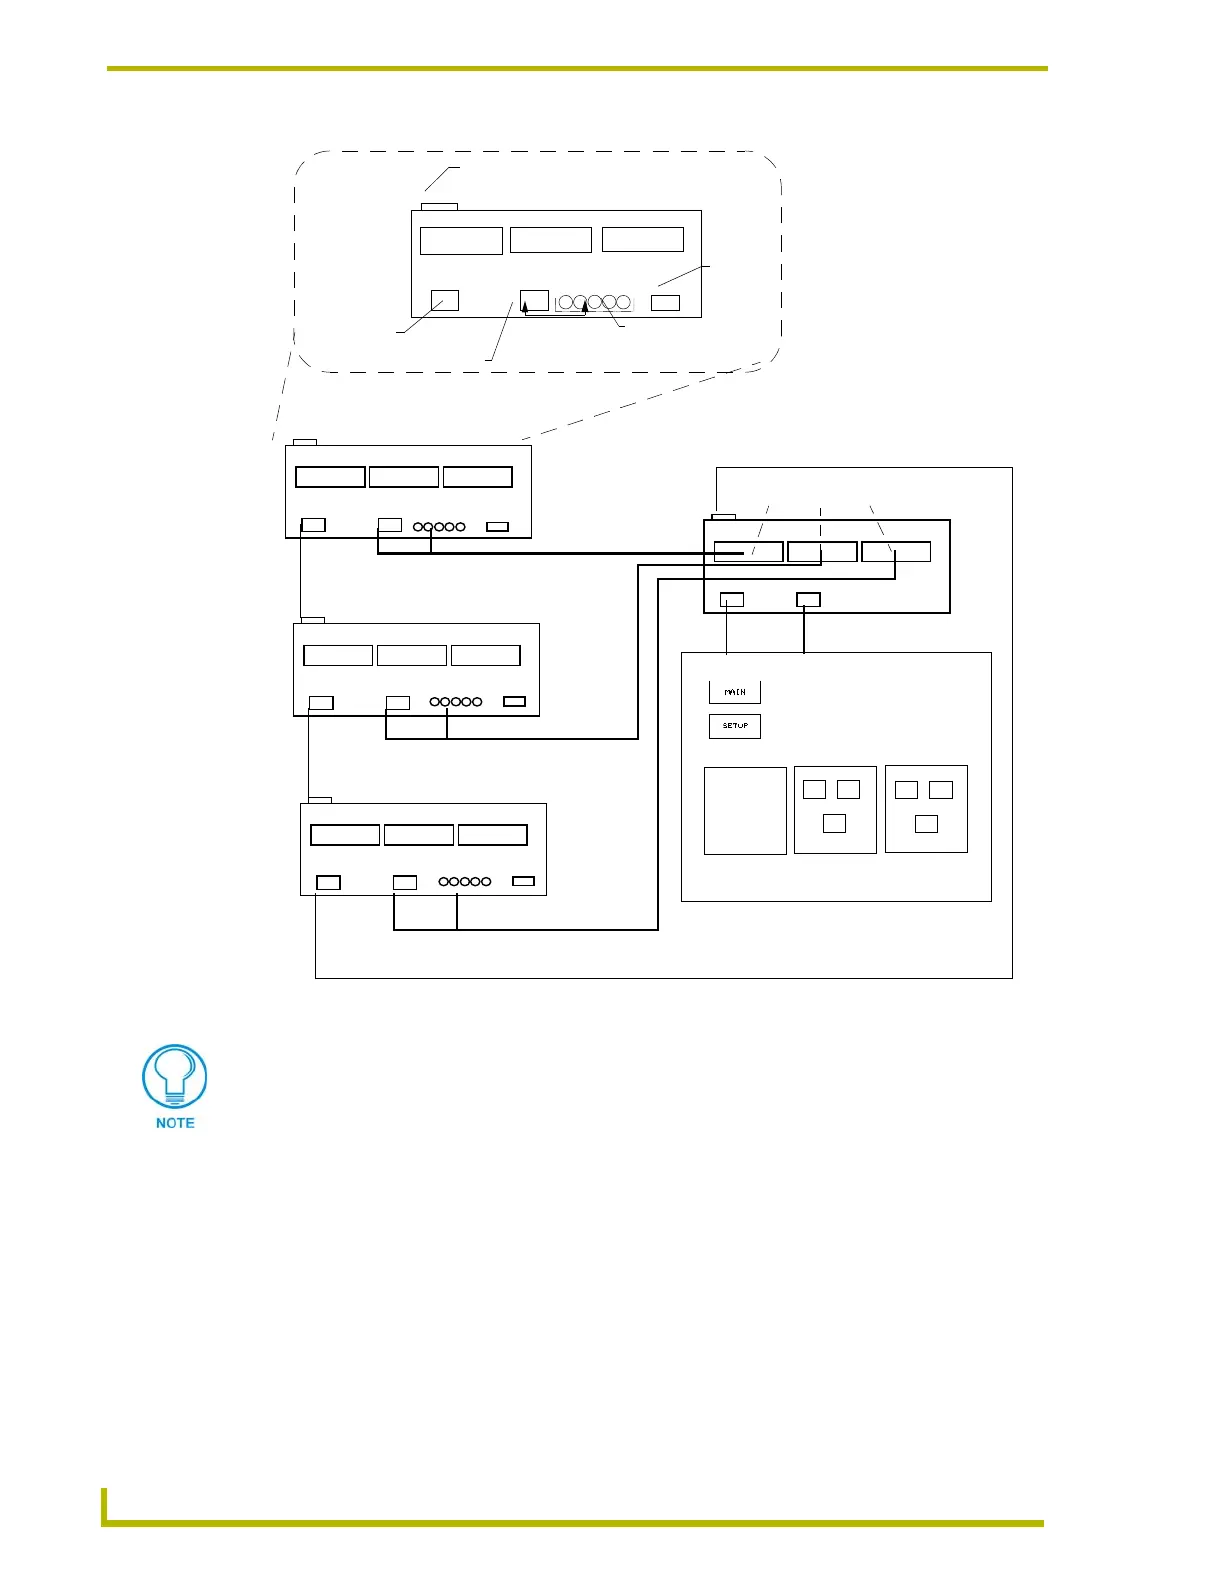
AXB-TPI/3 Touch Panel Interface 3
2. Follow the procedures for configuring the TPI/3 (in sequence), beginning with the Setting Up
AXlink procedures section on page 17, and ending with the Setting up the touch device through
AXlink section on page 18 before using the touch device connected to any of the TPI/3s.
3. Connect the Monitor Out (DB-15, 5-BNC) and Program port to Mouse port (DB-9) cables to
the respective positions on consecutive TPI/3s, as seen in FIG. 7. The Monitor Out, from each
of the secondary TPI/3s, is connected to a respective slot card on the rear of the AXB-TPI/3.
4. Connect the DB-9 cable from the rear of the touch panel to the Mouse port on the rear of the
main TPI/3.
FIG. 7 Sample TPI/3 stacked system
TPI/3 #4
X-3
X-2
X-1
or
HD-15 or
5-BNC
cable
TPI/3 #3
or
DB-9
TPI/3 #2
or
X-3
X-2
X-1
TPI/3 #4
screen
TPI/3 #3
screen
TPI/3 #2
screen
Touch Panel Device
(monitor)
VGA or RGB cards
TPI/3 #1
Main TPI/3
cable
DB-9
cable
HD-15 or
5-BNC
cable
HD-15 or
5-BNC
cable
Slot Card
Slot Card
Slot Card
Mouse Port
Mouse Out
or
5-BNC
AXlink
Programming Port
DB-9
DB-15
DB-9
cable
DB-9
cable
Use the Program port to communicate serially with the TPI/3. Use the AXlink port to
communicate with the TPI/3 using Send_Commands.
Each VID card accepts up to two video signals.
The above example supports up to 18 video signal inputs (2 per card or 6 per TPI/3).

 Loading...


