Appendix B: Wall Builder Tutorial
FIG. 51 Configuring the Wall Builder Setup Page
4. The screen shown in Figure 52
appears. Refer to the guidelines and option descriptions given in Figure 52, Figure 53, and
Tabl e 33
as you create your design.
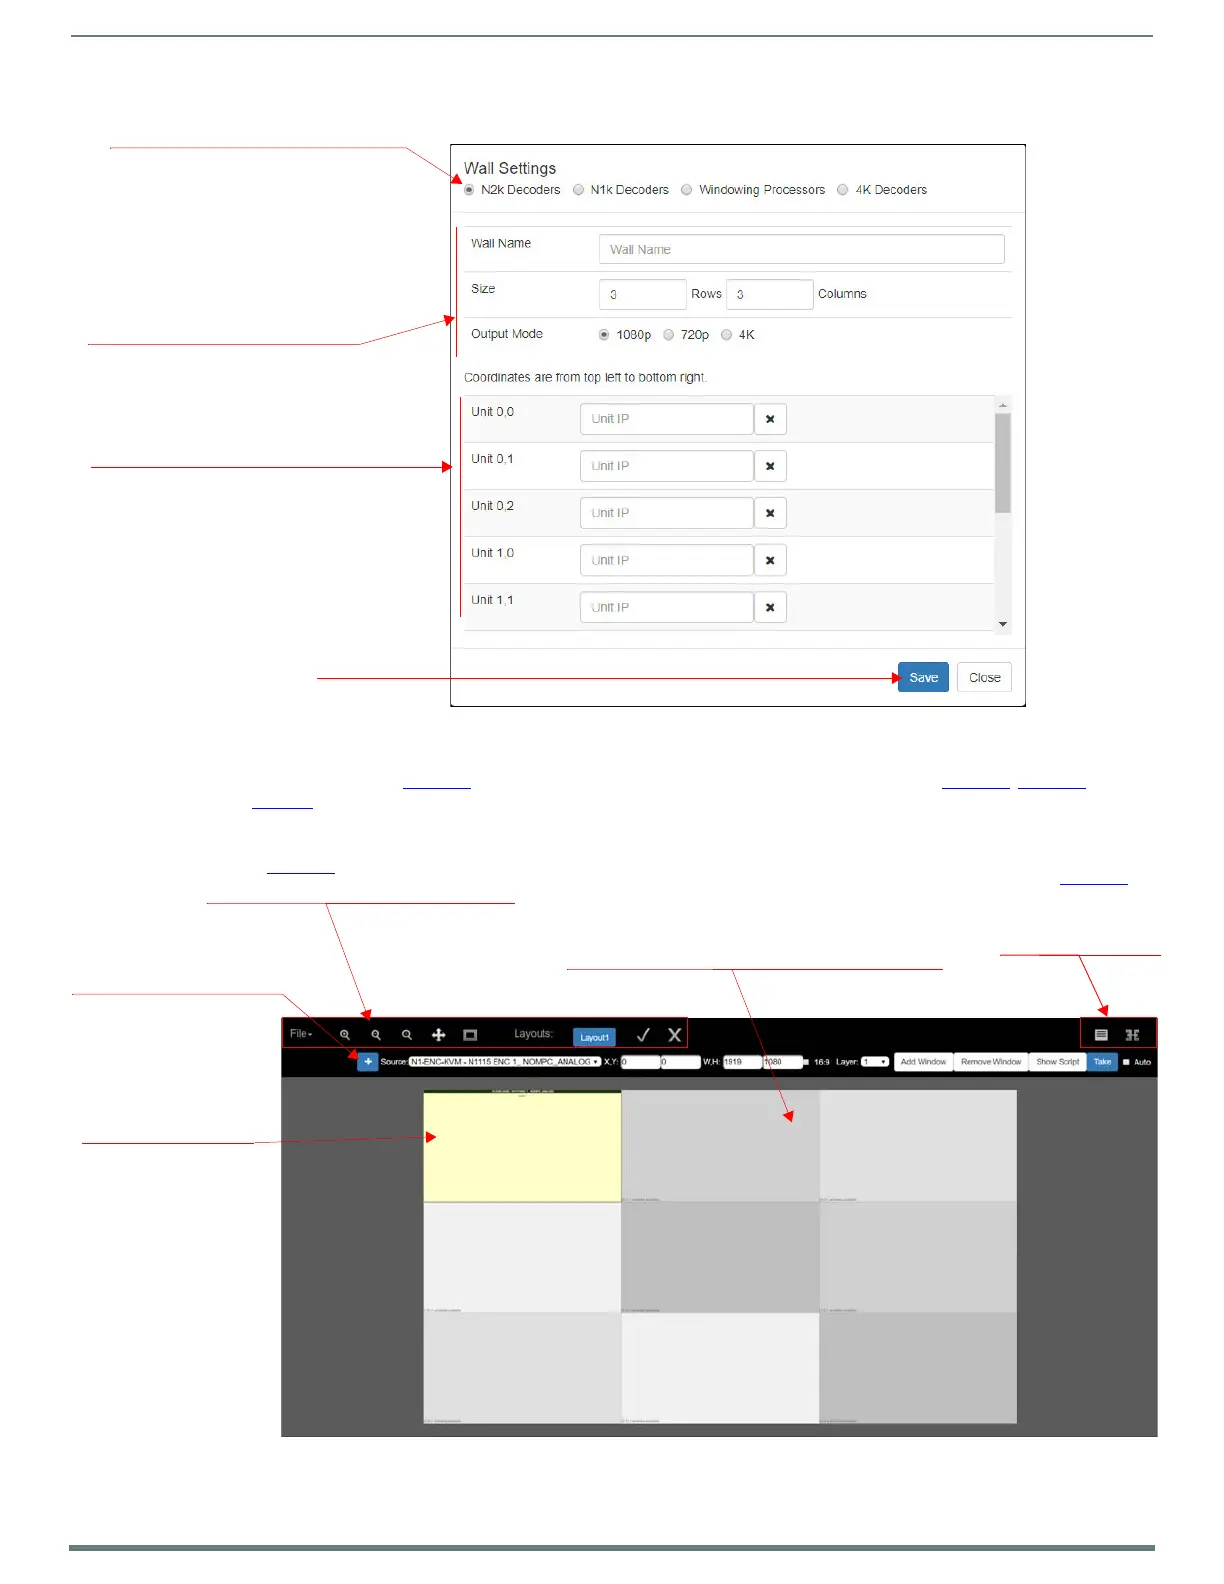
FIG. 52 Arranging the Wall
Choose N2K Decoders for this example.
Name your new wall, determine the number
of rows and columns, and choose the
output mode.
Note: Control through any control system
requires the video wall name. Control
commands are case/space sensitive, so
simple names with no spaces work best.
Enter the selected Decoder IP addresses
you would like to use.
Click Save.
Click the + button to add
windows to your wall.
The new window
appears at the top-left.
Drag/drop and resize
as desired. Hold the
<Shift> key to
maintain aspect ratio.
If an area is not covered by a window (in a Decoder-
only setup), Local Play displays. However, when using
Windowing Processors, a blank area will display the
Windowing Processor’s background graphic (which
can be customized to suit your application).
Refer to Figure 53 for descriptions of this
portion of the interface.
Refer to Figure 53 for
descriptions of this
portion of the
interface.