Appendix B: Wall Builder Tutorial
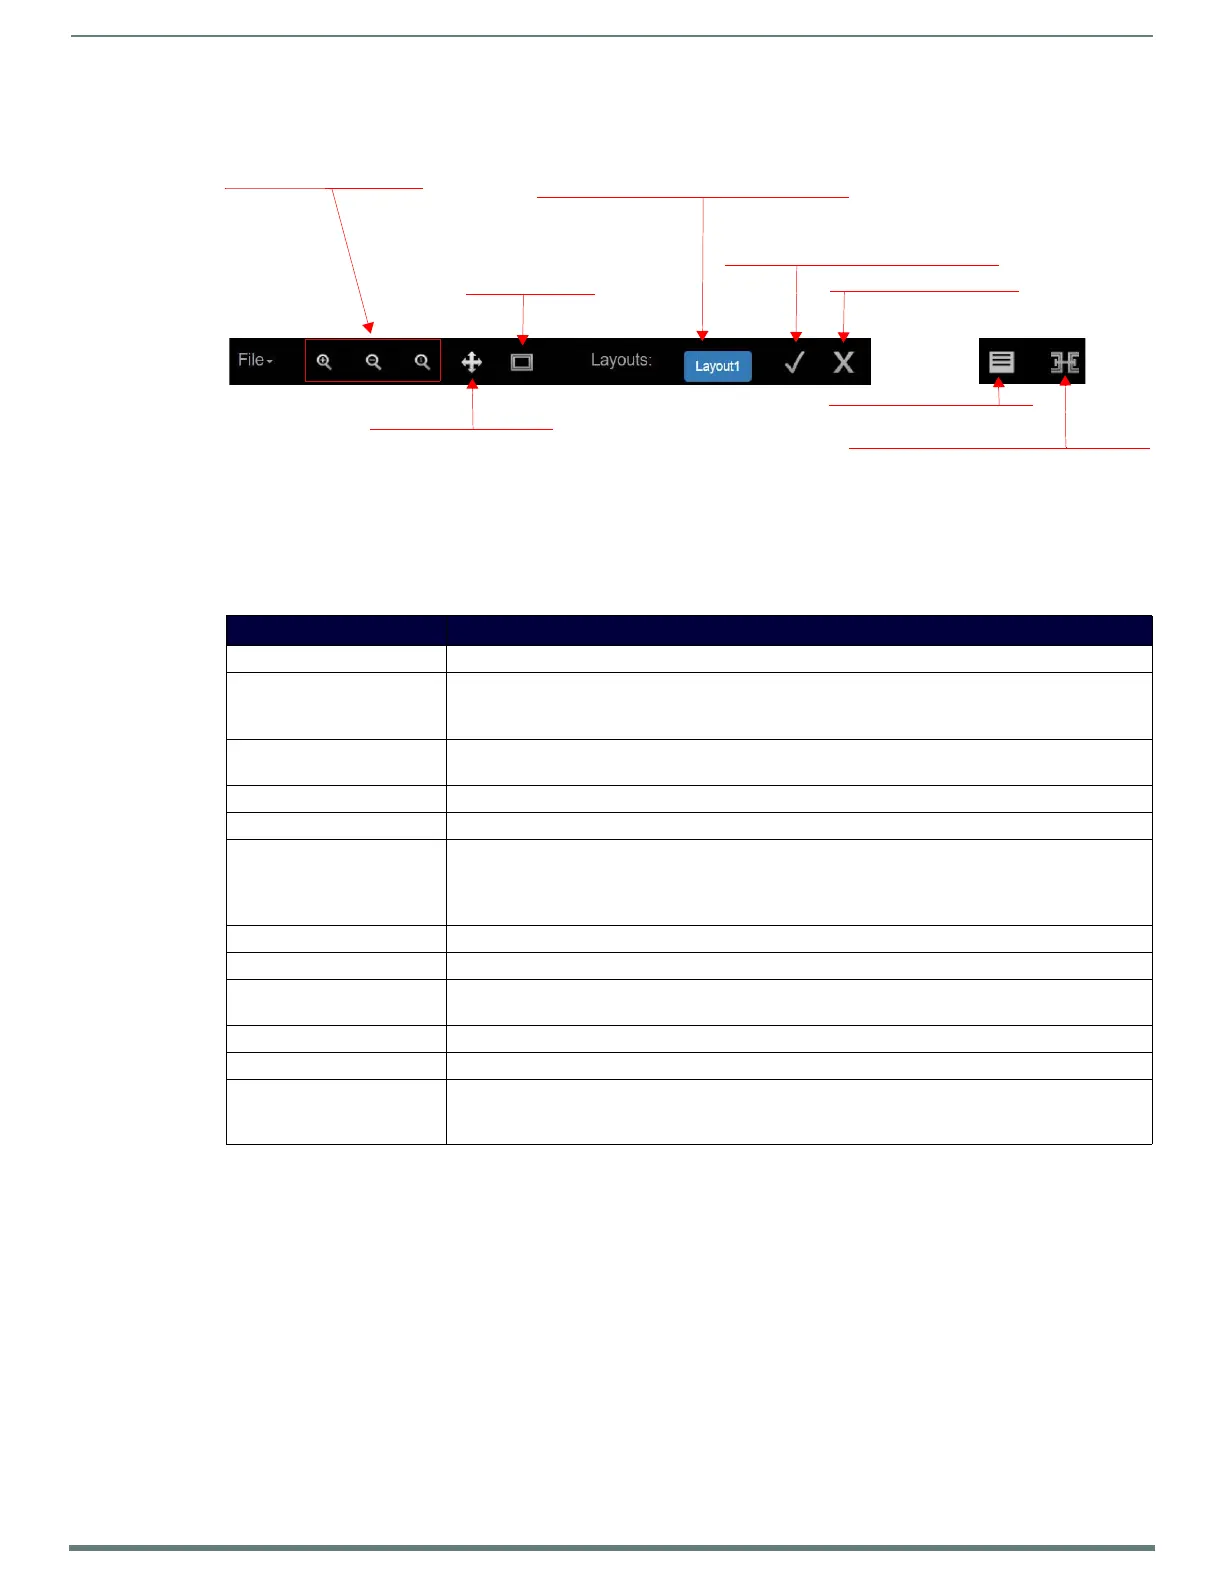
FIG. 53 Wall Arrangement Page: Top Menu Bar Icons
T
Zoom in, out, or to 100%.
Fit wall to screen.
Saved layouts are displayed as buttons in
this area. Use the buttons to go back and
forth between layouts that have been
created and saved for the selected wall.
Save the current layout configuration.
Delete the selected layout.
Return to Wall Setup page.
Adjust for bezel/edge correction (in
pixels) for the wall setup. There are
calculators available on-line which provide
rough conversions from mm to pixels.
Scroll around the layout.
TABLE 33 Wall Arrangement Options
Option Description
File drop-down menu Choose to create a new wall, open an existing project, save, delete, import, etc.
Source drop-down menu Change the source for the selected window. The current source name is displayed at the top of the
window.
Note: All windows must have a default source that will be recalled when a preset is recalled.
X, Y fields Enter the x and y coordinates of where you would like the window’s upper left-hand corner to be re-
positioned (or you can use mouse to re-size).
W, H fields Enter width and height values (in pixels) to re-size the selected window (or use mouse to re-size).
16:9 checkbox Enable to lock all the windows to a 16:9 aspect ratio.
Layer drop-down menu Choose a layer number for the selected window. The window with the highest layer number is displayed
in the front and the lowest is displayed in the back.
Note: Layer numbers are also used for video wall switching commands. All windows must have a unique
layer number to avoid accidentally affecting multiple windows with a command.
Add Window button Click to add a new window to the current layout.
Remove Window button Click to remove the selected window from the current layout.
Show Script button Displays the generated script from the layout that are sent to each Decoder for wall setup. These can be
copy/pasted into Script Builder.
Take but to n Click to view the current layout on your displays.
Auto checkbox Click to automatically send a Ta ke command whenever the layout changes.
Editing field Selects/displays the wall currently being edited. It is important to note that you can create multiple
layouts for a given wall. As you create and save the different layouts, they will appear as selections at
the bottom of the screen.

 Loading...