AQ M-Tech AB Ultrasound Controller Manual 19
7. Level Switch Mode
In Level Switch Mode the Level Switch measures a single level from the side of the container. It
measures the presence or no presence of liquid behind the container (or pipe) wall. The Level
Switch senses through the wall AND no hole is needed. Four Level Switches can be connected to
one Ultrasound Controller.
Quick start guide
• Install Level Switches according to instructions in the Level Switch Manual.
• Attach the included tape, see page 21
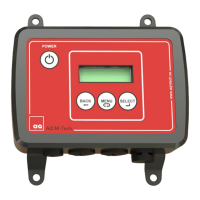
• Connect cables, see page 7 or 8 and 19.
• Switch on external power supply. You may have to press POWER to exit standby on D128.
• Read about navigating the menu system, page 9
• If display show: SET sensor MODE. Choose Press SELECT for Air LevelSwitchmode by scrolling
with MENU button and selecting with SELECT button.
• Go to SETTINGS see page 23 and set all parameter that need to be set.
• Now calibrate Level Switch 1. Make sure liquid level is below the Level Switch. Select
CALIBRATE with AIR (empty) then select Calibrate AIR Level Switch1 and press SELECT button
one second.
• Make sure liquid level is above the Level Switch. Select CALIBRATE with LIQUID (full) then
select Calibrate LIQUID Level Switch1 and press SELECT button one second.
• Do the calibration for all connected Level Switches. The calibration order air/liquid and Level
Switch number can be mixed.
• Go to SHOW DATA to check calibrated values, page16
• Ready.
Connecting the Level Switch
The Level Switch cable is better not
be extended. Maximum cable length,
see Level Switch manual. The
unshielded part of the cable should be
no longer than 40mm. Yellow and
green wire are not used except for
Level Switch DL which is a Level
Switch with two sensors.
If D72 is mounted inside a metal
cabinet it is good to connect D72 to
the cabinet (ground) and this is best
done using grounded cable glands for
the Level Switch cables. If grounded
cable glands are not used then
terminal 16 on the D72, DP72 or
terminal 19 on D128 can be
connected to the cabinet instead.
To minimize the risk of electric
interference and noise, especially in
ex-installation, see Electric Noise
page 10.