AQ M-Tech AB Ultrasound Controller Manual 29
but nothing should obstruct the echo. How well the sound passes through the wall depend on the
material and thickness, see above. This sensor also detects if there is liquid or air at its level. The
GF90 has the velocity sensor built in.
Installing the sensor on a non-horizontal bottom
If the bottom is not horizontal or has uneven thickness, a thick layer of silicone sealant can be
used to glue the sensor in a more horizontal position. In this case the sensor should be connected
to Ultrasound Controller and be active measuring before it is being glued so that the position can
be adjusted for the strongest echo. Fill the container half or more and attach the sensor with
silicone between sensor and bottom. Calibrate with liquid and go to Measured Level Sensor. The
echo strength is shown in dB. Small adjustments can be made of the angle of the sensor and the
thickness of the silicone in order to achieve maximum echo strength. Find the best position and
calibrate with liquid again and check position again for maximum echo strength. Then keep the
level sensor fixed there until the silicone cures.
Container top
When the container is full of liquid all the way up to the top, the ultrasound will bounce off the top
instead of off the liquid surface. Ideally the top should be parallell with the sensor and rather not
very much conical. If it must be conical, a small conical angle is prefferred, or a small non-conical
part of the radius above the sensor in order to make the echo stronger.
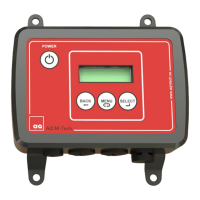
Level Sensor start-screen
When power is applied, the Level Sensor start-screen is displayed showing LevlSens on first
line to the right signifying this is Level Sensor start-screen. On the second line to the right is
written 1234 which shows the state of each of the four relays. A light digit on dark background
signifies a closed relay.
To the left, the digit 12 signifies sensor 1 (level) + sensor 2 (velocity), followed by the measured
level in %. If no measurement can be done there is text with error information instead. On the
second line, the digit 34 signifies sensor 3 (level) + sensor 4 (velocity). The digit background
changes to dark when liquid is sensed by the velocity sensor.
cal calibration needs to be done of air or liquid
set parameters remain to be set
--- not active
> 100% level is over 100%
err1 error1 – see troubleshooting
err2 error2 – see troubleshooting
err3 error3 – see troubleshooting
Example: Sensor 1 + 2 show 30% level
Sensor 3 + 4 need to be calibrated
SETTINGS
Through the SETTINGS-menu the parameters can be set.
Select SET Range to set the level change in mm which correspond to 100% level change.
(Measurement is done up to 170% of this level)