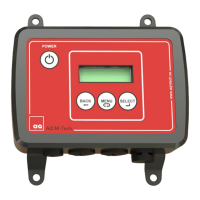
AQ M-Tech AB Ultrasound Controller Manual 27
8. Level Sensor Mode
In Level Sensor mode a sensor is attached at the bottom of the container and measures the
continuous liquid level. The sensor is attached outside the container and senses through the
bottom (no hole is needed). A second velocity sensor measuring sound velocity can also be
attached.
Four sensors can be attached to one Ultrasound Controller, measuring the level in two containers.
Quick start guide
• Install sensors according to instructions on page 28 and instructions in Level Switch Manual.
• Connect cables, see page 7 or 8 and 28
• Switch on external power supply.
• Read about navigating the menu system, page 9
• If display show: SET sensor MODE. See page 9 how to select Level Sensor mode.
• Go to SETTINGS see page 29 and set all parameter that need to be set.
• Calibrate with liquid sensor 1 & 2: Fill container above Sensor 2 and at least 100mm. Select
Calibrate with LIQUID, Select Cal Sensor 1 & 2 (Lev & Vel) and Press SELECT button one
second.
• Empty container (level below Sensor 2). Select Calibrate with AIR, Select Cal Sensor 2 (Vel)
and Press SELECT button one second.
• If sensor 3 and 4 exist, do the calibration for them also in similar way.
• Go to SHOW DATA to check calibrated values, page 31.
• Ready.
Functional Description
A Level Switch-type of sensor is attached under the container bottom. It sends ultrasound through
the bottom and through the liquid, and then receives the echo bouncing off the liquid surface. The
Ultrasound Controller then calculates the liquid level.
This measurement technique is dependent on sound velocity which vary to some degree with type
of liquid and temperature. By using a second velocity sensor attached on the vertical wall of the
container the velocity can be measured and compensate for it. It measures the velocity by
measuring the echo from the opposite container wall. In addition, it also makes level switch
measurements telling if there is liquid or not behind the wall. This can be used for setting limits for
the level measurement, improving reliability see SETTINGS.
It is important the echo is as strong as possible. Sound is attenuated by travelling through the
bottom and through the liquid. Small bubbles and particles in the liquid also causes attenuation.
The sensor need to be fairly horizontal (parallell to the liquid surface) in order for the echo to
bounce back in the correct direction. If the liquid surface is disturbed by waves or vortex then the
echo may not bounce back correctly. Unmixed liquids having different sound velocities can cause
refraction of the sound so it bends and do not bounce back to the sensor. The strength of the
echo can be seen in SHOW DATA.
In an empty container it is difficult to measure the level since there is no echo from a liquid
surface. Also levels below 20mm are difficult to measure since the echo is close to echoes within
the bottom. A special measurement technique (Wall-Reverberation measurement-technique, WR)
can give more reliable measurement when the level is below 20mm. It measures the strength of
echoes bouncing within the bottom. Liquid dampens those echoes.
Level Switch KSF should be used as sensor for level and Level Switch KS for velocity. Level
Switch RS cannot be used and Level Switch LS is not recommended.

 Loading...