AQUA SALT
+
MAINTENANCE AND INSTRUCTION MANUAL
Salt chlorine genera ENGLISH
ADSP7000753 rev. 5.0 09/07/2019 11/51
General instructions
The installation of the generator must be done as follows:
• In vertical position, with an inclination below +/-15°.
• Far from heat sources, in dry places, at a temperature
between 0 °C and 45°C.
• In a ventilated location that can be easily accessed for
periodical maintenance.
• Do not install the generator above the tank if you use liquids
that emit vapours, unless the tank is hermetically closed.
• Keep the unit closed.
• Installation and mounting instructions are the same for
every model.
• It’s strongly advised to use the grounding kit (optional) for
the protection of the measuring instruments and metal
parts of the pool installation
3.1
Standard model
installation
Before installing the product, please read what this process will require and familiarize with the
components. This section provides all information required for a correct installation of the
chlorine generator and its components.
3.1.1
Electrolytic Cell
Installation
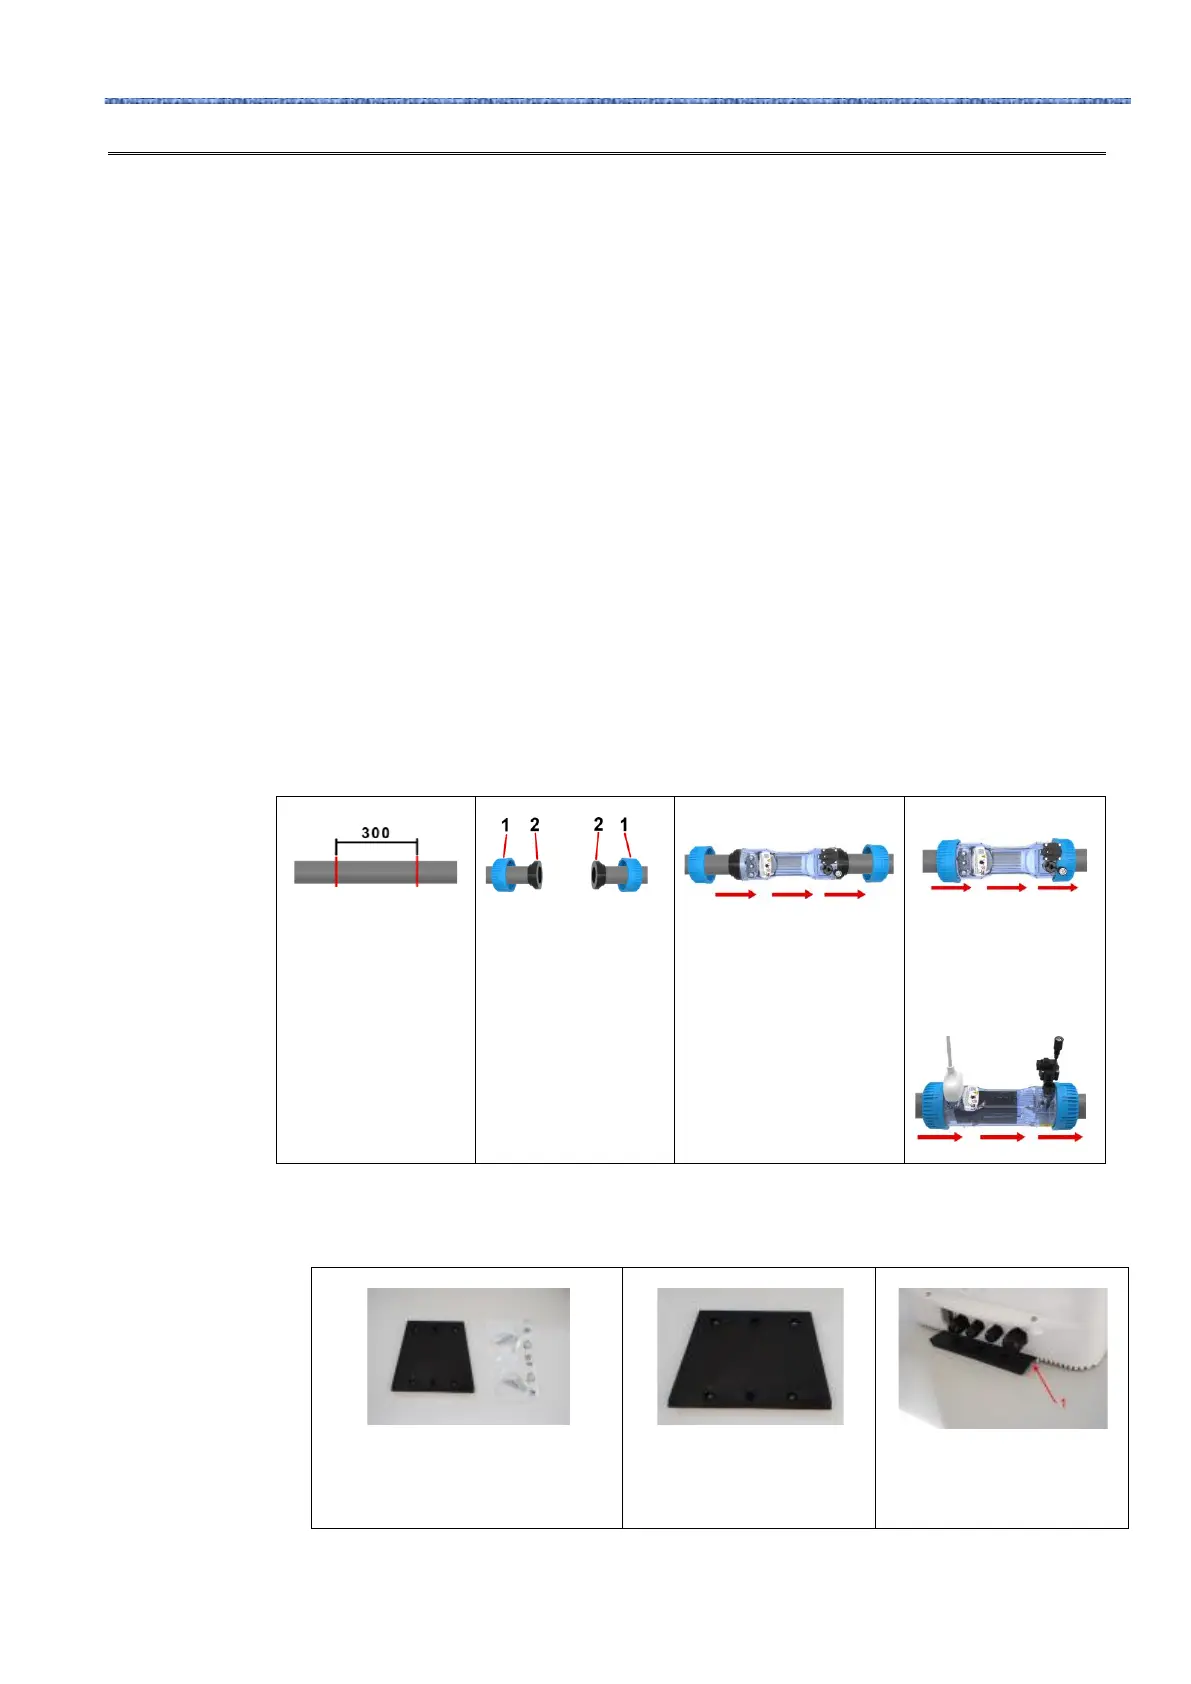
Follow these simple steps to install the electrolytic cell in your system.
1.
Cut the pipe where
the electrolytic cell
must be placed,
according to the
dimensions shown in
the picture above
2.
Insert the blue ring
nuts labelled with
number 1, and stick
the reducers indicated
with number 2 at the
two extremities of the
pipe. Wait as much as
indicated on the glue
packaging before
moving to the
following step.
3.
Place the electrolytic cell
in the direction indicated
by the arrows, i.e. the
direction water flows
through the system.
4.
Screw the blue ring
nuts to fix the cell to
the pipes. At the end
of this phase, the
electrolytic cell must
look like the picture.
3.1.2
Control, box
Installation
Control box has to be fastened to the wall. Screws and bracket for a proper wall fastening are
included in the supply.
2
Place the bracket in the
direction shown by the
picture using the screw
included.
3
Insert the control box,
making it slide on the
bracket from the top to the
bottom up to the end limit.