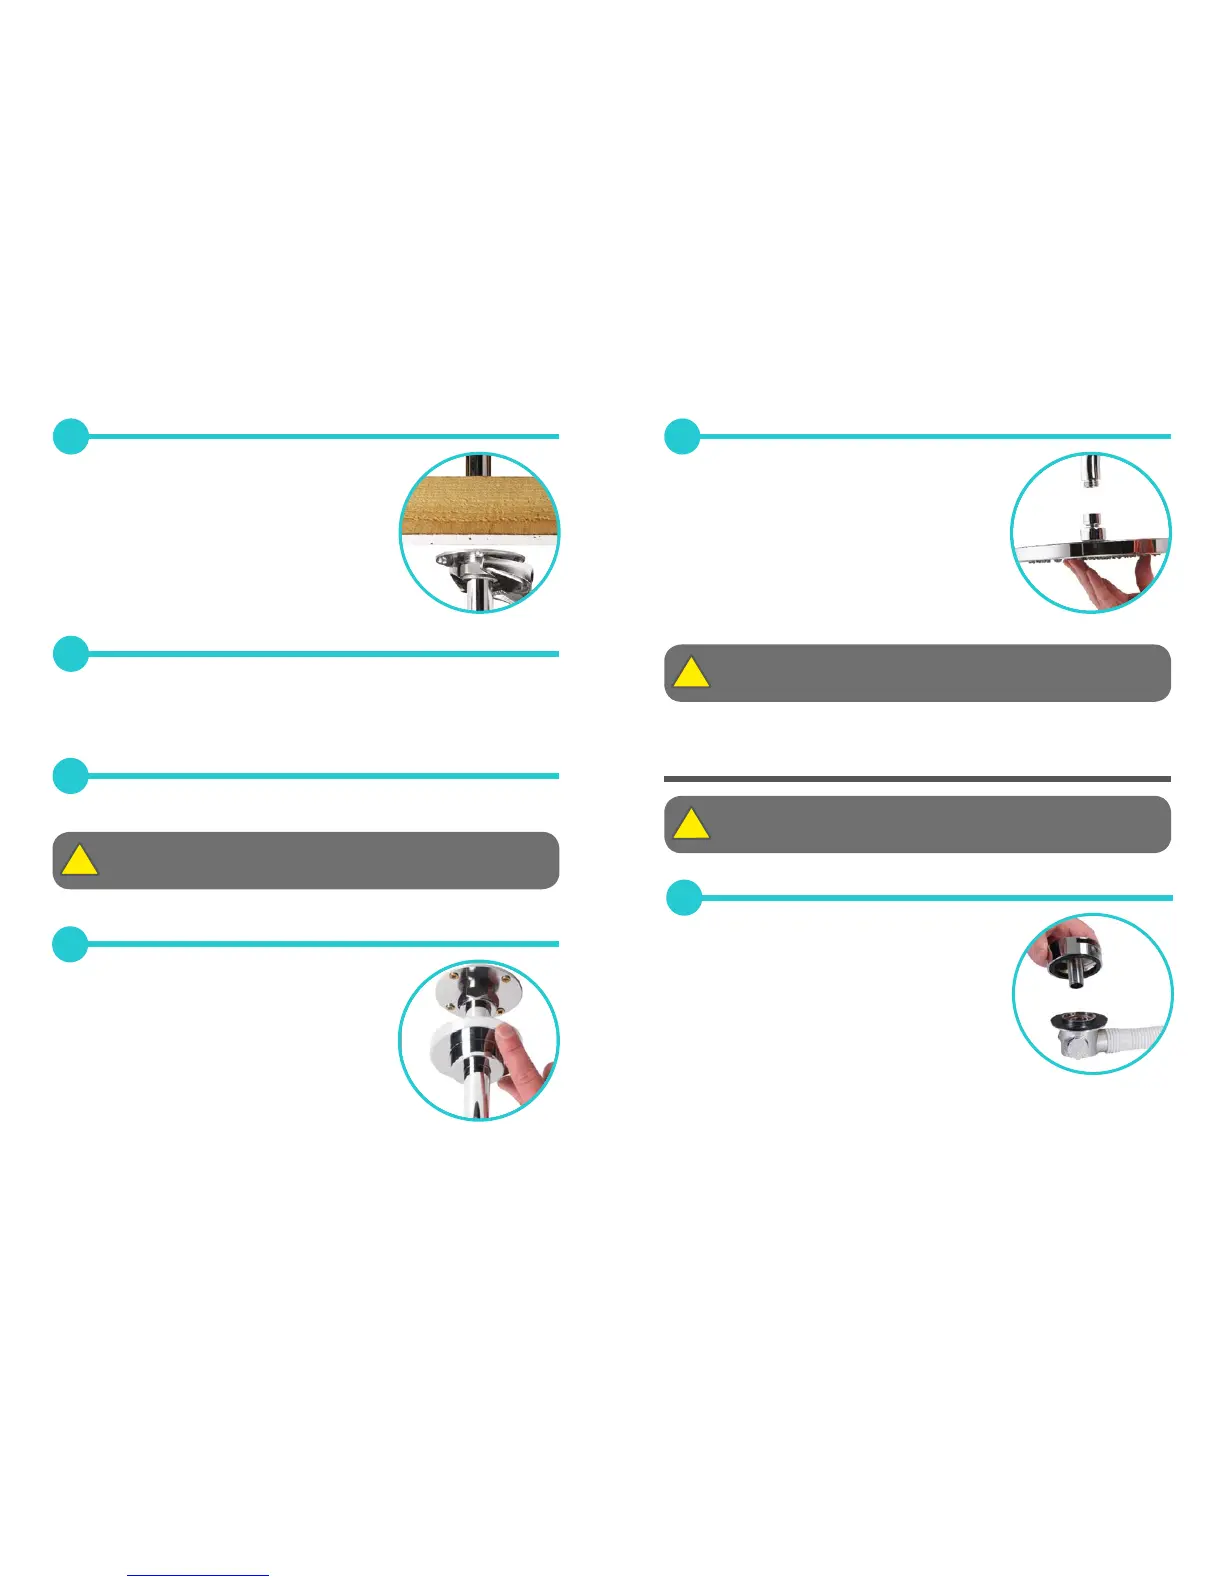
49
Ensuring the rubber washer is in the correct position,
attach the shower head to the fixed arm and carefully
secure using a suitable spanner, or a tool with
smooth jaws, suciently to lock the head into
position.
BATH OVERFLOW FILLER
50
Carefully unscrew and remove the overflow filler
outlet from the body assembly and set aside.
20 21
45
Feed the arm through the fixing bracket to the
correct depth. Tighten the nut using a 32mm
spanner if necessary to facilitate.
46
Cut o the excess pipe allowing for a suitable working length to allow for the
required 22mm connection. If a push fit connector is to be used then the pipe
must be abraded to remove all chrome plating.
47
Connect the pipe work from the Quartz
TM
smart valve or diverter to the end of
the fixed head pipe using a suitable coupling.
48
Lubricate the ‘O’ ring if necessary and carefully
slide the cover plate back over the fixed head arm
and into position against the ceiling.
Secure the cover plate to the arm using the grub
screw and 2.5mm hexagonal key provided.
Run the shower for a few seconds to clear any debris and to check for
any leaks.

 Loading...