14
Tilt the wall plate back and secure to the wall with
the remaining 3 screws provided, (if suitable)
ensuring the data cable is correctly located in the
wall plate (as shown).
15
Slide rail insert cover into place.
Your Quartz
TM
smart controller is supplied with
a colour accent ring that must be fitted.
For fitting instructions refer to the user
manual.
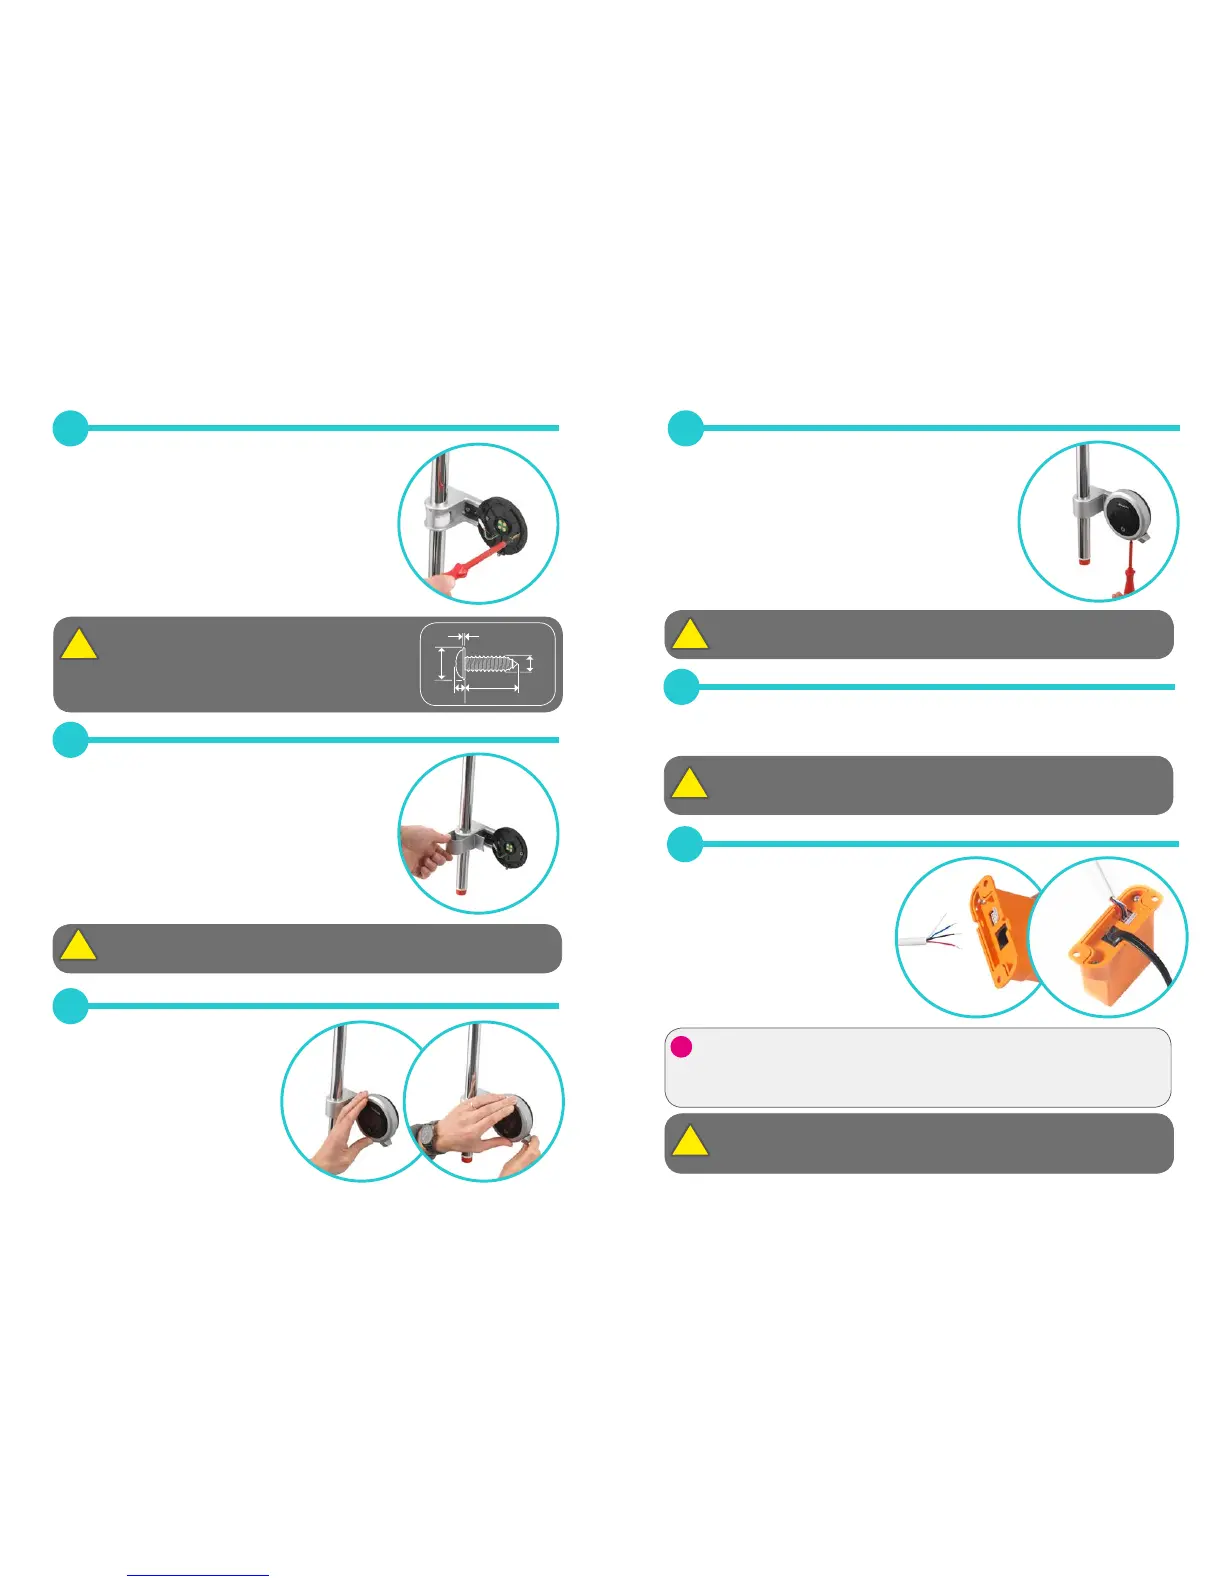
16
Position the Q
TM
controller into the
wall plate with the power symbol
at the 7 o’clock position.
Gently apply pressure to the
screen with one hand. Use the
other hand to rotate the
controller counter clockwise
using the Q
TM
lever until it stops
and is securely seated on the wall
plate.
If supplied screws are not used, use a screw with the
same size and head design, the screws used must be
non corrosive.
Allow the silicone to set before moving to point 16.
Power supply to the Quartz
TM
smart valve must be switched o before
connecting the Q
TM
controller.
18
If the Quartz
TM
smart valve is close to the shower then the cable can be trimmed.
Ensure that a minimum 20mm of wire and 5mm of copper is exposed,
(we recommend leaving minimum 100cm of cable spare).
The data cable must be run in conduit to allow for servicing and replacement
if required. A minimum size of 15mm conduit is recommended.
17
Tighten the screw located on the bottom of the
Q
TM
controller.
19
Connect the 10m data cable into
the CANBUS converter box
following the wiring order as
shown in the image and on the
label. White (WH), Blue (BL),
Black (BK), Red (RD).
Insert one end of the 500mm
black CANBUS data cable
into CANBUS converter.
Only the supplied cable in the Green bag can be used. Do not use any another
cable. If any other cable is used, damage will occur to the unit.
12 13
0.6
8.1
25
3.5
1.9
Do not overtighten
Helpful tip...
If you connect the wrong wire use the supplied cable removal tool to remove the
cable, any other tool may damage the CANBUS converter.
)
. .
 Loading...