Revision Date – 22/12/2014 page 58
9.14 DC power socket - Replace
Disconnect all power leads from the back of the
fridge.
Remove the rear cover (refer to section 9.2).
Remove the decal label from the power panel.
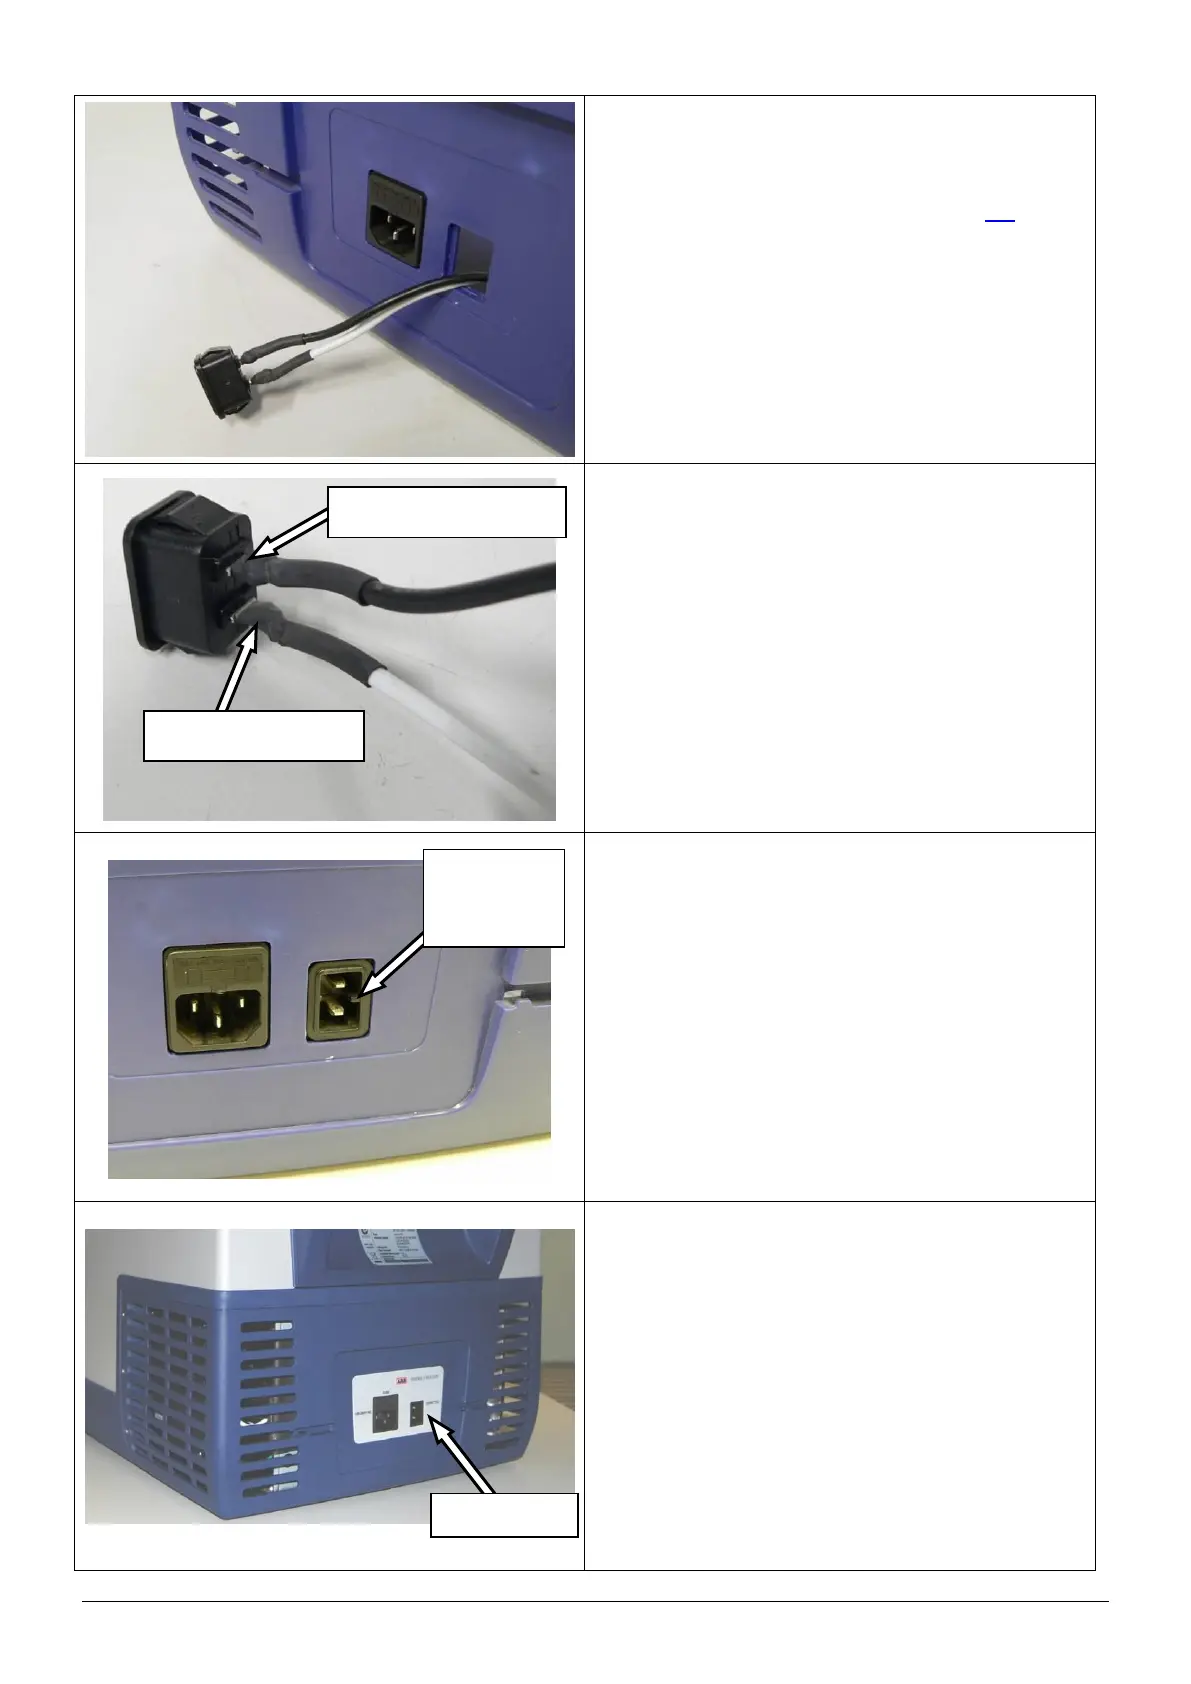
Withdraw the socket (complete with leads)
through the hole in the rear cover as shown.
HINT: Use a flat blade screw driver to depress
the tabs on the back of the socket.
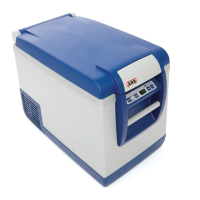
Disconnect the positive (white) and negative
(black) wires from the terminals on the back of the
DC socket using a soldering iron.
Connect the positive (white) and negative (black)
wires to the new DC power socket using a
soldering iron. The terminals on the back of the
socket are labelled “+” (positive) and “-” negative.
IMPORTANT: Make sure that the wires are
securely soldered to the correct terminals.
Apply heat shrink insulation to the exposed
sections of wire.
Restore power to the fridge and confirm correct
operation of the socket.
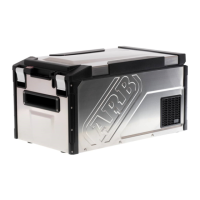
Refit the DC socket into the rear cover. Ensure
that the locating boss faces the outside of the
fridge as shown.
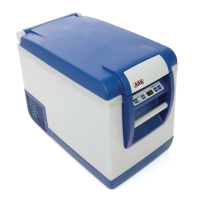
Refit rear cover.
CAUTION: When refitting cover, ensure that all
cables are securely fastened away
from sharp, moving or hot
surfaces.
Apply a new decal to the power plate.