26 Tensor
8.2.1 Menu items in detail
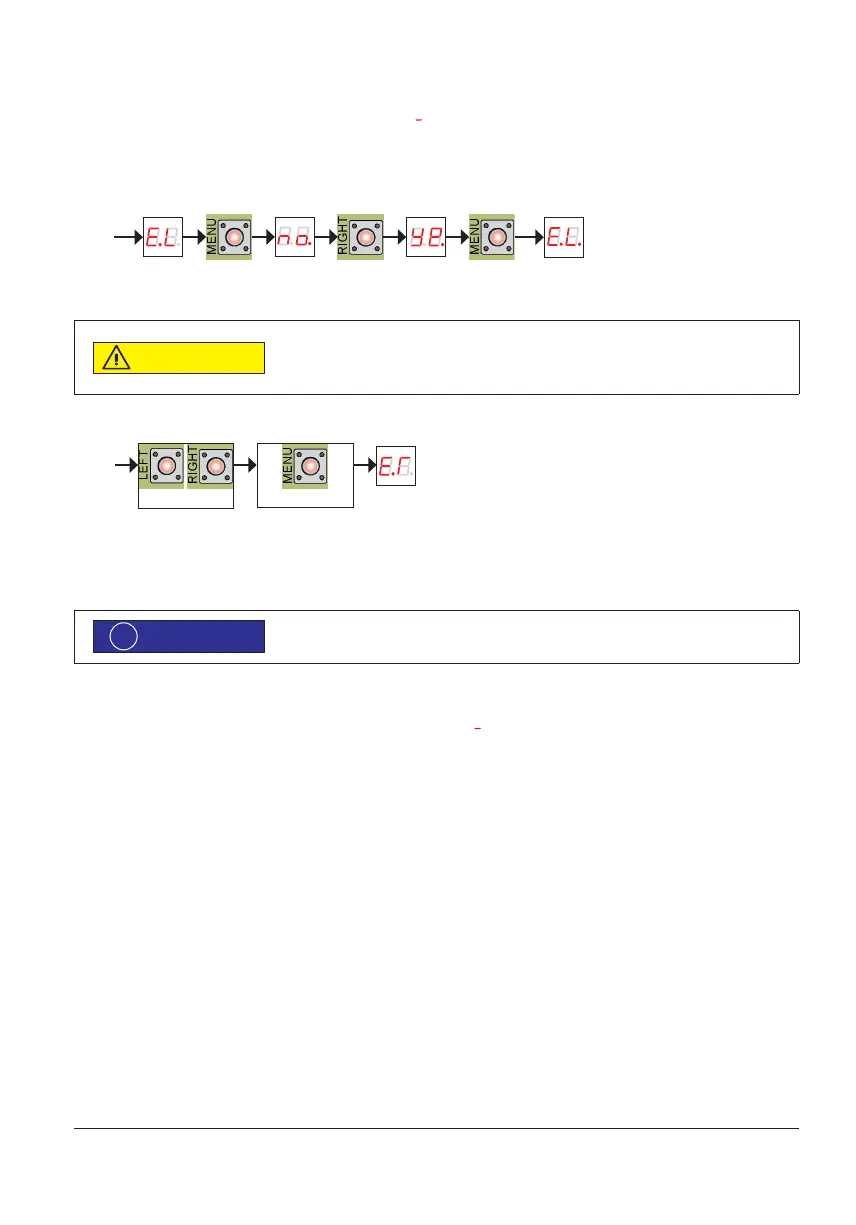
8.2.1.1 Programming end positions E.L / E.i
• Select the menu item "EL" for programming the left end position or "Er" for the right end position and conrm with button
[M]. The screen displays a conrmation dialog.
• Press the indicated button.
Motor or components may be damaged when driving on an obstacle. As long as the end
position is reprogrammed, the engine no longer stops at the predetermined end position.
For entering new end positions move the drive slowly and with caution.
• Move actuator to the desired end position by pressing [L] or [R] .
• Accept the current position as end position with the button [M] . If programming is aborted by changing to AUTO mode, the
previously programmed end position applies.
• Repeat steps for the right end position.
For technical reasons the two end positions must be at least a 28° apart. If the difference
range is too little, the controller gives out the error "RE" - "Range Error".
8.2.1.2 Set value input for the end positions s.L / s.i
The left and right limit switch position is assigned to a new set value. Voltage or current values at the input terminals 51, 52 provide
the controller with the default for the positioning of the motor. The actual position signals to the controller via the terminals 54, 55.
S.L S.t
The input must be connected suitably to the DIP switches conguration (3 and 4), see chapter 7.2.
• Select the menu item "SL" or "Sr" and conrm with button [M]. Depending on DIP switch setting one of the following three
values will be displayed:
− DIP3/DIP4 – ON/OFF: 0 mA / 4 mA / 20 mA / 0…20 mA
− DIP3/DIP4 – OFF/ON: 0... 10 V
− DIP3/DIP4 – OFF/OFF: 0... 5 V
• Voltage or current values must be set according to the following depiction and in accordance to the DIP switches congura-
tion.
Approach end pos. Save end pos.