ARTEX/ACR Electronics, Inc.
A3-06-2824 Handheld Programmer Operations Manual
Y1-03-0272 Rev. F Company Confidential Page 25
4.7.1 Aviation User / Tail Number (Short)
1. Select ELT Baud rate.
2. For the ELT 345 and ELT 1000, refer to Note 1 on page 23 before continuing.
3. For the ELT 3000 and ELT 4000, refer to Note 2 on page 23 before continuing.
4. Select Protocol.
5. Select Country Code.
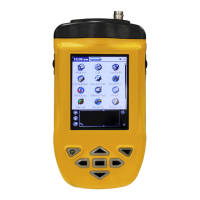
6. Go to Graffiti screen and tap on letter/numbers.
7. Enter the tail number of the aircraft, which is up to seven alphanumeric
characters.
• Acceptable characters are letters (A-Z), numbers (0-9), a hyphen (-), a
space ( ), and a slash (/).
• If fewer characters are entered, that will be reflected in the final hex code.
• Spaces are automatically filled in on the left of the data.
8. Tap “Done” when finished.
9. Tap “ENTER” button on Program screen. The 24-digit hex code is shown at the
bottom of the screen, with the abbreviated 15-digit hex code below it.
10. For ELT 345s or ELT 1000s only: tap “Program”; quickly place ELT switch in
the test mode and release. (Quickly is <1 second).
11. Tap the “Program” button to program the ELT.
12. Ensure that screen shows “Programming Successful”.
13. Verify ELT using “Sarcalc”, as described in Subsection 6.2.
4.7.2 Serial User / ELT / COSPAS (Short)
1. Select ELT Baud rate.
2. For the ELT 345 and ELT 1000, refer to Note 1 on page 23 before continuing.
3. For the ELT 3000 and ELT 4000, refer to Note 2 on page 23 before continuing.
4. Select Protocol.
5. Select Country Code.
6. Go to Graffiti Screen and tap on letter/numbers.
7. Enter the serial number, which matches the serial number seen on the product
label, or a number that was designated for use by the competent national
authority.
8. Enter the COSPAS-SARSAT TAC number.
9. Tap “Done” when finished.