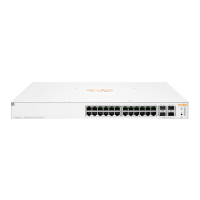
The 1930 Switch Series can be managed in one of two ways:
•
Through a Web-browser interface that you can access from any PC or workstation connected to the
switch.
• Through the Aruba Instant On Cloud Portal.
To access the Web interface, you must have the switch’s Internet Protocol (IP) address. In the factory default
conguration, the IP address is automatically acquired from a Dynamic Host Conguration Protocol (DHCP)
service that is available on your network. Most routers provide this service. The DHCP service automatically
provides a network IP address conguration to devices that request it, such as the 1930 switches.
Many features are congurable on the 1930. An user congurable management password will be required
for switch security. Follow these procedures to access the switch’s Web interface to perform the switch
conguration:
Procedure
1. Place the switch close to the PC that you will use for conguration. It helps if you can see the front panel
of the switch while working fr
om your PC.
2. Connect power to the switch, and then start your PC (if it is not already running) and wait until the switch
and PC have nished their start-up sequences.
3. Connect the PC to any port on the switch using a standard Ethernet LAN cable. Verify that there is a link
between the switch and PC by checking the LEDs for the network port that you are using.
4. If the switch has access to a DHCP service, it automatically acquires an IP address. Determine the IP
address of the switch by examining the client IP address table on your DHCP server or router (see the
router documentation for how to get this information). Another method for determining the switch IP
address is to connect the switch to your network through an adjacent network switch capable of LLDP
operation.
If a DHCP service is not available in your network, or for some reason the switch does not acquire an IP
address from the service, the switch defaults to IP address 192.168.1.1 after 120 seconds of
automatically attempting to acquire an IP address.
NOTE: Alternatively
, if you cannot determine the switch’s IP address, you can force it to use
the 192.168.1.1 address by rst disconnecting the switch from the network and then
unplugging and reconnecting power to it.
To communicate with the switch using the 192.168.1.1 address, see Using the 192.168.1.1 IP address
befor
e continuing these steps.
5. From the PC connected to the switch, open a Web-browser session and enter the switch’s IP address as
the URL. A landing page displays asking you to choose how to manage the switch. If you choose to
proceed using the Aruba Instant On Cloud Portal, follow the instructions within the portal's interface.
Otherwise, click Connect and follow the steps below.
Chapter 5 Initial conguration 37
Initial configuration

 Loading...