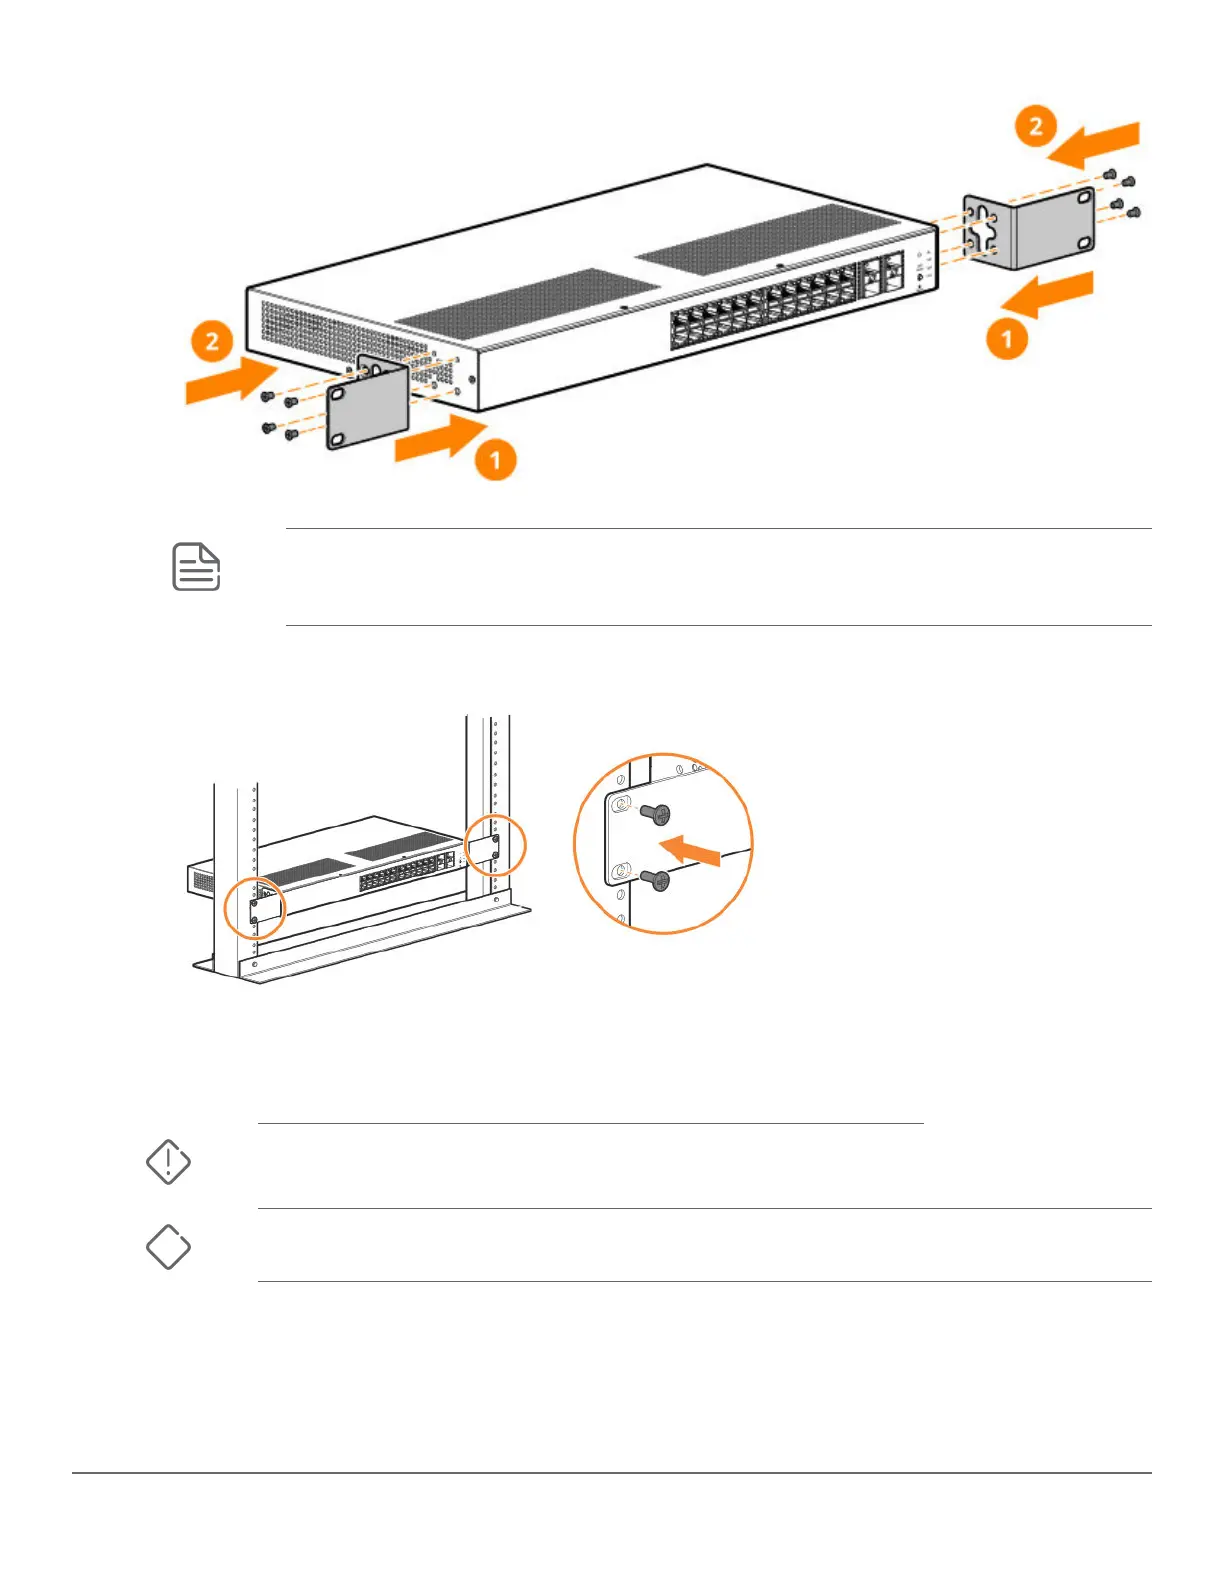
NOTE: The mounting brackets have multiple mounting holes and can be rotated allowing for
a variety of mounting options. These include mounting the switch so its front face is ush
with the face of the rack, as shown in the illustration.
2. Hold the switch with attached brackets in the rack and move it vertically until rack holes line up with the
bracket holes, then insert and tighten the four 12-24 screws holding the brackets to the rack.
Wall Mounting
You can mount all switches on a wall with either the front or rear panel facing up.
WARNING: For safe operation, please read before mounting the switch.
Wall mount the switch with the network ports facing up or down.
CAUTION: The switch should be mounted only to a wall or wood surface that is at least 1/2-inch
(12.7 mm) plywood or its equivalent.
To mount the 24- and 48-port switches, follow these steps:
1. Use a #1 Phillips (cross-head) screwdriver and attach the mounting brackets to the switch with the
included 8-mm M4 screws.
2. Attach the switch to the wall or wood surface with two 5/8-inch number 12 wood screws (not included).
28 Aruba Instant On 1930 Installation and Getting Started
Guide
 Loading...